The server running the SSO-enabled MassTransit MTWeb components must be bound to the organization's Active Directory domain. This will allow the web server (Microsoft Internet Information Services) to pass credentials received via the web browser to MassTransit and Active Directory for authentication. If the machine is not bound, or if you are unsure, ask your organization's network administrator for assistance.
When you have completed the requirements stated above, you can configure SSO following the steps corresponding to your available web server (IIS).
IIS7 SSO Configuration on Windows 2008
To configure single sign-on on Internet Information Services (IIS) 7, follow the steps below:
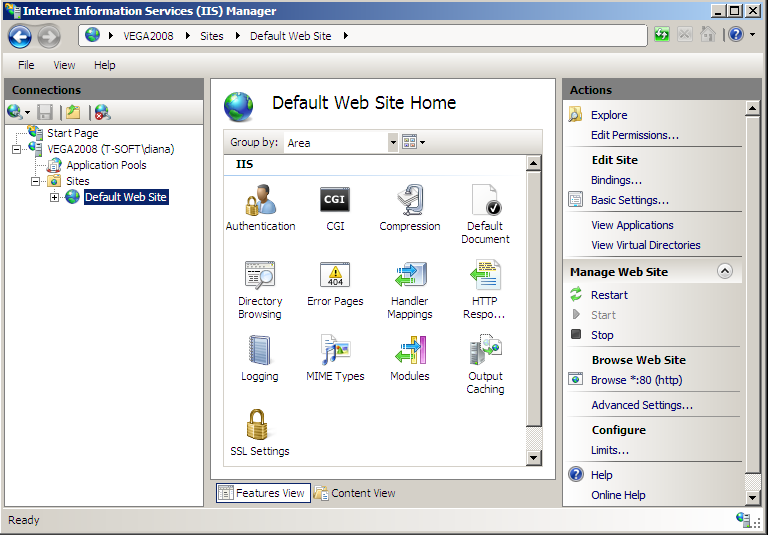
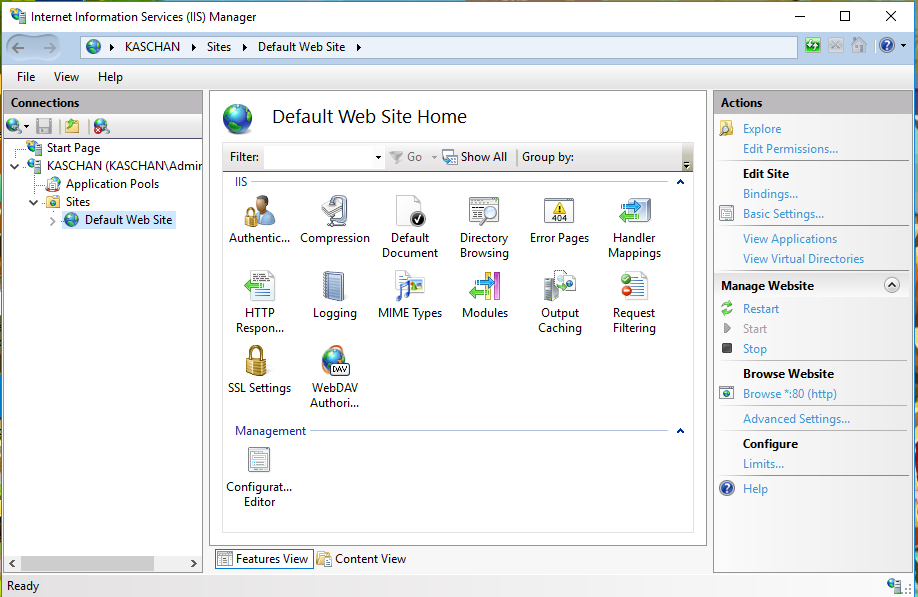
Open the IIS Manager from Start → Administrative Tools → IIS Manager.
In the Connections pane, expand the server name, expand Sites then click on the Default Web Site entry (or whichever entry is configured to host the MTWeb interface) to display the IIS configuration Home pane.
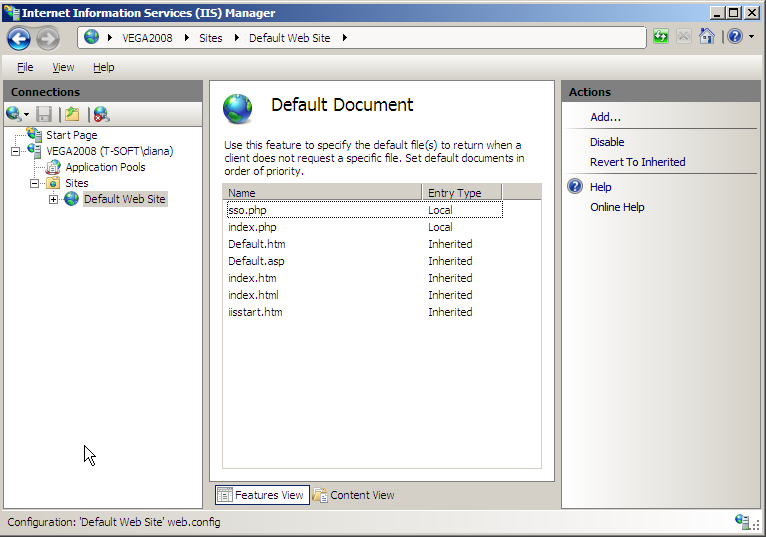
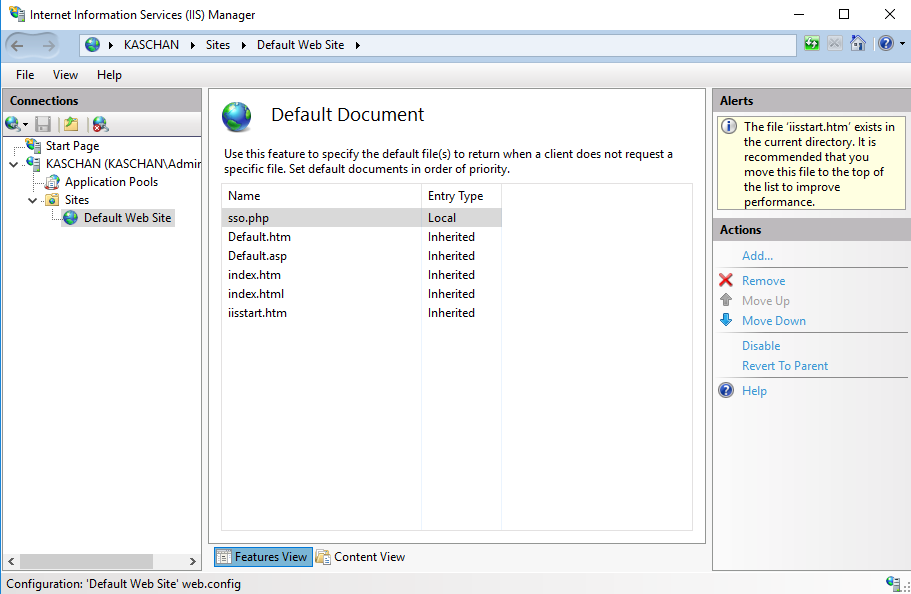
Double click Default Document from the Home pane.
Under the Actions pane, click Add…
In the Name: filed, enter "sso.php" (no quotations).
Move the "sso.php" to the top by clicking Move Up from the Actions pane. Ensure sso.php is listed above index.php, if it exists.
Under the Connections pane, click on the Web Site hosting the MTWeb interface. Then, double click Error Pages. There is a list of HTML documents used when IIS encounters an error.
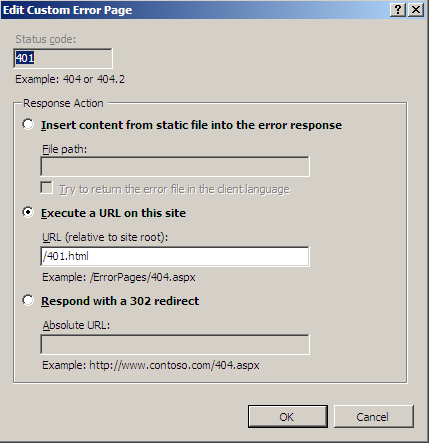
Highlight error 401 and click on the Edit... button from the Actions pane.
In the appeared Edit Custom Error Page window, select the Execute a URL on this site radio button.
In the URL (relative to site root) field, enter the following: /401.html
Click OK.
Under the Connections pane, click on the Web Site hosting the MTWeb interface. Then, double click Authentication. If you do not see Windows Authentication on the list of authentication methods, you will need to install that from the Server Manager. If you see Windows Authentication in the list of methods, skip to step 6.
Close the IIS Manager and go to Administrative Tools → Server Manager.
On the left, click on Roles.
Under Role Services click Add Role Services.
In the Select Role Services window, scroll down to the Security (Installed) section.
Check the box for Windows Authentication. Then click Next, Install and Close.
Reboot the server to ensure these changes take effect.
Go back to the IIS Manager.
Under the Connections pane, click on the Web Site hosting the MTWeb interface. Then, double click Authentication:
Highlight Anonymous Authentication from the appeared list and click on the Disable button from the Actions pane, if enabled.
Highlight Windows Authentication and click on the Enable button from the Actions pane to enable it.
Open the PHP configuration file, php.ini, in an application suitable for plain text edit. The file is located in the php folder, generally on the system drive in C:\php:
Find the option session.save_path and set this to "C:\php\sessiondata" (including the quotation marks) as shown below. If this option is commented out (preceded by a semicolon (;) ), remove the comment to make it active. session.save_path = "C:\php\sessiondata"
Save and close the php.ini file.
The sessiondata folder in the previous step may not already exist inside C:\php. If this folder does not exist, it must be created:
Navigate to C:\php and right-click. Select New, then select Folder. Name the folder sessiondata.
Right-click on the sessiondata folder and click Properties.
Click the Security tab.
Add privileges for the Internet Guest Account (IUSR) and the local Users group by clicking the Add... button:
Click on the Object Types... button, and select Users and Groups. Click the OK button.
Click Locations... and select the computer in the Locations window that appears. Click the OK button.
In the Select Users or Groups window, click on the Advanced button.
Click the Find Now button. Select both the Internet Guest Account IUSR and the local Users group by clicking the first, holding down the CTRL key, and clicking the second.
Click OK, then click OK.
Inside the sessiondata Properties window, highlight the Internet Guest Account user (IUSR) and click on the Edit... button. Then, under Permissions for... section, allow Full Control and click OK.
Highlight the IUSR account and click the Advanced button. In the "Advanced Security Settings for sessiondata" window, click the Edit... button.
Highlight IUSR from the appeared list and check the box next to Replace permission entries on all child objects with entries shown here that apply to child objects and click OK.
In the Windows Security dialog that appears next, click Yes.
Repeat for the Users group.
Click OK.
Navigate to the folder where MTWeb is located. This is generally:
for MassTransit 7.6 and later:
on 64-bit machines:
C:\Program Files (x86)\Acronis\MassTransit Server
for MassTransit 7.1 to 7.6:
on 32-bit machines:
C:\Program Files\Group Logic\MassTransit Server
on 64-bit machines:
C:\Program Files (x86)\Group Logic\MassTransit Server
for MassTransit 7.0.x:
on 32-bit machines:
C:\Program Files\Group Logic\MassTransit Server 7
on 64-bit machines:
C:\Program Files (x86)\Group Logic\MassTransit Server 7
Right-click on MTWeb, then click Properties. Similar to the previous step, allow Read & Execute permissions for the Internet Guest Account and the local Users group. Do not set advanced permissions for the child objects.
Inside the MTWeb folder, set the permissions for the parsed and templates_c folders. If these folders are not empty, delete their contents with exception of the readme.txt files, prior to completing this step. Apply Full Control permissions for the Internet Guest Account and the local Users group on the parsed and templates_c folders. Also, set the advanced permissions for child objects for the parsed and templates_c folders (like in Step 8d).
Restart IIS by right-clicking on the on the MassTransit Web Site entry under the Connections pane and then click Restart from the Actions pane. IIS will restart.
Configuration of single sign-on is now complete for your MassTransit MTWeb server.
Under certain circumstances it might be necessary to maintain both single sign-on and regular authentication mechanisms for the same MassTransit MTWeb server. If that should be the case, follow the steps in the Configuring Single Sign-On and Regular Authentication on the Same MassTransit Server section.
IIS 8, 8.5 and 10 SSO Configuration
The procedure is entirely identical between Windows Server 2012 (IIS 8), Windows Server 2012 R2 (IIS 8.5) and Windows Server 2016 (IIS 10).
To configure single sign-on on Internet Information Services (IIS) 8 or newer, follow the steps below:
Open the IIS Manager from Start → Administrative Tools → IIS Manager.
In the Connections pane, expand the server name, expand Sites then click on the Default Web Site entry (or whichever entry is configured to host the MTWeb interface) to display the IIS configuration Home pane.
Double click Default Document from the Home pane.
Under the Actions pane, click Add…
In the Name: filed, enter "sso.php" (no quotations).
Move the "sso.php" to the top by clicking Move Up from the Actions pane. Ensure sso.php is listed above index.php, if it exists.
Under the Connections pane, click on the Web Site hosting the MTWeb interface. Then, double click Error Pages. There is a list of HTML documents used when IIS encounters an error.
Highlight error 401 and click on the Edit... button from the Actions pane.
In the appeared Edit Custom Error Page window, select the Execute a URL on this site radio button.
In the URL (relative to site root) field, enter the following: /401.html
Click OK.
Under the Connections pane, click on the Web Site hosting the MTWeb interface. Then, double click Authentication. If you do not see Windows Authentication on the list of authentication methods, you will need to install that from the Server Manager. If you see Windows Authentication in the list of methods, skip to step 6.
Close the IIS Manager and go to Administrative Tools → Server Manager.
On the left, click on Roles.
Under Role Services click Add Role Services.
In the Select Role Services window, scroll down to the Security (Installed) section.
Check the box for Windows Authentication. Then click Next, Install and Close.
Reboot the server to ensure these changes take effect.
Go back to the IIS Manager.
Under the Connections pane, click on the Web Site hosting the MTWeb interface. Then, double click Authentication:
Highlight Anonymous Authentication from the appeared list and click on the Disable button from the Actions pane, if enabled.
Highlight Windows Authentication and click on the Enable button from the Actions pane to enable it.
Open the PHP configuration file, php.ini, in an application suitable for plain text edit. The file is located in the php folder, generally on the system drive in C:\php:
Find the option session.save_path and set this to "C:\php\sessiondata" (including the quotation marks) as shown below. If this option is commented out (preceded by a semicolon (;) ), remove the comment to make it active. session.save_path = "C:\php\sessiondata"
Find the option fastcgi.impersonate is and make sure it is set to 1.
Save and close the php.ini file.
The sessiondata folder in the previous step may not already exist inside C:\php. If this folder does not exist, it must be created:
Navigate to C:\php and right-click. Select New, then select Folder. Name the folder sessiondata.
Right-click on the sessiondata folder and click Properties.
Click the Security tab.
Add privileges for the Internet Guest Account (IUSR) and the local Users group by clicking the Add... button:
Click on the Object Types... button, and select Users and Groups. Click the OK button.
Click Locations... and select the computer in the Locations window that appears. Click the OK button.
In the Select Users or Groups window, click on the Advanced button.
Click the Find Now button. Select both the Internet Guest Account IUSR and the local Users group by clicking the first, holding down the CTRL key, and clicking the second.
Click OK, then click OK.
Inside the sessiondata Properties window, highlight the Internet Guest Account user (IUSR) and click on the Edit... button. Then, under Permissions for... section, allow Full Control and click OK.
Highlight the IUSR account and click the Advanced button. In the "Advanced Security Settings for sessiondata" window, click the Edit... button.
Highlight IUSR from the appeared list and check the box next to Replace permission entries on all child objects with entries shown here that apply to child objects and click OK.
In the Windows Security dialog that appears next, click Yes.
Repeat for the Users group.
Click OK.
Navigate to the folder where MTWeb is located. This is generally:
for MassTransit 7.6 and later:
on 64-bit machines:
C:\Program Files (x86)\Acronis\MassTransit Server
for MassTransit 7.1 to 7.6:
on 32-bit machines:
C:\Program Files\Group Logic\MassTransit Server
on 64-bit machines:
C:\Program Files (x86)\Group Logic\MassTransit Server
for MassTransit 7.0.x:
on 32-bit machines:
C:\Program Files\Group Logic\MassTransit Server 7
on 64-bit machines:
C:\Program Files (x86)\Group Logic\MassTransit Server 7
Right-click on MTWeb, then click Properties. Similar to the previous step, allow Read & Execute permissions for the Internet Guest Account and the local Users group. Do not set advanced permissions for the child objects.
Inside the MTWeb folder, set the permissions for the parsed and templates_c folders. If these folders are not empty, delete their contents with exception of the readme.txt files, prior to completing this step. Apply Full Control permissions for the Internet Guest Account and the local Users group on the parsed and templates_c folders. Also, set the advanced permissions for child objects for the parsed and templates_c folders (like in Step 8d).
Restart IIS by right-clicking on the on the MassTransit Web Site entry under the Connections pane and then click Restart from the Actions pane. IIS will restart.
Configuration of single sign-on is now complete for your MassTransit MTWeb server.
Under certain circumstances it might be necessary to maintain both single sign-on and regular authentication mechanisms for the same MassTransit MTWeb server. If that should be the case, follow the steps in the Configuring Single Sign-On and Regular Authentication on the Same MassTransit Server section.
Additional setup for end-users
End users may need to add the site to the list of trusted sites and select the proper logon type.
Go to Control Panel -> Internet Options -> Security -> Trusted Sites -> Sites.
Add your MassTransit site's address.
Press add and then close the Trusted Sites dialog.
Click on Custom Level... for the Trusted Sites zone and under Logon select Automatic logon with current username and password.
Configuring SSO and Regular Authentication on the Same MassTransit Server
In order to maintain both single sign-on and regular authentication mechanisms, you need to configure SSO for your web server first and then complete this configuration. If you haven't configure SSO, follow the steps corresponding to your available web server (IIS6, or IIS7) above and get back to this section again.
Configuring SSO and Regular Authentication on IIS 6
Make sure you have configured single sign-on as described above.
Open the Internet Information Services (IIS) Manager.
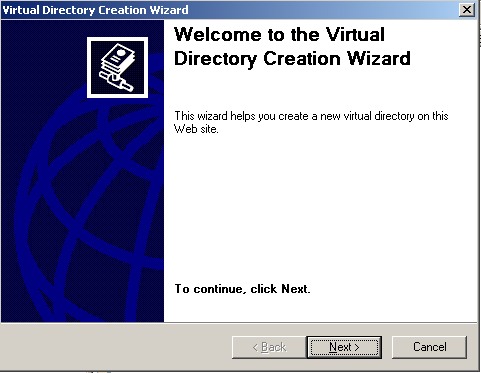
Right click on the Web Site hosting the MTWeb interface and select New → Virtual Directory…
The Virtual Directory Creation Wizard opens up. Click on the Next button.
Assign an alias to the virtual directory, such as NoSSO, and click Next.
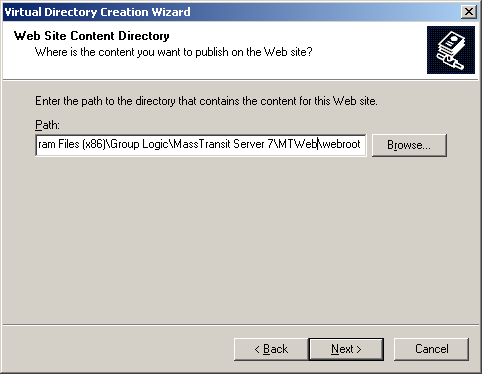
Browse to the same location on disk as pointed to by the web site hosting the MTWeb interface and click Next. By default, this location is:
MassTransit 7.1 to 7.6: C:\Program Files (x86)\Group Logic\MassTransit Server\MTWeb\WebRoot
MassTransit 7.6 and newer: C:\Program Files (x86)\Acronis\MassTransit Server\MTWeb\WebRoot
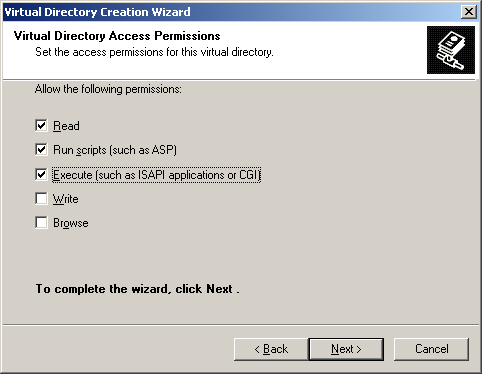
Make sure Read, Run Scripts (such as ASP) and Execute (such as ISAPI applications or CGI) check boxes are checked and click Next.
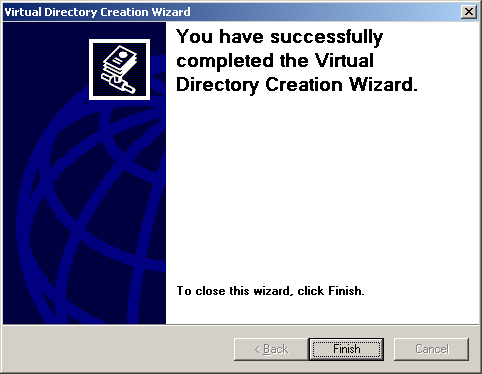
Click on the Finish button.
In the Internet Information Services (IIS) Manager, right click on the newly created virtual directory and select Properties.
In the resulting dialog, click the Documents tab:
Ensure the Enable default content page check box is selected.
Click Add..., and in the Add Content Page dialog, type index.php. Click OK.
Move index.php to the top of the list by clicking the Move Up button. Ensure index.php is listed above sso.php, if it exists.
Click OK.
Restart IIS by right-clicking on the machine name in the left-hand pane of the IIS Manager, selecting All Tasks and choosing Restart IIS…. In the Stop/Start/Restart… dialog that appears, choose Restart Internet Services on MachineName, and click OK. IIS will restart.
Configuration of the regular authentication entry point to the MTWeb web site is done now. Users not wishing or not being able to use the single sign-on mechanism will be able to navigate to the MassTransit authentication page directly by appending the web site's URL in their browser with /NoSSO. For example, if the user is connecting to http://masstransit.company.com, he should type the following in the web browser and then click Go or press Enter: http://masstransit.company.com/NoSSO
Configuring SSO and Regular Authentication on IIS 7
Under certain circumstances, it might be necessary to maintain both single sign-on and regular authentication mechanisms for the same MassTransit MTWeb server. At this time, IIS 7 does not support this kind of dual mode configuration. Users not wishing or not being able to use the single sign-on mechanism will have to navigate to the MassTransit authentication page directly by appending the web site’s URL in their browser with /index.php. For example, if the user is connecting to http://masstransit.company.com, he should append /index.php to this address, and then click Go or press Enter in their web browser to connect to: http://masstransit.company.com/index.php