
The name in the quotations is your user name and next to it is displayed the used transfer method. In this case, you are ready to use the plug-in.
When you have downloaded and installed the MassTransit Web Assistant plug-in, you need to configure your account to use it and then you can start transmitting files with it.
Transmitting files via the plug-in may be set as a default method by your administrator. To see what the currently used transfer method is, look at the left top corner of the web browser page:
if you are using the plug-in, the following will be displayed:
The name in the quotations is your user name and next to it is displayed the used transfer method. In this case, you are ready to use the plug-in.
if you are using HTTP, the following will be displayed:
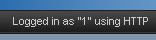
The name in the quotations is your user name and next to it is displayed the used transfer method. In this case, click on the Switch to use MassTransit Plug-in link in the right top corner of the page.
Now, you can send files via the plug-in.
If you are logged into the MassTransit web site and you have set to use the plug-in, follow the steps below to send files to MassTransit contacts or to arbitrary e-mail addresses (if allowed):
Note: If you are using a plug-in version prior to 7.1.x, you will not be able to add multiple addresses. In this case, download the latest version of the plug-in or switch to HTTP mode.
If your administrator has given you permissions to, you can enter a valid arbitrary e-mail address in the To field. Entering an e-mail address will create a contact with that address as a user name on the MassTransit server and an e-mail notification will be sent to the contact to inform him that there are files for download. The notification contains a passkey link which allows the contact to log into the MassTransit web site without having to know a password and leads to the Download Files tab of his newly created account.
Note: Contact the administrator of the MassTransit server to give you the appropriate privileges if you want to send files to arbitrary email addresses.
By default, the MassTransit server is selected to receive the files. If you do not enter a user name in the To field, the files will be sent to the server.
If available, you can select a contact to send the files to by clicking on the arrow button next to the To field. A list with the available contacts will appear. Select the desired contact from the list. Since MassTransit 7.1, you can pick more than one contact from the To field.
Note: You need to have the appropriate privileges set by the MassTransit administrator in order to be able to send files to MassTransit contacts. Contact the administrator of the MassTransit server if you do not have privileges to send files to other MassTransit contacts.
If available, you can select the service that you want to be executed on the sent files in the Service field.
Note: To process the files you are sending to a service, you need to have the appropriate privileges first. Contact the administrator of your MassTransit server for information on / configuration of services.
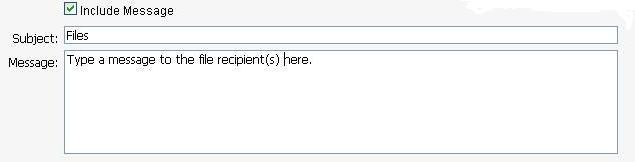
If you are using a MassTransit 7.1.x plug-in and later, the Include Message check box will be present on the Send Files tab. If you select it, two more fields will appear where you can enter text for the file recipient(s): Subject and Message.
Select the files or folders you want to send. You can do that by:
When there are designated files for sending, they will be displayed in a list along with information about them.

If there are files that you want to remove from the sending list:
When you have selected the files you want to send, click the Send button.
The MassTransit Web Assistant plug-in will launch in the background and the file transfer will begin. You can observe transfer information in the Log tab of the plug-in.
The files should be sent successfully to the select contact(s)/service(s).