Configuring MySQL and SMTP Server

  1. If MySQL was already installed on your system, the Pre-Installation Requirements/Options window appears. Select the Allow Acronis MassTransit to use this installation of MySQL (recommended) check box, in order to continue with the MassTransit installation. Then, click Next.

    Linked JPEG File Template MT

  2. If MySQL has not been configured, the MySQL Database Configuration window appears.
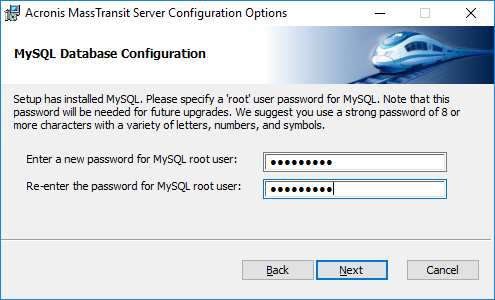
    1. Enter a password for the MySQL root user.
    2. Re-enter the password for the MySQL root user in the second field.

    Linked JPEG File Template MT

  3. The Acronis MassTransit Database Configuration window appears. To configure the MassTransit database, you must set the login credentials for MySQL. The fields for MySQL server name and port number for accessing it are prepopulated, and masstransit is entered as an account name for the MassTransit database. You can modify the prepopulated settings, if needed.
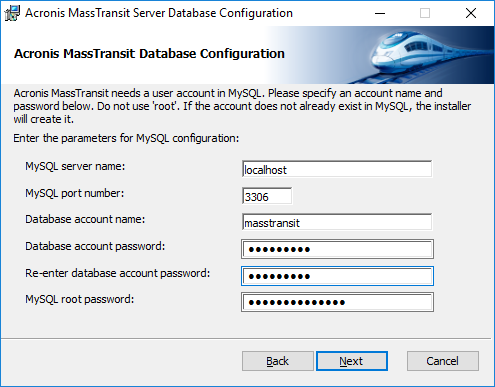
    1. Enter a password for the MassTransit database account.
    2. Re-enter the password for the MassTransit database account.
    3. Enter the MySQL root password in the bottom field.
    4. When all fields are filled in, click Next.

    Linked JPEG File Template MT

  4. The Remote Administration Configuration window appears. Select the Enable Remote Administration check box if you want to manage MassTransit from a different computer. Otherwise, click Next.

    Linked JPEG File Template MT

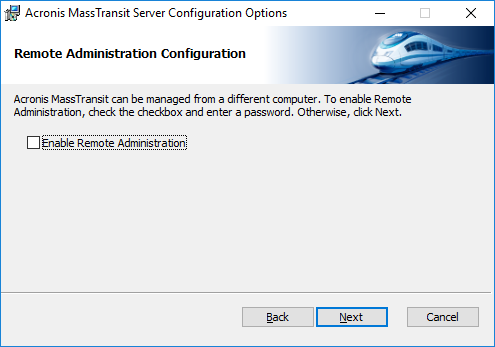
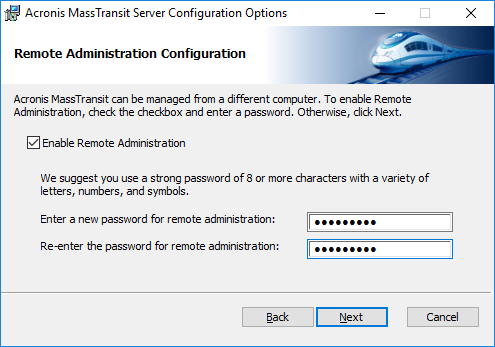
    If you have selected the check box, enter and re-enter a password in the respective fields that appear. Then, click Next.

    Linked JPEG File Template MT

  5. The Acronis MassTransit Email Notification Settings window appears. Configure the SMTP server settings to enable email notifications. Otherwise, clear the Configure SMTP server settings for email notifications check box.

    Linked JPEG File Template MT

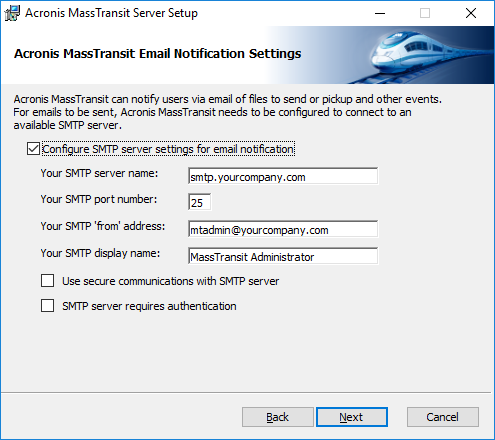
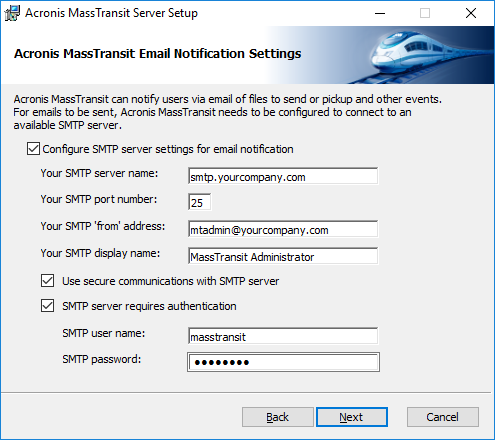
    1. In the Your SMTP server name field, configure the name of the SMTP server that MassTransit will access.
    2. In the Your SMTP port number field, enter the port number for accessing the SMTP server.
    3. In the Your SMTP 'from' address field, enter an email address that will appear in the "From" line for automatically generated email notifications.
    4. In the Your SMTP display name field, enter a username that will appear in the "From" line for automatically generated email notifications .
    5. Select the Use secure communications with SMTP server check box if you want to connect to the SMTP server by using a secure connection.
    6. Select the SMTP server requires authentication check box, if true. Then, fill in the two additional fields that appear: SMTP user name and SMTP password.
    7. Click Next.

    Linked JPEG File Template MT