Follow these steps to upgrade MassTransit 7.x and 8.x to the latest version of MassTransit.
If you upgrade from MassTransit 6.x, follow the steps in Upgrading MassTransit 6.x, instead of the steps here.
Follow the steps carefully to ensure that all of your settings are kept with the new installation.
Before you begin
Before starting the upgrade process, verify that:
You know the version of MassTransit that you are currently running
You know the version of MySQL that you are currently running. To check it:
Go to Windows Start menu and type cmd.
Right-click the Command Prompticon and select Run as administrator.
At the command prompt, navigate to the bin folder in your MySQL installation directory. For example, cd C:\Program Files (x86)\MySQL\MySQL Server 5.1\bin.
At the command prompt, enter mysql -V (be sure to use a capital V).
Verify your MySQL version in the fist line of the text that appears.
You have Microsoft .NET Framework 3.5 SP1 installed and running.
You have downloaded the MassTransit installer.
You have a license.txt file obtained from Acronis. Your license.txt file is located in your root MassTransit Server folder.
Double-clickInstallMTHP.exeto launch the MassTransit Server Installer.
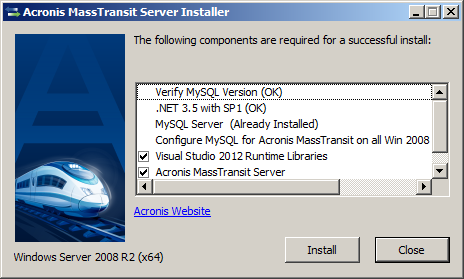
The Acronis MassTransit Server Installerwindow appears. The MassTransit Server installer checks if the .NET 3.5 framework with Service Pack 1, and MySQL 5.1.52 or later are already installed on this machine. If they are not, the installer will prompt you to install them. Click Install to continue.
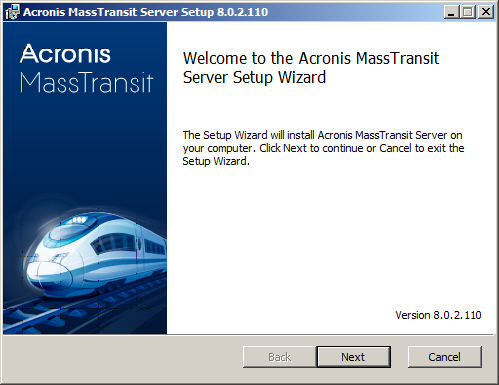
You can check your MassTransit version in the top-left corner of the MassTransit Server Setup Wizard window. This window remains open until the MassTransit installation completes. Click Next to continue.
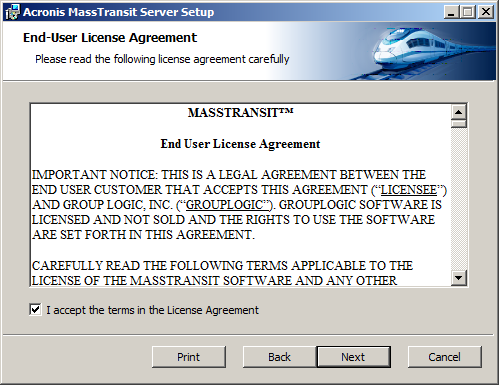
The End-User License Agreement window appears. The Next button becomes active after you select the check box. Once you have read and accepted the license agreement, click Next to continue or click Cancel to leave the installation.
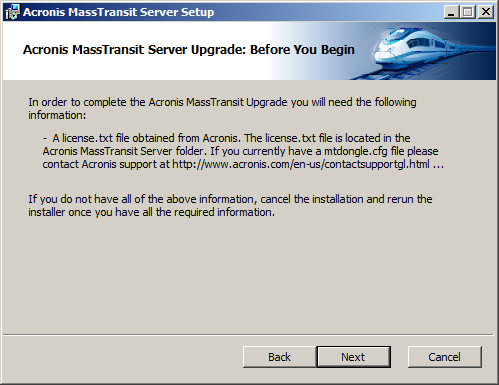
The Acronis MassTransit Server Upgrade: Before You Begin window informs you about the requirements for a successful upgrade of MassTransit. Click Next if you have a license.txt file obtained from Acronis. Otherwise, click Cancel.
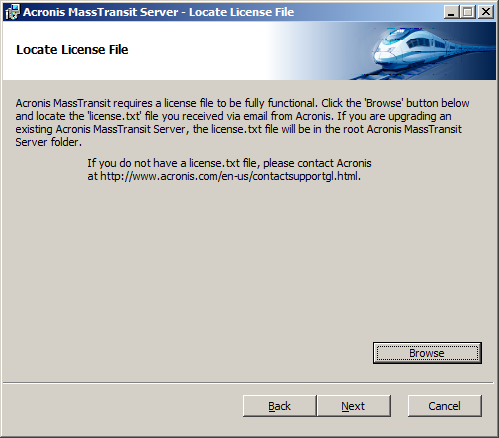
The Locate License File window appears.
Click Browse to locate the license.txt file.
After you have selected the file, click Next.
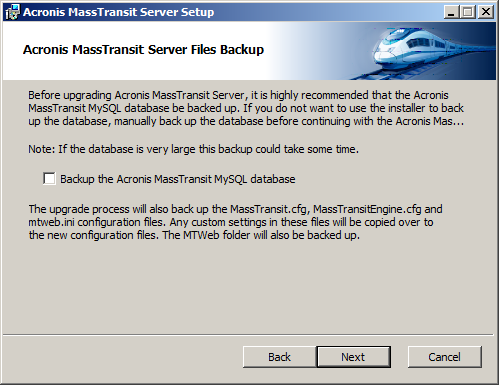
The MassTransit Server Backup window appears. To back up your database, select the Backup the Acronis MassTransit MySQL database check box, and then click Next.
The upgrade process will also backup the MassTransit.cfg, MassTransitEngine.cfg, and mtweb.ini configuration files. Any custom settings in these files will be copied over to the new configuration files. The MTWeb folder will also be backed up.
Note: It is highly recommended that you back up your MassTransit MySQL database. If you don‘t want the MassTransit installer to do it, you can manually back up the database before continuing with the MassTransit Server installation. For more information on how to do it, refer to Database Back Up in the MassTransit Best Practices section.
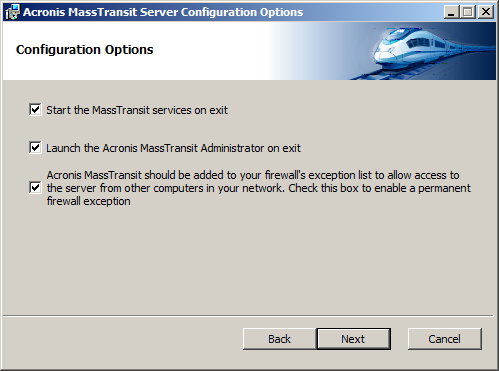
The Configuration Options window appears, with the following options available:
Select the first check box to start the MassTransit services immediately after the installation.
Select the second check box to launch the MassTransit Administrator for managing MassTransit immediately after the installation.
Select the third check box to create a permanent firewall exception for MassTransit, so that other computers in your network can access the server.
When ready, click Next.
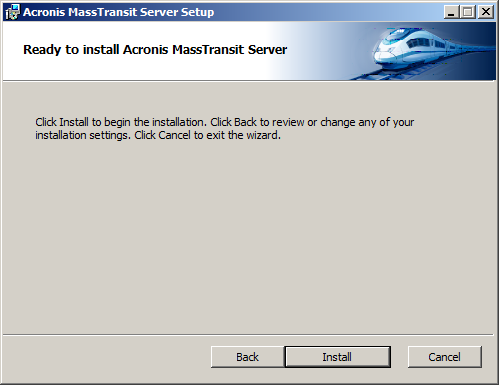
The Ready to install AcronisMassTransit Server window appears. If you need to review any of your settings, click Back. To proceed with the installation, click Install.
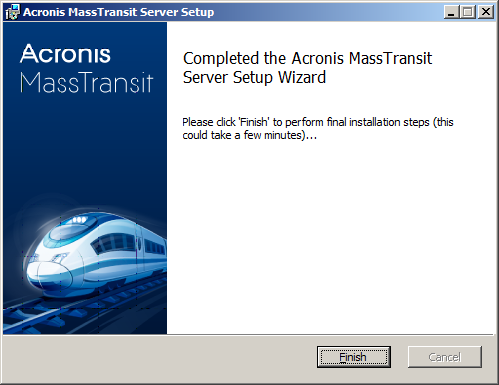
When the MassTransit installation completes, the following window appears. Click Finish.
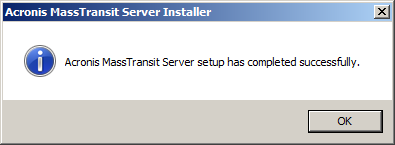
The AcronisMassTransit Server Installer message informs you that the MassTransit Server setup has completed successfully. Click OK.
Note: If you had MassTransit running as a special user account instead of the Local System account, set that account for the new version through the Services Control Panel. Set the MassTransit and MassTransit Transporter processes to use the same account.
If you use MTWeb, you must grant the IUSR account Modify permissions to the following folders: MTWeb\parsed and MTWeb\templates_c. You must also grant IUSR account Write permissions to MTWeb\WebRoot\MT-PHPLog.log.