Initial Setup

The Setup Wizard takes the administrator through a series of steps to get the basic functionality of the server working.

Note: After the Configuration Utility has run, it will take 30-45 seconds for the server to come up the first time.

Navigate to the Files Advanced's web interface using the IP address of your network adapter and the desired port. You will be prompted to set the password for the default administrator account.

Note: If you run Files Advanced with the default certificates instead of using certificates from a Certificate Authority, you will get an error that the server is untrusted.

Note: All of the settings you see in the Initial Configuration page will also be available after you complete it. For more information on any of the settings, please visit the Server Administration articles.

Note: Internet Explorer 8 is not supported.
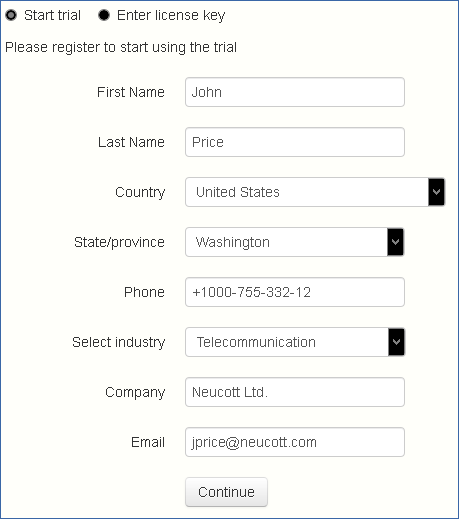
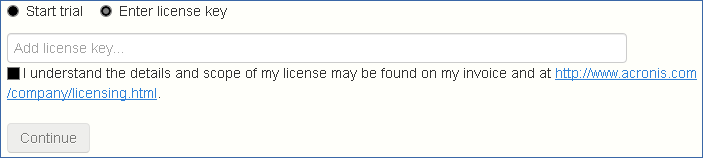
Licensing

To start a trial:

  1. Select Start Trial, enter the required information and press Submit.

    Linked JPEG File Template AAS

To license your Files Advanced instance:
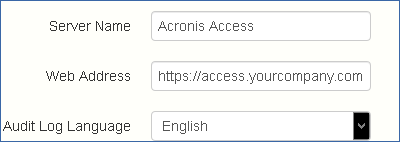
  1. Select Enter license keys.
  2. Enter your license key and select the checkbox.

    Linked JPEG File Template AAS

  3. Press Save.

General Settings

Linked JPEG File Template AAS

  1. Enter a Server Name.
  2. Specify the root DNS name or IP address where users can access the website (starting with http:// or https://).
  3. Select the default language for the Audit Log. The current options are English, German, French, Japanese, Italian, Spanish, Czesh, Russian, Polish, Korean, Chinese Traditional and Simplified.
  4. Press Save.

SMTP

Linked JPEG File Template AAS

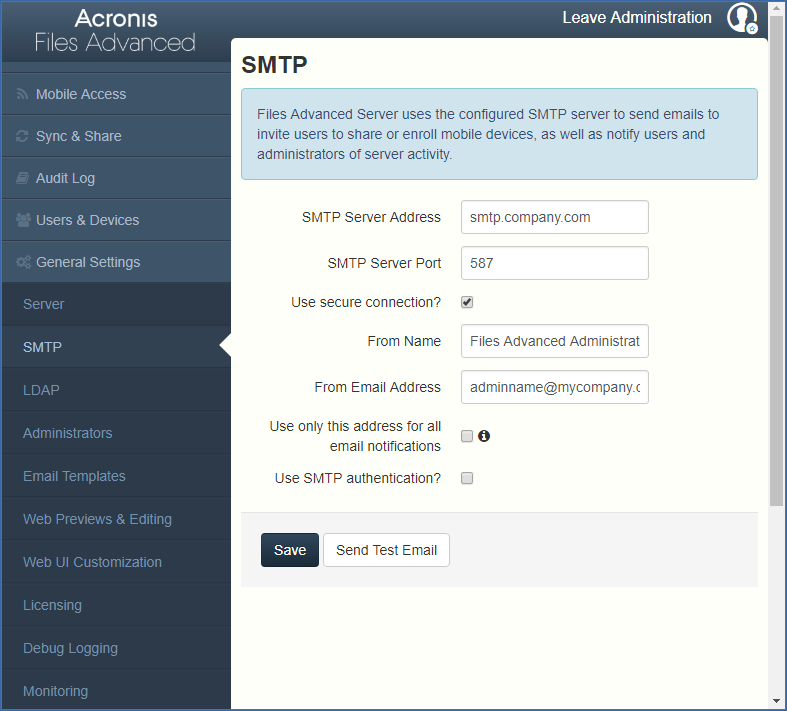
Note: You can skip this section, and configure SMTP later.

  1. Enter the DNS name or IP address of your SMTP server
  2. Enter the SMTP port of your server.
  3. If you do not use certificates for your SMTP server, unmark Use secure connection?.
  4. Enter the name which will appear in the "From" line in emails sent by the server.
  5. Enter the address which will send the emails sent by the server.
  6. If you use username/password authentication for your SMTP server, mark Use SMTP authentication? and enter your credentials.
  7. Press Send Test Email to send a test email to the email address you set on step 5.
  8. Press Save.

LDAP

Linked JPEG File Template AAS

Note: You can skip this section, and configure LDAP later but some of Files Advanced' functionality will not be available until you do.

  1. Mark Enable LDAP.
  2. Enter the DNS name or IP address of your LDAP server.
  3. Enter the port of your LDAP server.
  4. If you use a certificate for connections with your LDAP server, mark Use Secure LDAP Connection.
  5. Enter your LDAP credentials, with the domain. (e.g. acronis\hristo).
  6. Enter your LDAP search base.
  7. Enter the desired domain(s) for LDAP authentication. (i.e.to enable LDAP authentication for an account with the email joe@glilabs.com, you would enter glilabs.com)
  8. Press Save.

Local Gateway Server

Linked JPEG File Template AAS

Note: If you're installing both a Gateway Server and the Files Advanced Server on the same machine, the Gateway Server will automatically be detected and administered by the Files Advanced Server. You will be prompted to set the DNS name or IP address on which the Local Gateway Server will be reachable by clients. You can change this address later on.
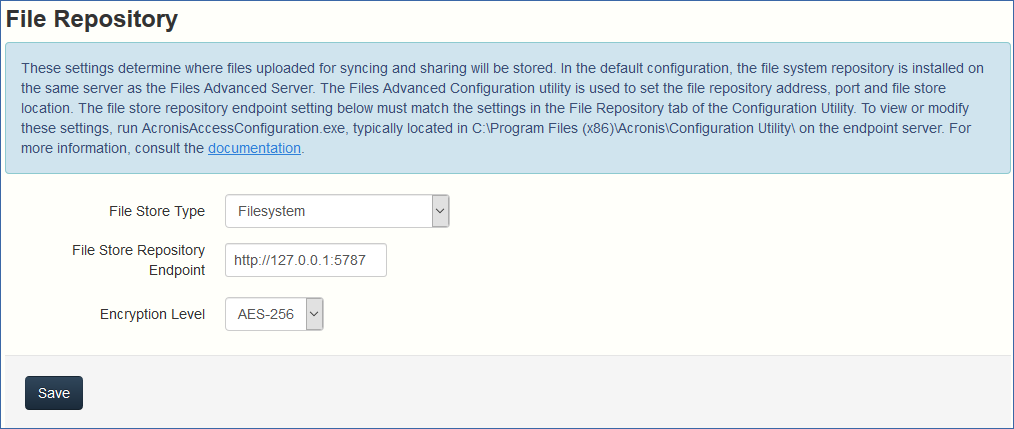
  1. Set a DNS name or IP address for the local Gateway Server.
  2. Press Save.

File Repository

Linked JPEG File Template AAS

  1. Select a file store type. Use Filesystem for a file store on your computers or Amazon S3 for a file store in the cloud.
  2. Enter the DNS name or IP address for the file repository service.

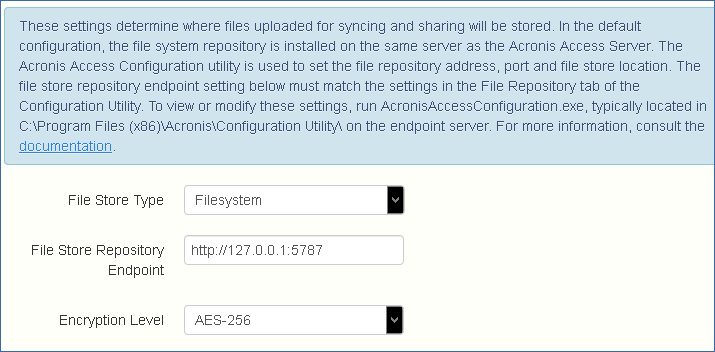
    Note: The Files Advanced Configuration utility is used to set the file repository address, port and file store location. The File Store Repository Endpoint setting must match the settings in the File Repository tab of the Configuration Utility. To view or modify these settings, run AcronisAccessConfiguration.exe, typically located in C:\Program Files (x86)\Acronis\Files Advanced\Common\Configuration Utility on the endpoint server.

  3. Select an encryption level. Choose between None, AES-128 and AES-256.
  4. Select the minimum free space available before your server sends you a warning.
  5. Press Save.