According to sources at Microsoft and other leading tech-industry groups, there are between four and five million different applications available for use with the Windows operating system (OS).
In This Article, We Will Be Covering:
- What Windows System Restore is and what it does
- Using Windows System Restore
- Why Windows System Restore is not a true backup
- Why Windows System Restore may not work and how to fix it
- Backing up and restoring Windows with Acronis True Image
Windows System Restore – The Essentials
It is easy to see why Windows is still the most popular desktop and laptop computer OS in use today. How popular? Well, Linux and Mac combined have about 10 percent of the desktop operating system market and Windows machines make up the other 90 percent. Because there are so many applications available for Windows, the OS must be many things for many different programs and tasks. For the most part, Windows does a remarkable job of ensuring compatibility and interoperability between the many applications used with the OS. Nevertheless, there are times when installing new programs or making changes to Windows can cause unforeseen issues or problems. When problems do arise, you can sometimes use Windows System Restore to resolve them.

First - It’s Not for Everyone
Windows System Restore does offer some useful, albeit limited, features for recovering corrupt or damaged Windows installations. In this article, we will discuss how Windows System Restore works and how to resolve common problems with the utility. More important, we will discuss why using a true backup solution, like Acronis True Image, can not only help keep your Windows system running properly but also protect all your data – not just Windows system files. Therefore, if you want the ability to perform a complete system restore in Windows 10 (or restore Windows 7 or 8,) you can save considerable time and effort by checking out Acronis True Image.
How Windows System Restore Works
Windows System Restore is a built-in Windows utility application that lets you “restore” your Windows installation and important system files to a previous state using Restore Points. A restore point is essentially a snapshot of your Windows system files and installed applications at a specific point in time. Restore points can be created manually or by Windows when updating the system or making other important changes, such as installing new software. Once Windows creates a restore point, it is stored on your computer’s hard drive until it is either used to restore the Windows installation to a previous state or deleted. If you experience problems with your computer after creating a restore point (i.e. installing a new application, running Windows Update, or creating one manually,) you can use Windows System Restore to roll back the system to a specified restore point. If there are no problems with the selected previous restore point, the system should run normally after the restoration.
What You Can and Cannot Do with Windows System Restore
When Windows runs a system update or installs a new application, many changes are made to certain system files and the Windows Registry. These changes may affect the way Windows starts, the programs that run at startup or how the operating system handles certain types of files. With so many possible changes to the Windows environment, an issue with any one of them could result in errors or problems. With Windows System Restore, you can undo some changes made to Windows during installations, updates and other events in case post-event errors or problems arise.
Things Windows System Restore Can Do
The name Windows System Restore seems to imply that the utility can restore a lost or damaged system. While this is partially true, the name itself is somewhat misleading. Consequently, many users are misinformed when it comes to what Windows System Restore can actually do. So, to help you better understand Windows System Restore, let’s review what you can fix or restore with the utility.
- Roll back or return Windows to a previous state. This can be done after: A Windows update – When Windows performs an update of the operating system, it may change or update various system files. If the updated versions of files are not compatible with other applications, Windows may not operate properly. With Windows System Restore, you can rewind the changes made by the update and revert to the state of the Windows installation that was in place before the update was run. Program installations – Many Windows applications allow you to create restore points during the installation process (and some even create restore points automatically. If the new program causes issues, you can run Windows System Restore to remove the application and reverse any changes made to Windows during its installation. Note: If you choose to roll back to an earlier state, not all changes on the machine are reversed or removed. In most cases, only Windows system files, registry entries and application additions/deletions (that were made after the selected restore was created) are removed, reversed, or modified. The process does not remove any user documents or other files you may have created or added after the creation of the restore point.
- Create or roll back restore points manually – If your computer is running properly and there are no issues or problems, you can create a restore point manually so that you can use it to fix any Windows issues that might arise in the future. If you choose to enable and use Windows System Restore, creating a manual restore point (when the system is running the way it should,) could make resolving Windows issues easier than relying on automatic restore points created by Windows or other applications. Additionally, if you need to use the utility to roll back the system, you can select a restore point other than the last one created. So even if a manually created restore point is not the latest version, it can still be useful to returning Windows to normal operation.
What Windows System Restore Doesn’t Do
Many people assume that since Windows System Restore is named the way it is that it helps them back up and restore their system completely. This is simply not the case. While the utility does share a few traits of a backup application, there are many backup-related tasks that you cannot perform with Windows System Restore. Some of the things you can’t do with Windows System Restore include:
- Perform a full system restore – Although Windows System Restore lets you restore Windows settings to a previous state, it does not allow you to do a complete system restore. If you have other files and applications outside of Windows, the utility will not allow you to recover them if they’re ever lost or damaged.
- Recover lost or deleted files – Windows System Restore does not back up any user-created files when creating restore points. Therefore, if you delete or lose data you create, then rolling back to a previous restore point will not help you recover deleted files. The only way to recover deleted or missing user files is by using a true backup utility such as Acronis True Image.
How to Use Windows System Restore
While Windows System Restore may not be an ideal backup solution for Windows, it can be useful in some situations when you wish only to roll back a Windows Update or undo changes made by a misbehaving application. However, before using Windows System Restore you must ensure that the utility is active and configured correctly. Accessing and configuring Windows System Restore is not a straightforward task, as the utility itself is somewhat hard to find. Therefore, we will examine how to use System Restore in Windows. Note: The process is very similar for System Restore in Windows 7, Windows 8 and Windows 10.
Configuring Windows System Restore
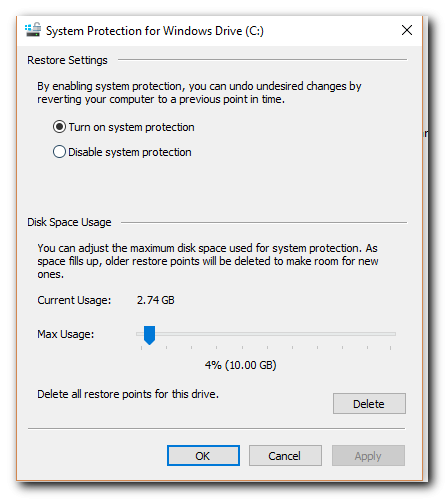
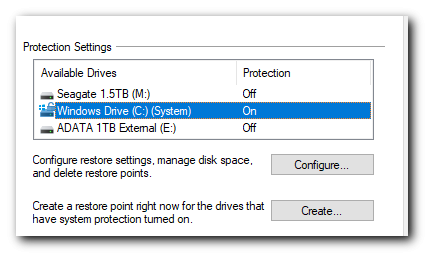
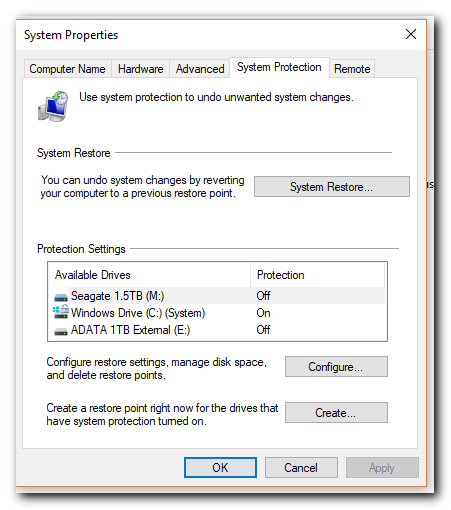
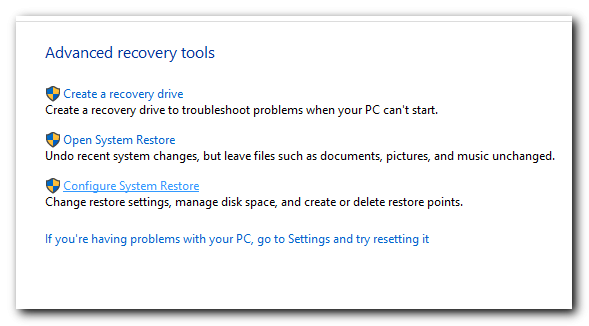
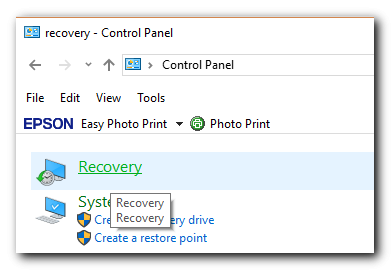
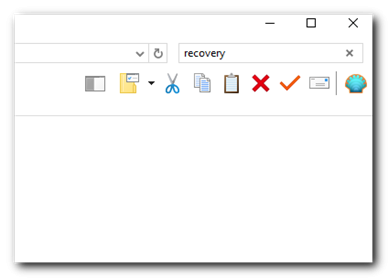
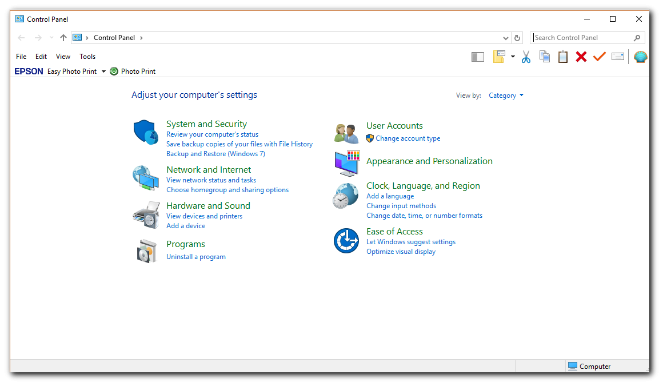
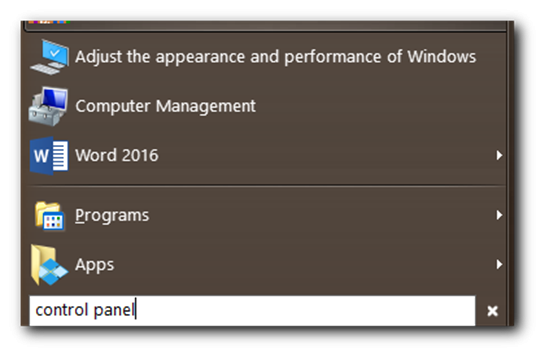
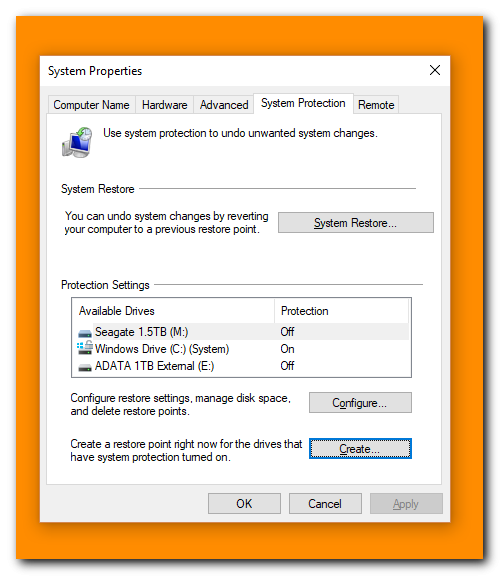
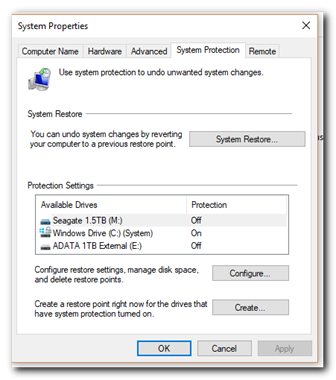
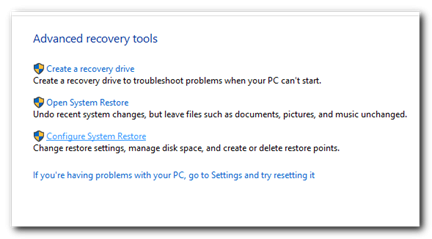
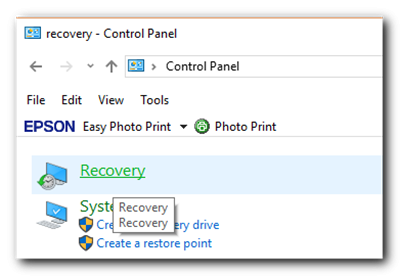
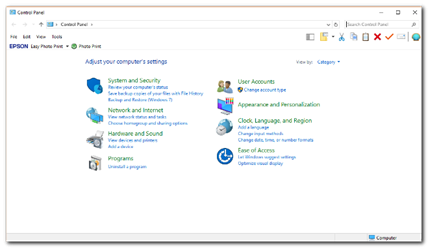
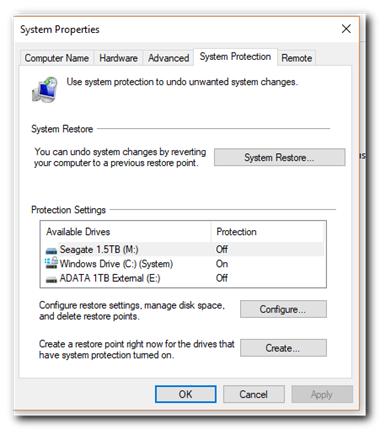
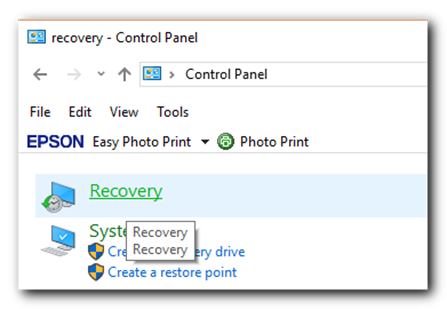
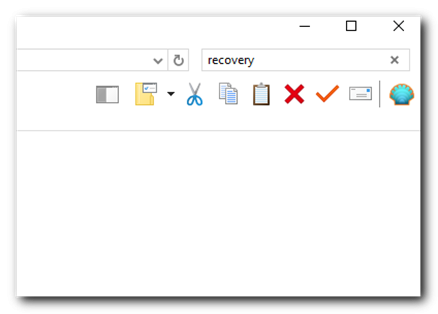
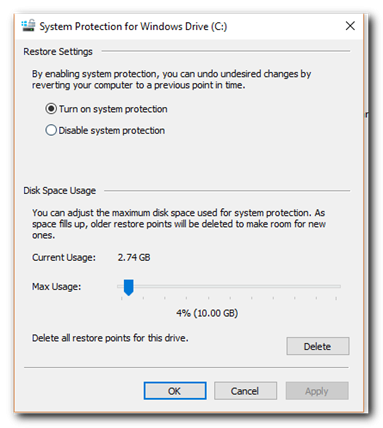
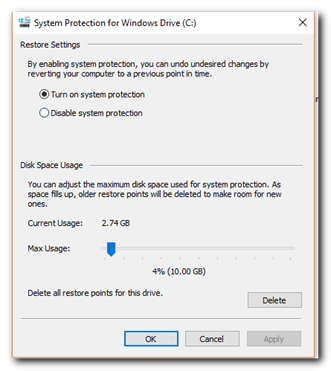
To enable and configure Windows System Restore, follow these steps: Step 1 – Type “Control Panel” in the Windows Search box and then press “Enter.” When the search results list appears, click the “Control Panel” link. Step 2 – Enter “Recovery” in the Control Panel Search box and press “Enter.” Click “Recovery” in the search results list. Step 3 – In the Advanced Recovery Tools list, click “Configure System Restore.” Step 4 – After the System Properties window appears, click the “Configure” button. Step 5 – Select the drive letter used for your Windows installation (usually C:) and then click “Configure.” Step 6 – In the System Protection window, enable the “Turn on System Protection” option. Use the slider tool to select how much drive space you want to use for restore points, and then click “OK.” Note: In most cases, it’s OK to leave Windows’ recommended settings for drive space intact. Only make changes if you have a very good reason for doing so. If you allocate too little drive space, Windows System Restore may not be able to create complete restore points. If you assign too much space to Windows System Restore, you’re probably just wasting drive space that could be used for other applications and files.

Creating a Restore Point
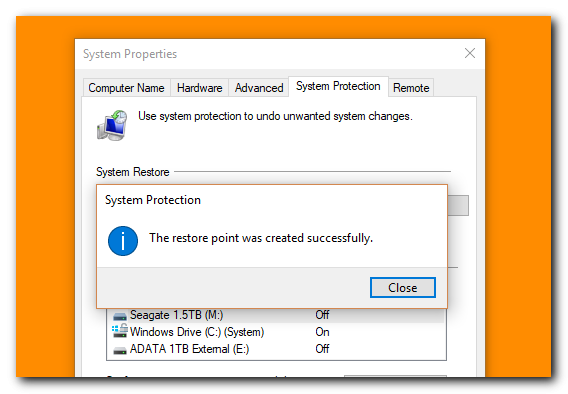
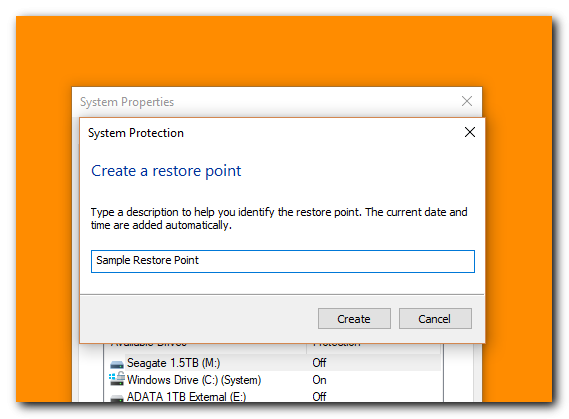
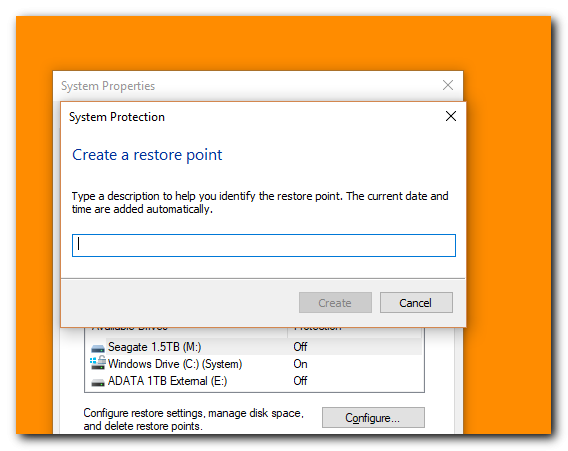
Windows will create restore points automatically when installing updates and some applications. If you would rather create manual restore points, (which is a good idea), you can do so relatively easy after navigating to the Windows System Protection window. Step 1 – In the Windows Search box, type “Control Panel” and then press “Enter.” Click “Control Panel” when the search results list appears. Step 2 – In the search box in the upper-right corner of the Control Panel window, type “Recovery” and then press “Enter.” Click “Recovery” in the search results list. Step 3 – After the Advanced Recovery Tools list appears, click “Configure System Restore.” Step 4 – In the System Properties window, click the “Create” button. Step 5 – After the pop-up window appears, enter a name for the new restore point and then click “Create.” Step 6 – Click “Close” after Windows creates the new restore point. Tip – You can verify that the new restore point was created successfully by first clicking the “System Restore” button in the System Protection window. In the Restore System Files and Settings window, click the “Choose a different restore point” option and then click “Next.” In the next window, you should see the name of the restore point you created manually. Click “Cancel” after verifying that the new restore point exists.

Rolling Back to a Restore Point
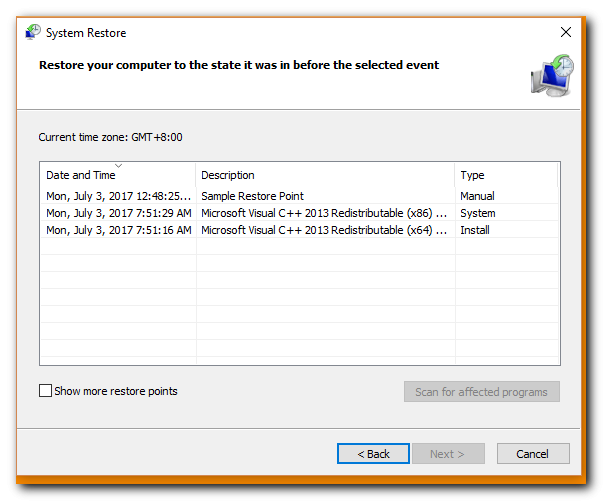
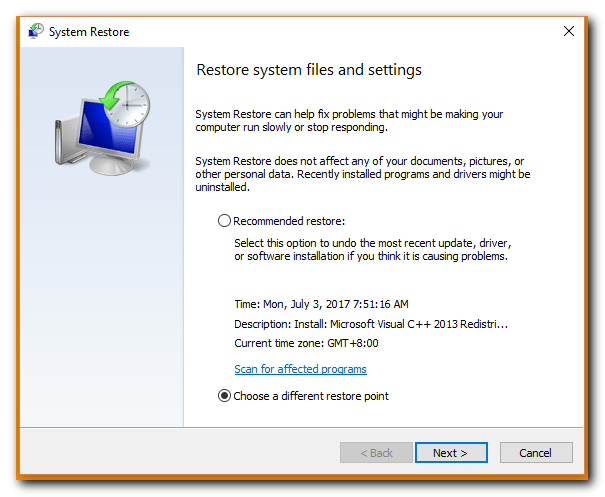
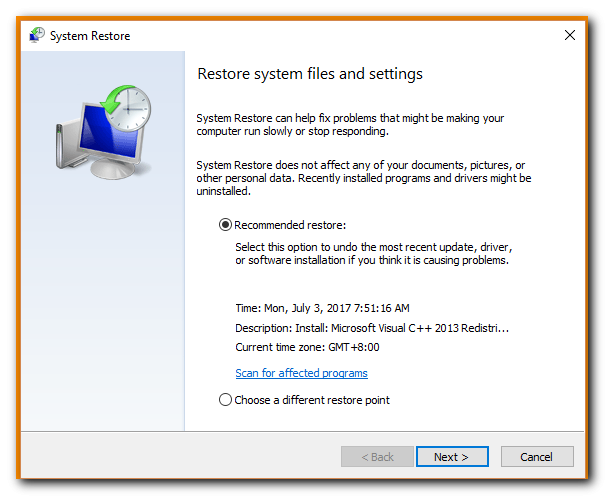
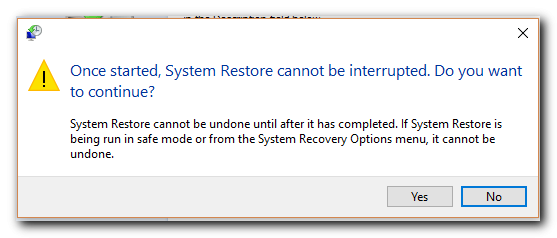
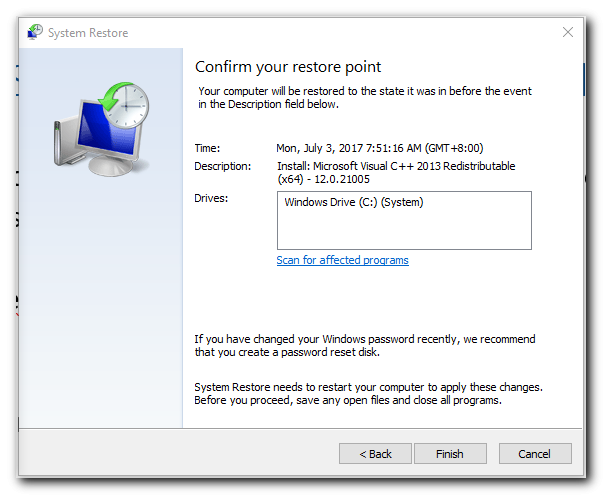
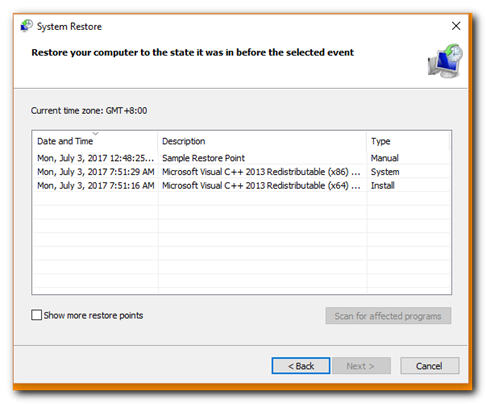
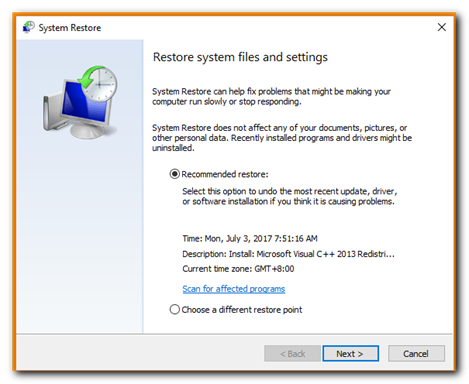
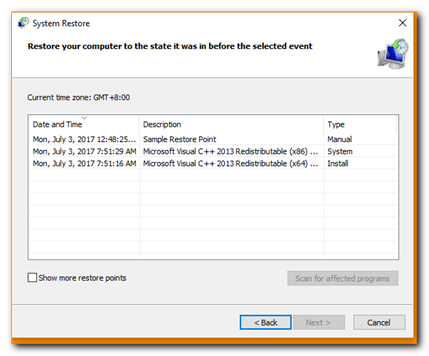
If Windows is not working the way it should, you can roll back to a previous restore point to attempt to fix the problem. To do so, follow these steps: Step 1 – In the Windows Search box, type “Control Panel” and then click the magnifying glass icon or press “Enter.” Select the “Control Panel” link in the search results list. Step 2 – Type “recovery” in the search box in the upper-right corner of the Control Panel window and then press “Enter.” Select “Recovery” in the search results list. Step 3 – In the Advanced Recovery Tools list appears, click “Open System Restore.” Step 4 – In the System Properties window, click the “System Restore” button. Step 5 – In the Restore System Files and Settings window, you have two options. You can choose to use the latest restore point (which is usually the recommended option) or you can select a different one. After making your selection click “Next.” Note: If you opt to choose a different restore point, select the name of the one you want to use and then click “Next.” Step 6 – Verify the information in the Confirm Your Restore Point window and then click “Finish.” Windows will prompt you once again and inform you that once the process starts, it cannot be interrupted. Click “Yes” to continue or select “No” to cancel the operation. After rolling back the system to the selected restore point, the system should restart automatically.


Windows System Restore Failures
Most of the time, Windows System Restore performs its limited functions efficiently and without issue. Nevertheless, there are times when the utility may not work as expected. In some cases, Windows may not be able to create restore points. In others, it may not be able to roll back to a given restore point. Therefore, we will discuss some of the reasons Windows System Restore might fail and how to address them.
Software Incompatibility
Most modern Windows applications work fine with Windows System Restore and will not interfere with the creation or recovery of restore points. However, there are some types of applications that do not function properly when the utility is active. And some programs may not uninstall correctly when using Windows System Restore to roll back to a previous restore point. Programs that may not function or roll back properly with Windows System Restore include various anti-virus and anti-malware programs; applications used to monitor and clean the Windows registry; and other system files. In fact, when using many of these applications, you may be prompted to disable Windows System Restore completely before running scans or other tasks. Consequently, you may need to disable anti-virus/malware and other system scanning applications before you can use System Restore to create or roll back a restore point.
Other Common System Restore Problems
Besides incompatibility issues between Windows System Restore and some security applications, there are a few other common reasons the utility might fail to function properly. Before doing anything else, ensure that the “Turn on System Protection” option is enabled in the System Protection window. If System Restore is enabled, and still not working, some other things to check include the following:
Insufficient System Restore Space
If you’re unable to create restore points, check to see if Windows has dedicated enough space for the task. If Windows is storing multiple restore points, the Max Usage setting in the System Protection window may be set to a value too small to contain a new restore point. Therefore, try increasing the Max Usage setting to increase system restore storage space or remove unneeded restore points manually.
Corrupted Restore Points
If you created a restore point while running applications not compatible with Windows System Restore, the restore point may be corrupt even if no errors or warnings were displayed. To determine if this is the case, try to roll back to another restore point in the System Restore window. In some cases, you might have to go back one or two restore points to roll back to one that works the way it should.
Failed Drivers and Startup Scripts
If Windows is failing to work properly because of hardware driver errors or errant startup applications or scripts, Windows System Restore may not function properly while running the operating system in normal mode. Hence, you may need to start the computer in Safe Mode, and then attempt to run Windows System Restore. You should be aware, though, that if you roll back to a restore point while in Safe Mode, you will not be able to reverse the roll back later. Tip – The “Undo System Restore” option is available in the System Restore window after successfully rolling back the system (unless the restore was done while running Windows in Safe Mode.)
Limitations of Windows System Restore
While System Restore can be useful in restoring Windows functionality in some instances, the utility has as many limitations as it does benefits. So you can’t consider Windows System Restore a true backup solution. Some of the things that prevent System Restore from being a real backup option for Windows include the following:
User-Created Files Not Included
As mentioned above, Windows System Restore does not allow you to back up or restore files you create in Windows. This means that if you create documents or other important files and they are subsequently lost or deleted, rolling back a restore point will not help you recover them. This differs greatly from a true backup application, which is intended to do just that – back up the files most valuable to you.
Restore Points Locked to a Single Computer
While restore points can help you restore program and system settings in Windows, they can only be used on the system on which they were created. Hence, if you purchase a new system or perform major hardware upgrades to an existing system, you cannot use restore points created on the old system (or old hardware) to restore programs and settings. With better backup applications, such as Acronis True Image, you can restore files and settings on new systems or dissimilar hardware.
Hard to Find and Use
As mentioned and demonstrated above, Windows System Restore is not intuitive or easy to use. There are no ready-to-use shortcuts for System Restore in the program menu or in Control Panel, which means even accessing the utility is a bit difficult. A good Windows backup and recovery application should not only be powerful but easy to use as well. In this regard, System Restore leaves a lot to be desired.
Malware and Viruses Love Restore Points
There’s a good reason many anti-virus, anti-malware, and other security programs are not compatible with Windows System Restore. That’s because if you create a restore point on an infected or compromised computer, that restore point remains infected – even if you remove the malicious code with the security application. As a result, restore points are a favorite hiding place of malware and viruses.
If you use an infected restore point to roll back your computer in the future, you’re simply re-infecting your system with the virus or malware. That’s why most good security applications require you to disable System Restore before running scans and/or removing infected files.
Back up Windows the Right Way with Acronis True Image
If you’re looking for the best way to create an easy backup of everything in Windows (or everything on your system,) a true backup solution is far superior to Windows System Restore. Acronis True Image is such a solution. It lets you create a complete Windows backup image of your system quickly and efficiently. In addition, it:
- Backs up everything in windows – Windows System Restore protects only a small subset of Windows system files and does not allow you to backup or restore documents, photos, videos and other important files. With Acronis True Image, you can opt to back up only selected files and folders or choose to back up everything on your hard drive. A complete backup is the only way of ensuring a true system restoration or recovery.
- Is easy to use – While Windows System Restore requires you to jump through a lot of hoops to even access the utility, Acronis True Image is much easier to use. In fact, you can create a complete Windows image backup with just a couple of mouse clicks.
- Works with all security programs – You’ll never have to worry about compatibility issues with anti-virus or other security applications when using Acronis True Image to back up or restore your Windows computer. Acronis True Image works great with all security applications, which means you’ll never need to disable or disrupt backup schedules before running system scans or removing bad code.
- Restores to other machines and devices – With Windows System Restore, you’re limited to using restore points on a single computer. With Acronis True Image’s Universal Restore feature, not only can you restore a backup to a new or different computer, you can also restore files and folders to other devices, such as Android smartphone or iPhones.
- Offers easy disk imaging – Acronis True Image includes many advanced backup options including the ability to create an exact, sector-by-sector image of everything on your hard drive. With Acronis True Image’s disk imaging features, you can quickly and easily create a mirror-perfect installation of your Windows installation and store it on a hard drive or save it to the cloud for secure off-site protection.
As you can see, Acronis True Image offers much more in the way of protecting your Windows installation than System Restore. So, if you want to avoid the frustration associated with System Restore and lesser backup tools, try the number one personal backup software, Acronis True Image.
About Acronis
Acronis is a Swiss company, founded in Singapore. Celebrating two decades of innovation, Acronis has more than 1,800 employees in 45 locations. The Acronis Cyber Protect Cloud solution is available in 26 languages in over 150 countries and is used by 20,000 service providers to protect over 750,000 businesses.