
More than a third of all companies worldwide have begun migrating to Windows 10, now that Windows 7 end of life is less than a year away. The IT departments at these companies know there are many compelling reasons why they must upgrade to Windows 10 before January 14, 2020 – including ensuring the performance, stability, security, and compliance of their entire infrastructure.
Yet these IT pros also know there are many problems with Windows 10 updates that make this transition a time-consuming, manual effort, especially if they have a lot of Windows 7 machines that need to be updated.
To streamline these deployment efforts and minimize the loss of user data and settings, they need a reliable and easy-to-use migration tool – like Acronis Snap Deploy.
How to Upgrade Your Entire Office to Windows 10 with Minimum Effort
The good news is that by combining Acronis Snap Deploy with Microsoft’s User State Migration Tool, companies have a way to migrate existing user data – including files, apps, and settings – quickly and easily. This software combination also delivers rapid bare-metal deployment of a master image of their Win 10 configuration to multiple machines at the same time.
As a result, companies can use Acronis Snap Deploy to deploy a standard configuration – including the OS, files, and applications, as well as machine-specific configurations such as machine names, IP addresses, domain membership, etc. – to all their PCs at once rather having to conduct individual installations. And since Acronis Snap Deploy can deploy to live Windows machines, the need to manual boot each PC is eliminated, saving even more time.
This article explains how you can use Acronis Snap Deploy and Microsoft’s USMT to upgrade multiple Windows 7 machines to Windows 10 while preserving user profiles and applications settings.
PRO TIP: Before starting your Windows 10 update, you should back up all of your Windows 7 machines using Acronis Backup. That will ensure that the files, apps and system of your Windows 7 PCs can be recovered if anything extraordinary happens during the update process. In addition, you can use Acronis Backup to protect the deployed Windows 10 machines.
How to migrate user settings with USMT at scale
Generally speaking, updating from Win 7 to Win 10 using Acronis Snap Deploy with Microsoft’s USMT is a four-step process:
1. Prepare the Windows 7 machines which need to be upgraded by installing:
- Microsoft USMT from the Windows ADK package
- Acronis Snap Deploy 5 Management Agent component
2. Run USMT on Windows 7 machines with /ScanState parameter to capture the current configuration and save it on some remote location, e.g. network share.
3. Prepare Windows 10 machine by installing USMT and other required applications which apply to your environment. This machine will be used as a single “Master” image source for deployment on all Windows 7 machines.
4. Configure the deployment task in Acronis Snap Deploy and run the deployment using post-deployment scripts which will run USMT with /LoadState parameter in order to apply individual (per-machine) users’ settings after deployment.
Let’s examine those steps in detail.
Prepare Your Windows 7 Machines So User Settings and Apps are Preserved
Microsoft’s USMT is a part of the Windows ADK package, which can be installed on its own. You’ll need to download the Windows ADK so you have the latest USMT. It’s important to note that the same version of Windows ADK (10) should be used on all machines. Installing the same version will ensure the user configuration exports and imports properly during the upgrade. (We recommend you download the current documentation for both USMT and Windows ADK as well.)
To automate the installation of USMT onto multiple Windows 7 machines, you can use the CLI installation option of Windows ADK with the following parameters:
adksetup.exe /quiet /installpath c:\ADK /features OptionId.UserStateMigrationTool
In this case, the /InstallPath defines the path where you want to install Windows ADK and /features OptionId.UserStateMigrationTool ensures you only install the USMT feature.
Automating the USMT installation via Group Policy
Installing Windows ADK can be completed using the Active Directory group policy. The following example uses the Group Policy Management snap-in.
1. Create the group policy and enable it for the required set of machines in your domain. 2. Use a batch file or any other scripting engine you prefer to automate the USMT setup.
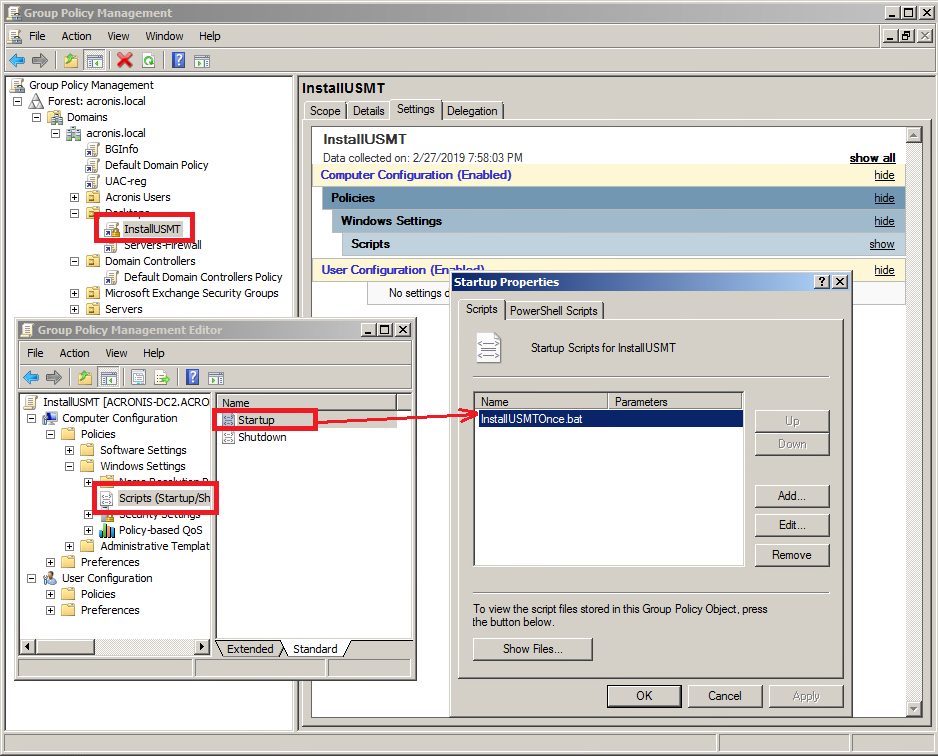
In this example, the batch file verifies whether or not the Windows ADK is already installed. If it isn’t, then it is mounted from an installation file located on a network share:
if exist "C:\[PATH_TO_ADK_INSTALLATION_FOLDER]\Assessment and Deployment Kit\Docs\" goto skip
\\[ADDRESS]\[SHARENAME]\adksetup.exe /quiet /installpath c:\[PATH_TO_ADK_INSTALLATION_FOLDER]\ /features OptionId.UserStateMigrationTool
exit /b
:skip
exit /b
When applying the policy you’ve created, you’ll want to verify that it will be applied to the correct Organization Unit – the one that contains the Windows 7 machines you want to upgrade to Windows 10.
Using the USMT to capture the current system state
The key to ensuring you migrate all user settings is to use the USMT to capture the system state from each Windows 7 machine you’re updating, then keeping them individually in a dedicated location.
The following sample script allows you to use a network share as that dedicated target location:
cd "C:\Program Files (x86)\Windows Kits\10\Assessment and Deployment Kit\User State Migration Tool\amd64"
scanstate.exe /i=MigUser.xml /o /c
\\[NetworkShareHost]\[path_to_share]\%computername%\
To use that sample script, you’ll need the following definitions:
- “C:\Program files (x86)\...” is the default installation folder for your Windows USTM - “C:\Program files (x86)\...” is the default installation folder for your Windows USTM - MigUser.xml is the USMT configuration file example (available by default) which migrates users’ settings – including Startup menus, and all My Documents files. It also captures any custom files that are defined in the MigUser.xml description. Depending on your requirements, you can customize the existing file or use a different .xml configuration file. (Here’s where you’ll want to refer to the USMT documentation you downloaded.) - \\[NetworkShareHost]\[path_to_share]\%computername%\ is the path to the network share where the system state configuration generated by USMT will be stored. Note that it will be stored individually for each machine in a corresponding folder (folder name = hostname of the machine)
Install the Acronis Snap Deploy Management Agent
You’ll now need to install the Acronis Snap Deploy 5 Management Agent to multiple machines. You can do that in one of three ways.
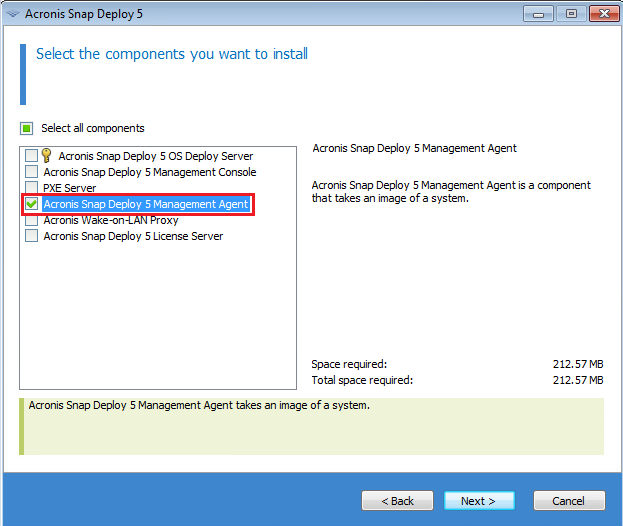
First, you can use the main installation package to run it directly on the Windows 7 machine. You can then proceed with a Custom installation, but you should only choose the Acronis Snap Deploy 5 Management Agent component.
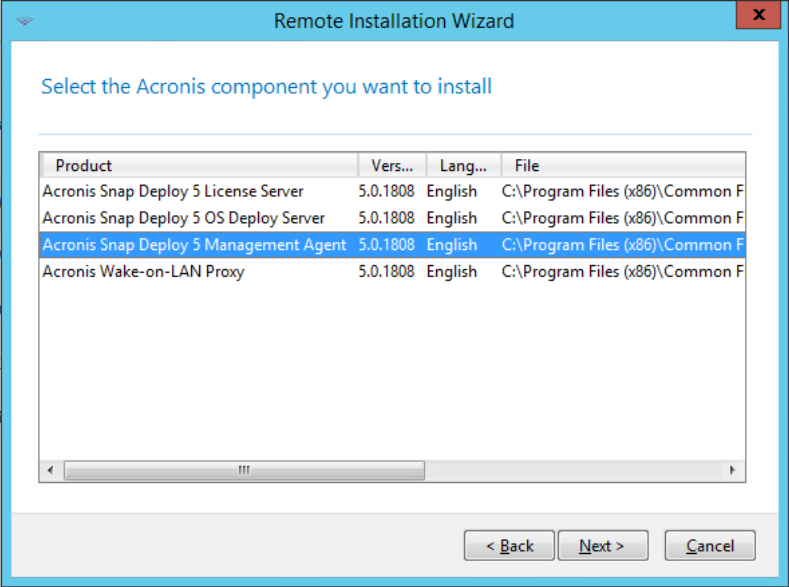
A second option is to run a remote installation using the Acronis Snap Deploy Management Console.
From the console, you should click on the Tools and select Install Components Remotely from the drop-down menu. The wizard will then give you the option of installing the Acronis Snap Deploy 5 Management Agent component.
The third option is to install the .MSI package extracted from the Acronis Snap Deploy 5 installation file. Simply run the Acronis Snap Deploy installation file and choose Extract installation files option.
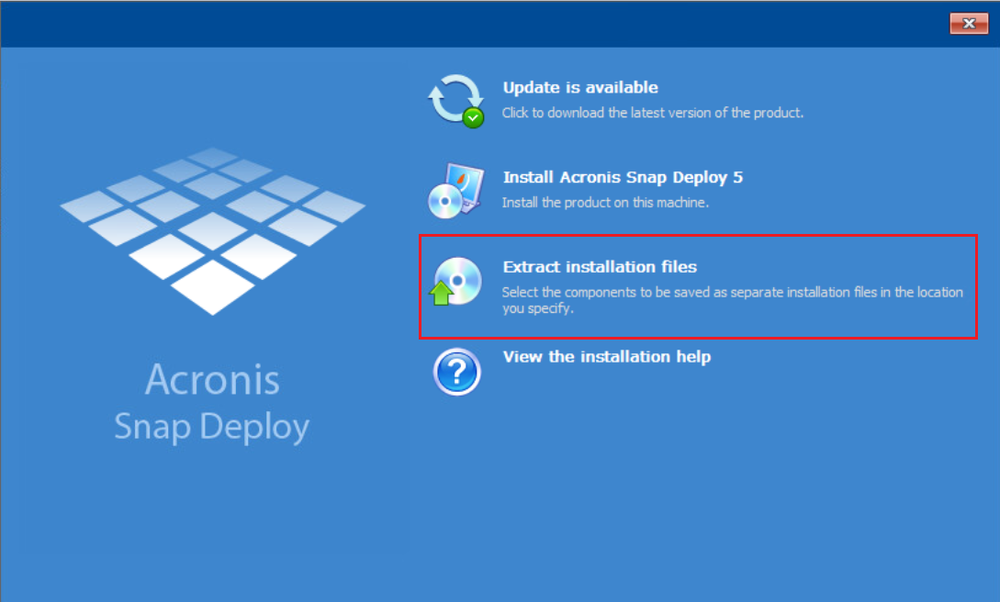
As with the other two options, choose the Acronis Snap Deploy 5 Management Agent component and once it’s extracted you can install the .msi package using the following command:
msiexec /i AcronisSnapDeployAgent.msi /qn /norestart
Please note that if there are multiple Acronis Snap Deploy OS Deploy Server instances installed on your network, you should define the specific address of the OS Deploy Server in the Windows registry on the agent side by adding a corresponding registry record (see this chapter in the Acronis Snap Deploy User Guide):
REG ADD HKLM\Software\Acronis\SnapDeploy\ManagementAgent\ /f /v "Server" /t REG_SZ /d
[IP_ADDRESS_OF_OS_DEPLOY_SERVER]
Make sure the installed Acronis Snap Deploy Agent is “Online”
After successfully installing the agent onto a Windows 7 machine, that PC should appear in Acronis Snap Deploy Management Console with a state status of “Online”. That means it is ready for deployment of Windows 10.

Preparing Your Windows 10 Master Image for Deployment
One of the main benefits of using Acronis Snap Deploy as your Windows 10 upgrade tool is that it enables rapid bare-metal deployment of a master image of your company’s default Win 10 configuration to multiple machines at the same time. Here’s how you prepare that master image.
First, you need to install Microsoft’s USMT onto the Windows 10 machine that you are going to use as the master image. You’ll follow the same process as described above for the USMT installation.
You’ll then want to install any other applications that are required in your IT environment. Keep in mind, you’ll want to exclude any apps captured with the USMT above, which you plan to migrate using the USMT.
Once you’ve got all of the desired apps and settings prepared, you’ll create a master image of this machine using Acronis Snap Deploy. There are two ways to capture that image:
1. Boot your master machine using Acronis Snap Deploy bootable media and then run the Master Image Creator
2. Install the Acronis Snap Deploy 5 Management Agent, connect to this machine via the Management Console, and then capture the image
Deploying Your Windows 10 Master Image
Once you’ve prepared the target machines and created the master Windows 10 image you want to deploy, the last step is to configure the deployment task – including the post-deployment scripts that will automatically apply any user profiles configurations saved by the USMT. The process is very straightforward.
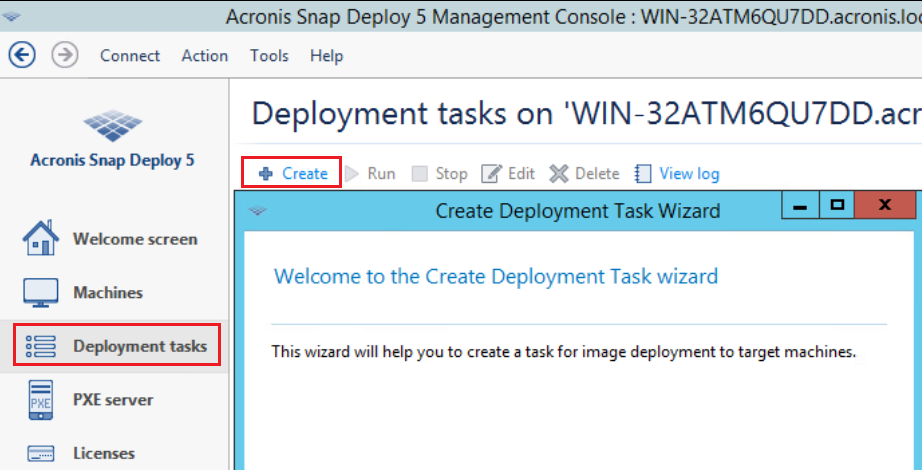
First, go to the Acronis Snap Deploy Management Console (connected to OS Deploy Server) to create a new Deployment task.
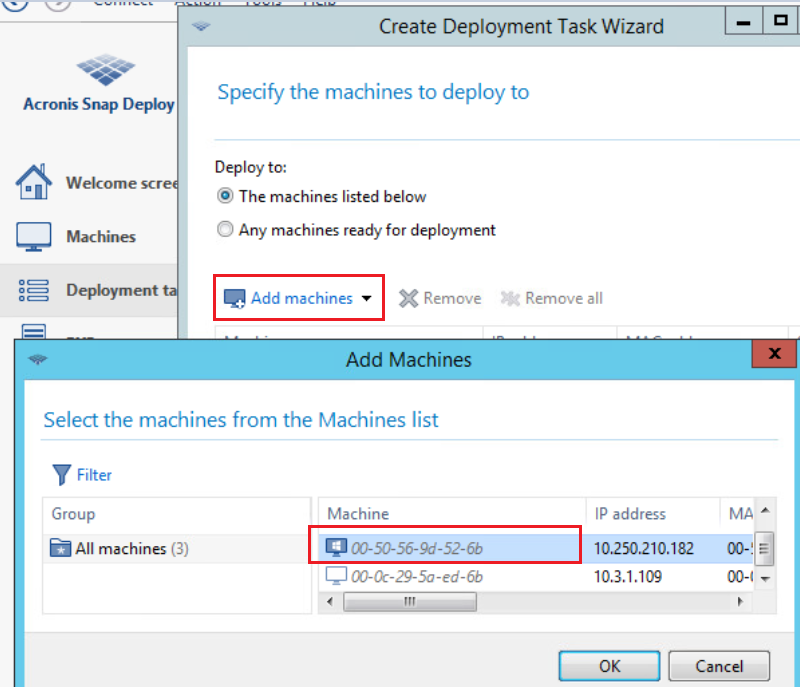
Add the target Windows 7 machines from the list that you want to upgrade.
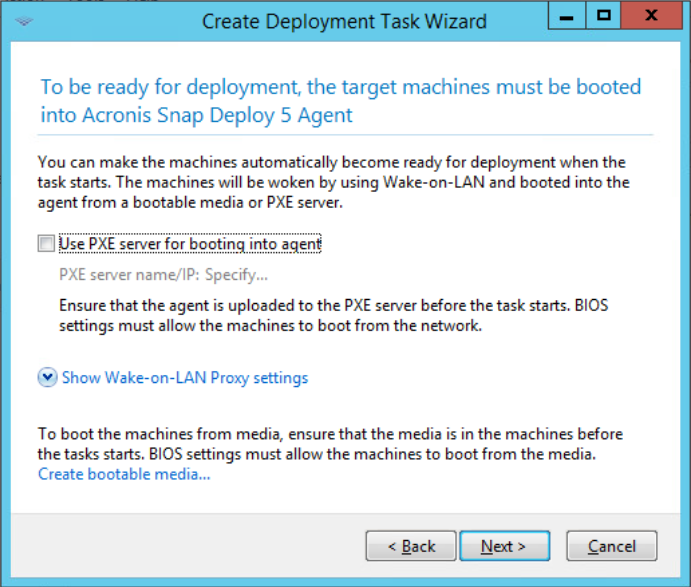
At this point, you’ll be prompted for PXE Server and Wake-On-LAN Proxy configuration, but these components are not used when using the Acronis Snap Deploy 5 Management Agent, so you can skip that step simply by clicking Next.
Then create a new deployment template and select your Windows 10 master image.
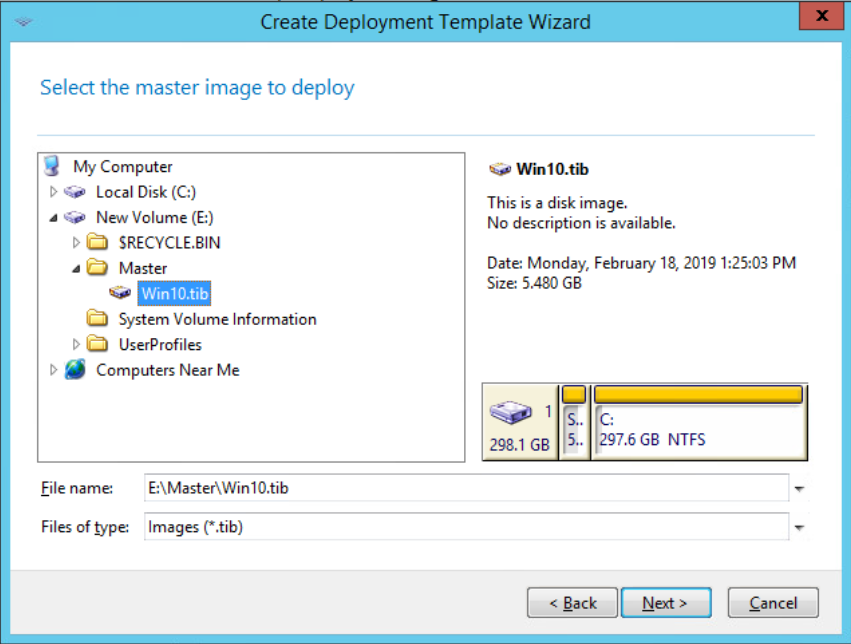
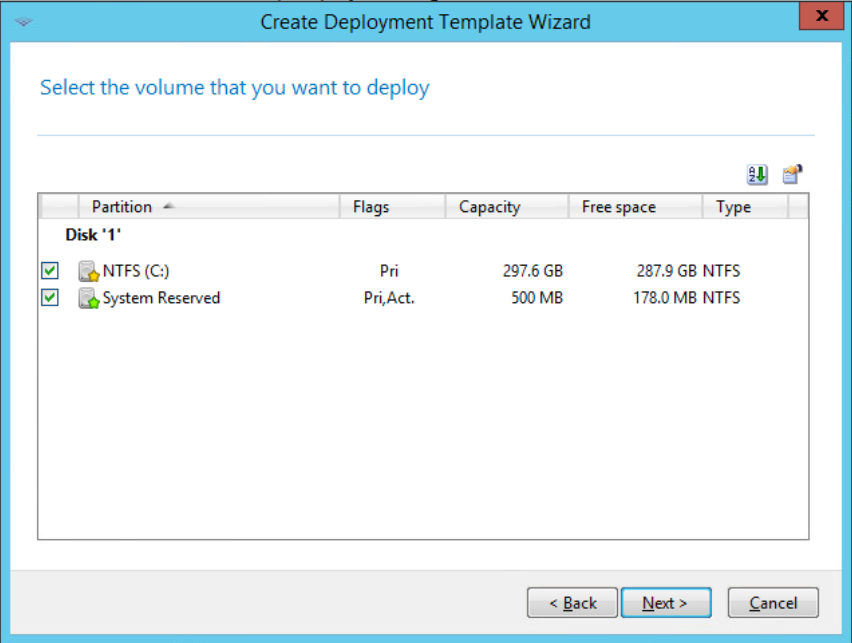
You’ll want to make sure you select all of the volumes you to be deployed, including the System Reserved partition.
You’ll then need to configure your deployment options. Be sure to pay attention to the following settings:
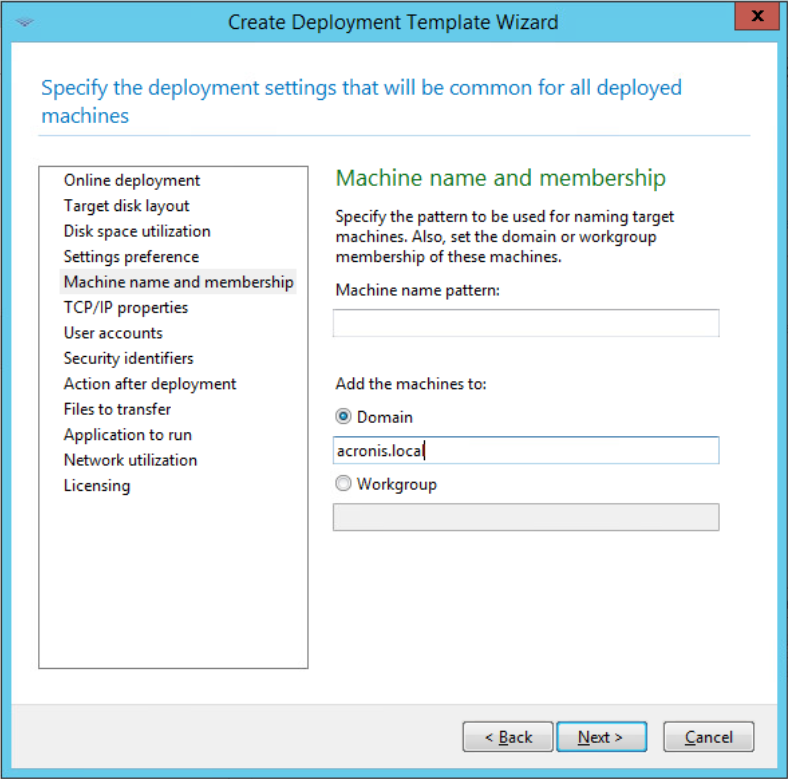
o Machine name and membership, which defines the machine name and domain settings (as described in Machine name and membership). Machines must keep their original hostnames so the USMT configuration in the %computername% folders is applied correctly. To preserve the original machine name, it has to be defined using “Individual deployment settings” for this machine in “Machines” list prior to running deployment. (See Enabling, disabling, and resetting individual settings.)
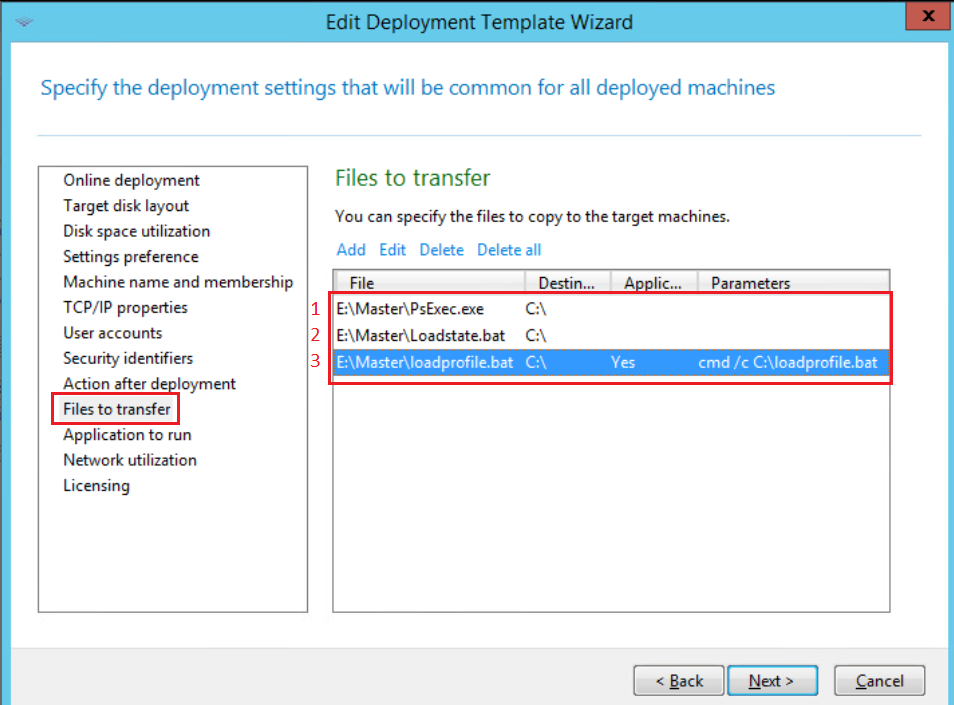
o Files to transfer, since the order of files must be exactly: 1 – Psexec; 2 – Loadstate.bat; 3 – Loadprofile.bat
1. The PSexec utility must be copied to the deployed machine in order to run the “LoadState” USMT script, which will apply the configuration captured by USMT to the target machine. (PSexec.exe can be downloaded here.)
2. The Loadstate.bat (referenced from “Loadprofile.bat”) applies the previously saved USMT configuration to the machine by executing USMT “loadstate.exe” utility. The Loadstate.bat contents are:
@echo OFF
cd "C:\Program Files (x86)\Windows Kits\10\Assessment and Deployment Kit\User State Migration Tool\amd64"
loadstate.exe /i=MigUser.xml /lac /nocompress \\[NetworkShareHost]\[path_to_share]\%computername%\
shutdown /r /t 00
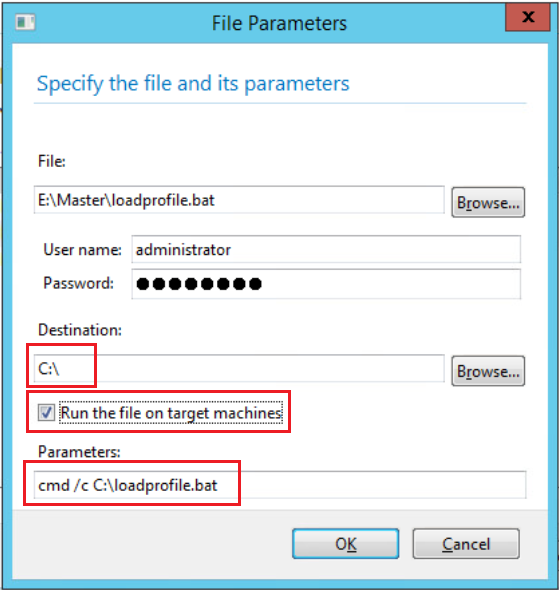
3. The Loadprofile.bat script must be copied into the same folder along with PSexec. The Loadprofile.bat contents are:
@echo ON
cd C:\
PsExec.exe -h -u [username] -p [password] /accepteula "C:\loadstate.bat"
…where [username] and [password] corresponds to the credentials of a user with local administrator privileges on the machine – domain administrator credentials, for example.
4. Of course, other deployment options can be configured if needed.
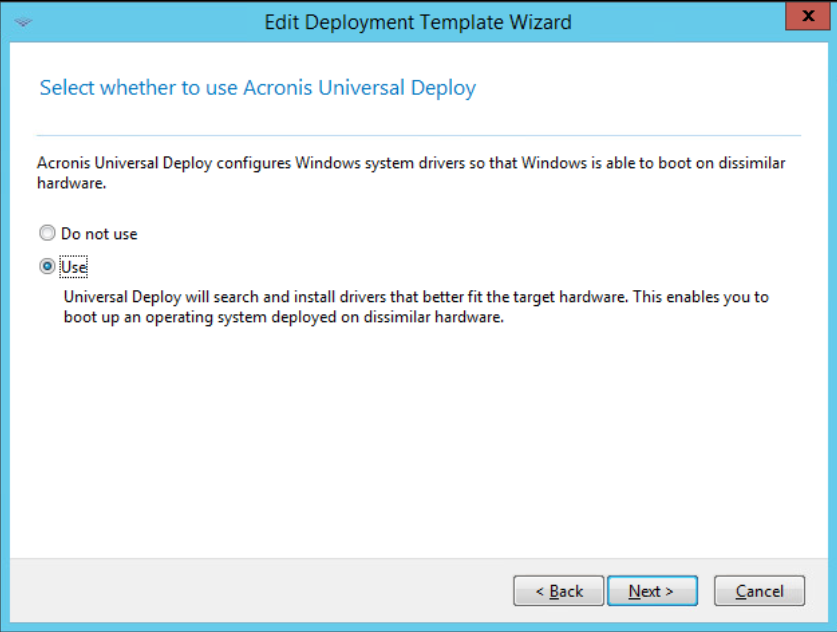
To ensure the deployment goes smoothly, you may want to enable Acronis Universal Deploy. This feature helps avoid deployment issues in the event that the hardware of the Windows 10 machine which was used to create your master image is different from the hardware in your target Windows 7 machines. Acronis Universal Deploy will automatically find and install the right drivers for the target hardware to prevent any compatibility issues.
Your task is now configured and ready to go, so you can proceed with the deployment.
Reviewing and Confirming a Successful Deployment
The master image will be deployed to all of your former Windows 7 machines. Those machines will reboot after applying users profiles settings, and you’ll be able to log in to verify that your Windows 10 update has been successful.
Users should be able to confirm all of their individual apps and settings were successfully migrated during the process as well.
About Acronis
Acronis is a Swiss company, founded in Singapore. Celebrating two decades of innovation, Acronis has more than 1,800 employees in 45 locations. The Acronis Cyber Protect Cloud solution is available in 26 languages in over 150 countries and is used by 20,000 service providers to protect over 750,000 businesses.