For: IT Administrators, MSPs, and business owners managing company-wide Windows upgrades
What it solves: “How do we move to a new Windows version without data loss or downtime?”
Key takeaways (read this first)
- Start small: Run a pilot on 1–2 non-critical devices to surface driver, app, and policy issues before broad rollout.
- Pick the right path: Use in-place upgrades for modern, compliant hardware; use wipe-and-load/new hardware for older or non-compliant endpoints to ensure performance and standardization.
- Back up the whole system: Take a full disk-image backup (including hidden/OEM partitions), then an incremental just before cutover to capture last-minute changes.
- Deploy at scale: Use golden images and centralized deployment to ensure consistency, shorten hands-on time, and reduce human error across many devices.
- Plan for fast recovery: Verify you can restore single files or full systems, and keep the option to spin up old images as VMs for quick access to legacy apps or keys.
- Archive safely: Retain pre-migration images in secure, cost-effective storage for months in case missed files or audits arise.
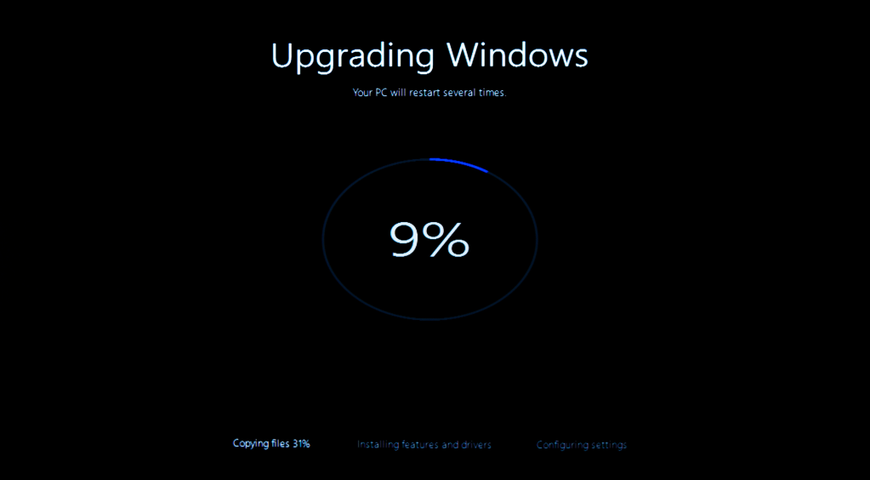
Migrating to a new version of Windows is more than running a setup wizard; it demands clear planning and rock‑solid backups. Below are the essential steps organised into three phases: Pre‑Migration Planning, Backup & Deployment and Post‑Migration Recovery.
Phase 1 – Pre‑Migration Planning
Before touching any devices, assess your environment and plan the migration. A phased approach catches problems early and prevents a “big‑bang” failure.
- Assess hardware and app readiness (pilot first) Not all PCs support Windows 11; requirements include TPM 2.0, Secure Boot and recent processors. IT professionals use tools like Microsoft’s PC Health Check to audit each endpoint. Legacy applications may not run under the new OS, so create a compatibility matrix and test key apps on a small pilot group. Start with IT staff or open‑minded users, then expand in phases.
- Decide on migration style: Decide whether to perform an in‑place upgrade or a clean install (also called wipe‑and‑load). In‑place upgrades are convenient for newer computers that already meet Windows 11 requirements and need minimal reconfiguration. A clean install is usually preferable for older devices or when moving to new hardware; it guarantees a standard corporate image and avoids carrying forward “software cruft.”
Phase 2 – Backup & Deployment (the core process)
Data protection is the heart of a safe migration. Use full‑disk imaging and modern deployment tools to ensure that if anything fails you can roll back quickly.
- Perform a full system backup before upgrading: A system image is not just a copy of documents; it’s an exact replica of the entire drive—including the Windows OS, settings, programs and all files. The advantage of a system image is that if a hard drive dies or the upgrade fails, you can restore everything without reinstalling Windows. Do not rely on file‑copy backups for OS migration; a full disk image is the only way to recover the complete environment.
- Use disk‑imaging tools, not just file copies: File‑level backups protect documents but ignore the operating system and applications. A system‑image backup creates a full image of the device, including programs, device drivers, system preferences and browser settings. Acronis Cyber Protect, for example, automatically backs up the entire system and stores it locally or in the cloud; if Windows 10 crashes during an upgrade, the image can be restored to the same PC or new hardware.
- Back up hidden and vendor partitions: Don’t forget OEM recovery partitions or hidden boot volumes. Many manufacturers store recovery data on these partitions. Include them in your system image so you preserve factory‑reset options. Comprehensive imaging tools capture these sectors by default.
- Take a final incremental backup right before migration: Schedule one last backup immediately before you upgrade. An incremental backup captures only the changes since the last full image, so it runs quickly. This final snapshot ensures that user files created after your earlier backup are not lost.
- Use mass‑deployment tools for efficiency: Manually installing Windows on each PC wastes time and introduces inconsistency. Imaging tools built for corporate deployments let you create a golden image and push it to many machines simultaneously. Acronis Snap Deploy, for instance, lets you capture a standard configuration—including OS, configuration files and applications—and deploy that image to multiple machines in parallel. The software supports multicast transfers and offer manual, automatic or scheduled deployment options. Even when hardware differs, Acronis Universal Deploy injects the right drivers so you can restore to dissimilar systems.
Phase 3 – Post‑Migration Recovery & Archiving
A successful migration isn’t finished when Windows 11 is installed. You need mechanisms to recover old data and provide users with what they need.
- Convert the old system image into a virtual machine: Having a bootable copy of the previous environment allows you to retrieve forgotten license keys or settings. Many imaging tools—including Acronis Cyber Protect—offer instant restore or VM conversion. By spinning up the image in a hypervisor, you can access the old desktop in minutes and copy anything you missed.
- Enable granular, file‑level recovery: Choose a backup solution that allows you to restore individual files from a system image. Acronis True Image (now Cyber Protect Home Office) lets you mount a disk image and recover specific files without a full system restore. This capability minimises downtime because users can get a single folder back immediately.
- Archive pre‑migration backups: Do not delete your old images once the migration succeeds. Archive them to low‑cost storage (cloud or external drive) so you can recover data or settings months later. After verifying everything works, plan a retention schedule to free space while still meeting regulatory requirements.
Additional FAQ
What are the main risks during a Windows migration? Data loss from incomplete backups, extended downtime due to installation problems, application incompatibility and new security misconfigurations are the biggest risks. A structured plan that begins with a pilot group, includes full‑disk imaging and uses phased deployment mitigates these problems.
Why is disk imaging better than file‑level backup for OS upgrades? File‑level backups copy only selected data (documents, photos). A system image is a sector‑by‑sector copy of the entire drive—including Windows, applications, drivers and settings—which lets you restore the machine to its exact previous state. Without a system image, you must reinstall Windows and reconfigure software manually.
Can I just use Windows’ built‑in backup tools? Windows includes basic imaging utilities (e.g., “Backup and Restore (Windows 7)” in Control Panel), but they lack central management, flexible deployment and cross‑hardware restore options. Third‑party solutions like Acronis Cyber Protect integrate backup, security, patch management and mass‑deployment features—capabilities crucial for MSPs and large organisations.
How long does a typical business migration take? Planning and pilot testing often take several weeks. Once the imaging and deployment infrastructure is in place, a phased rollout across hundreds of machines can often be completed over a weekend or during off‑hours to minimise disruption.
About Acronis
A Swiss company founded in Singapore in 2003, Acronis has 15 offices worldwide and employees in 60+ countries. Acronis Cyber Platform is available in 26 languages in 150 countries and is used by over 21,000 service providers to protect over 750,000 businesses.