ESXi Host Configuration Recovery
ESXi host configuration recovery (BMR restore) can be used to quickly recover the ESXi server when, for example, it crashes and cannot be booted. ESXi Host Restore wizard allows you to configure the recovery of the previous configuration of the ESXi host stored in a previously created backup. Through the wizard you can check and reconfigure local datastores (datastores created on local disks) and remap vSwitches that were previously mapped to physical NICs. Also, you can define which backup locations should be used for the recovery of the missing VMs after the ESXi host is restored and boots up.
ESXi Host Restore wizard is available from Acronis Bootable Media interface only. The media can be created by Acronis Bootable Media Builder. It is a separate installation package. This functionality cannot be run from the Acronis Backup for VMware Agent Web Interface.
In the first step select the Archive and the Recovery Point that will be restored. Open the pop-up and select the location where the ESXi host configuration backup archive is stored. Then, select the Archive with the ESXi Host Backup. When the archive is selected, the latest recovery point is chosen by default. However you can change the default selection.
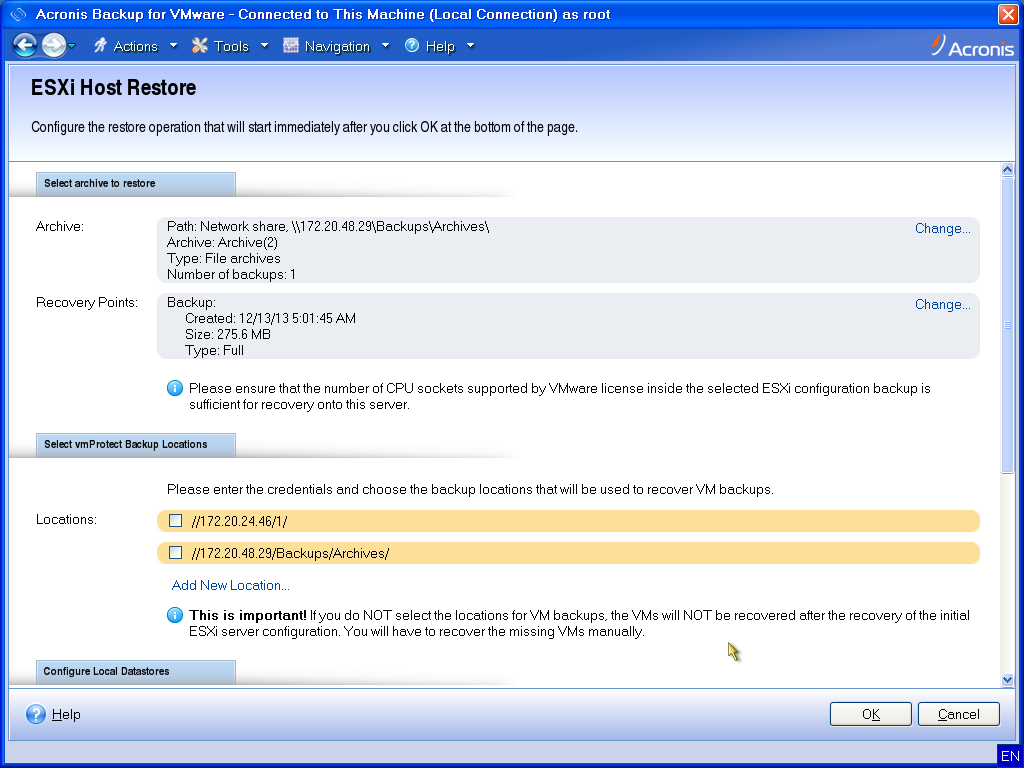
The second step is to Select Backup for VMware Backup Locations. Select the check box for the backup location and enter its credentials in the pop-up window. The locations are listed. The selected locations are colored grey and the locations that are not selected are colored yellow.
Locations are listed according to the contents of the ESXi host configuration backup archive, where the information about VMs backup locations is stored (Recent Locations paths). You can add new locations in this step. All these locations will be used to restore VMs backups after the ESXi host is up and running. Moreover, the locations can be password protected and the credentials will be required to access data after the ESXi server is recovered and Acronis Backup for VMware starts to recover the missing VMs. Only the following locations can be selected in this step:
ESXi Host Configuration Recovery
Note, if you do not select the VMs backup locations here, these VMs will not be recovered automatically after the recovery of the initial ESXi server configuration. In this case, you will have to recover the missing VMs manually.
Also note, that unpredictable issues may occur if you restore ESXi host configuration to a new machine while the original ESXi host is active and managed by a vCenter. Before doing so please remove the original ESXi host from vCenter and add it back after performing the recovery.
The third step is to Configure Local Datastores. Because the original ESXi server can become faulty or the system hard disk drive and the datastore can be lost, the destination configuration may differ from the original server.
The list shows the detected HDDs and their size. Here you can see the datastores already present on the detected HDDs. If the datastore on HDDs matches with the datastore in the original configuration (stored inside the ESXi configuration backup), its name appears in green. If the datastore is detected but does not match the original configuration, its name appears in yellow. If the detected datastore is going to be cleaned up for a new datastore creation, its name appears in red. Select the Use for new datastores check box to use the HDD for a new datastore creation.
The new datastore will be created on all the disks selected on this step overwriting any existing data on these disks. Therefore, you should carefully verify the selection.
The ESXi system partitions will be created on the disk which you check under “Restore ESXi to:” column. You can select the detected local or flash drive(s) here.
The fourth step is to Configure Virtual Network. This step is required to map the vSwitches present in the ESXi configuration backup being restored to physical NICs. You can recover the ESXi configuration backup on the same server or on different hardware. This step allows the following:
After going through all the steps, click OK to start the recovery. Here’s what happens after you proceed with the recovery: