Installing Acronis Access Advanced on your server

The following steps will allow you to perform a fresh install and test Acronis Access Advanced with HTTPS using the provided Self Signed certificate.

Note: For upgrade instructions visit the Upgrading section.

Note: For instructions on installing on a cluster visit the Installing Acronis Access on a cluster section.

The installation of Acronis Access involves three steps:

  1. Installation of the Acronis Access Server installer.
  2. Configuration of the network ports and SSL certificates used by the Acronis Access Server.
  3. Using the web-based setup wizard to configure the server for your use.

Installing Acronis Access

Please make sure you are logged in as an administrator before installing Acronis Access.

  1. Download the Acronis Access installer.
  2. Disable any anti-virus software you have or it may interrupt the installation procedure resulting in a failed installation.
  3. Double-click on the installer executable.
    Installer_Main Window
  4. Press Next to begin.
  5. Read and accept the license agreement.
  6. Press Install.

    Note: If you're deploying multiple Acronis Access servers, or you are installing a non-standard configuration, you can select which components to install from the Custom Install button.

  7. Either use the default path or select a new one for the Acronis Access main folder and press OK.
    Installer_List of components
  8. Set a password for the user Postgres and write it down. This password will be needed for database backup and recovery.
    Installer_PostgreSQL settings
  9. A window displaying all the components which will be installed appears. Press OK to continue.
  10. When the Acronis Access installer finishes, press Exit.
  11. The configuration utility will launch automatically to complete the installation.
    Installer_Configuration Utility launching

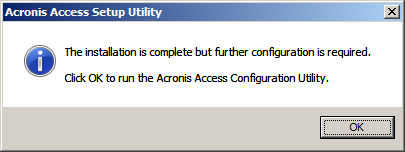
For instructions on using the Configuration utility, visit the Using the Configuration Utility page.