Upgrading multiple mobilEcho servers with Client Management
Scenario 3 - Upgrading multiple mobilEcho servers with Client Management
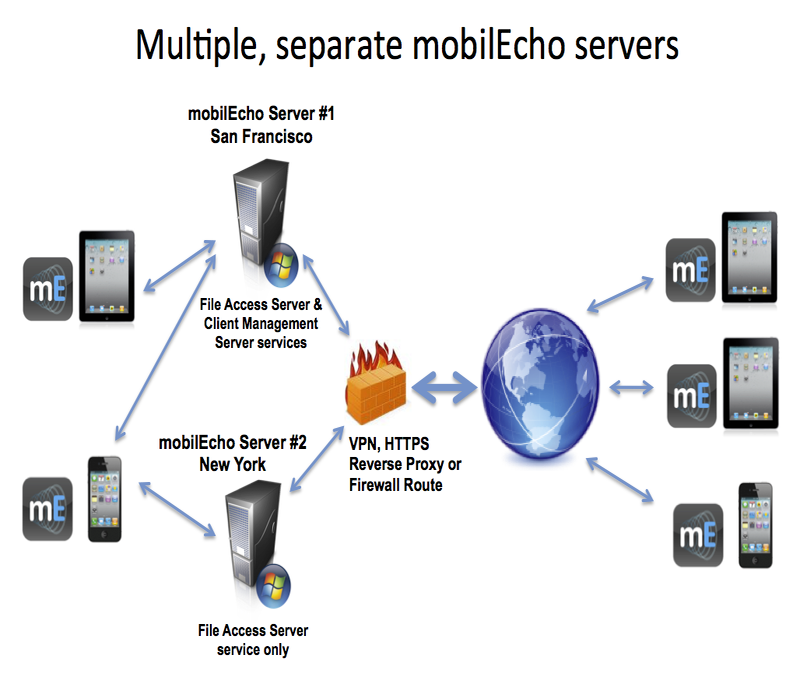
In this scenario, you have a multiple Windows servers running mobilEcho 4.5 or earlier. One server has both the required mobilEcho File Access Server service running and the optional mobilEcho Client Management Server service enabled. The other servers are just acting as mobilEcho File Access Servers.
When upgrading to Acronis Access, your mobilEcho File Access Servers will be upgraded to Acronis Access Gateway Servers. This service will continue to accept connections from mobilEcho clients and to act as the gateway to any file server, NAS or SharePoint data sources your users are accessing.
The mobilEcho Client Management Administrator web console on your server acting as your mobilEcho Client Management Server will be upgraded to an Acronis Access Server web console. After upgrade, you will no longer use the mobilEcho Administrator Windows program on each mobilEcho File Access Servers to administer those servers. This new web console will be used to administer all of your mobilEcho servers and clients from one unified web interface.
To perform an upgrade of Acronis Access:
On the Windows Server acting as your mobilEcho Client Management Server:
Follow the instructions in Scenario 2 to upgrade the Windows Server that is acting as your mobilEcho Client Management Server. This is the server that you connect to when you log into the mobilEcho Client Management Administrator web console.
Once you complete that upgrade, you will have a functional Acronis Access Server web console with the mobilEcho File Access Server (now called an Acronis Access Gateway Server) residing on that Windows server registered for administration. You will also see your additional servers listed on the Acronis Access Gateway Servers page as “Legacy” servers. In the example below, your upgraded server “BGU2008” is registered and your yet to be upgraded server “Department Server” has not yet been registered.
Next, you will upgrade each additional server that is acting as a mobilEcho File Access Server only. Please follow the steps bellow.
On every Windows Server acting as a mobilEcho File Access Server only:
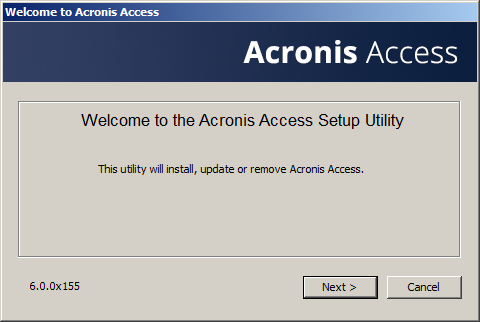
Run the Acronis Access installer on the desired server.
Press Next on the Welcome screen.
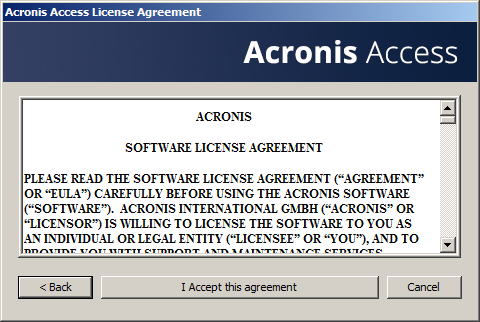
Read and accept the license agreement.
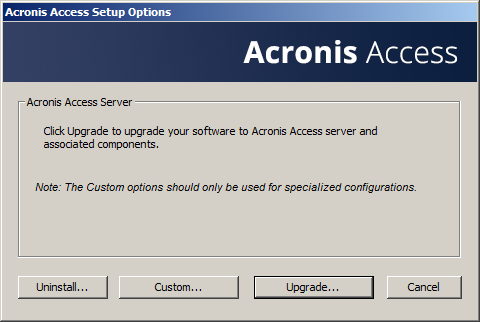
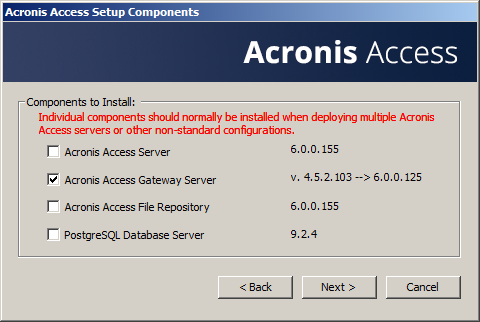
Click Custom.
Select only the Acronis Access Gateway Server component and press Next.
The rest of the installation and Configuration Utility steps follow what is outlined in the earlier scenarios, with the exception that you will not need to configure the Access Server and File Repository in the Configuration Utility.
When you complete the Configuration Utility process, there will be no additional web console configuration, as the Acronis Access Server console was not installed.
Return to the Acronis Access Server console on the first server you performed the full installation on. Open the Gateway Servers page and click the menu button for the additional Gateway Server that you just upgraded to Acronis Access, and select Register.
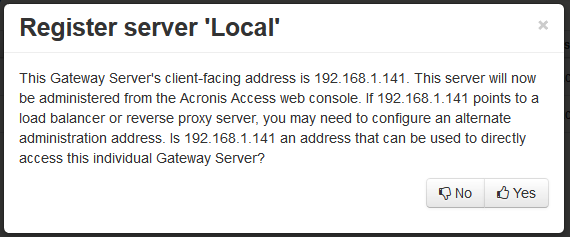
You will be asked if the existing network address for the server you are registering can be used to directly access the server. The existing address is typically the network address that your mobile device users must use to access the Gateway Server, so it’s possible this address points to a proxy server or load balancer.
Note: If this is the case, you need to select “No” at this dialog and enter an alternate network address that will be used by the Acronis Access server to gain direct network access to this Gateway Server.
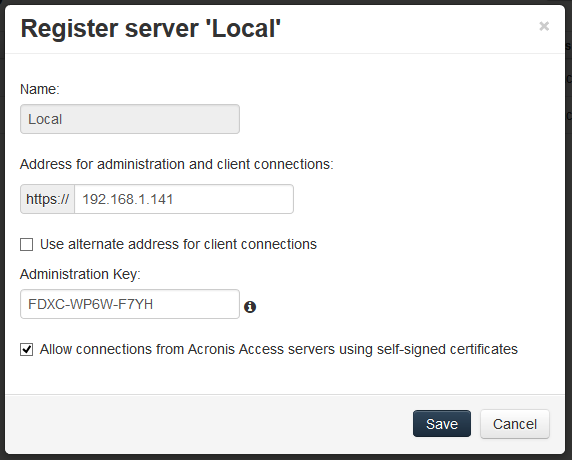
You will then be presented with the registration dialog.
Note: If your Gateway Server is using a self-signed SSL certificate, you will need to enable “Allow connections from Acronis Access servers using self-signed certificates”.
Note: You will also need to enter an Administration Key, to enable the pairing with this remote server. This is done to validate and secure the administrative relationship.
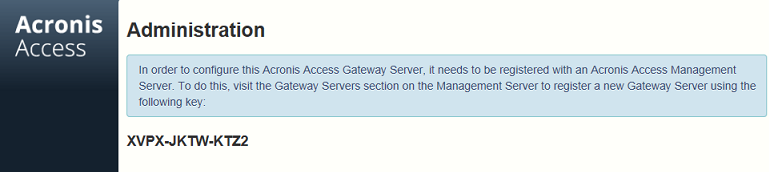
To obtain an Administration Key from this Gateway Server, open a new browser window or tab on the actual Windows Server that you are registering, and navigate to the Gateway Server’s HTTPS address. This should be the same address that is listed in the “Address for administration and client connections” field.
Note: For security purposes, this must be done from a web browser running on the actual Windows Server that the Gateway Server is running on. You will not be able to view your Administration Key from a remote web browser.
Enter the 12 digit Administration Key (including dashes) into the registration form and click Save.
Note: Once the server has been registered it will appear in the Gateway Servers list as registered and you can adjust its settings and view its details and status.
Note: When registered, the Volumes that existed on this mobilEcho Gateway Server prior to being upgraded to Acronis Access are imported into the Data Sources – Folders list. The will behave just as explained in the prior upgrade scenarios.
All management of this Gateway Server is now done from within Acronis Access Server web console. When creating new Folders on the Data Sources page, this Gateway Server will now appear in the list of Gateway Servers available to give access to the new Folder.
If you have any additional Gateway Servers to upgrade and register, please follow the same procedure as above.