Viewing and editing a project ticket
You can view, edit, and track the time and progress of any project ticket.
In each ticket, you can:
-
Log time spent on the project step.
-
Complete the project step (project steps can only be completed by setting the project ticket status to Completed).
-
Add a comment, or canned response.
-
Email updates to the customer (who is defined as the project sponsor when creating the project).
-
Change the project step status (only if the ticket has not been set as Completed).
-
Attach files.
-
Schedule the ticket (which does not change the step start or due date). This enables you to adjust the ticket schedule more precisely if, for example, you set the scheduled time to less than the project step time frame.
To update a project ticket
- In the Management Portal, go to Task management > Projects.
- In the far right column of the project you want to update a ticket for, click the ellipsis icon (...), and then select Open.
-
Click the Tickets tab.
-
In the list of project step tickets, click the ticket you want to update.
You can also access the project step ticket from the Project ticket section in the relevant project step in the project plan. -
Using the timer at the top of the project step pane, define the relevant time spent on the project step.

-
Select the Email the customer checkbox if you want to send ticket updates to the customer.
-
In the ticket's Activities tab:
-
Click the Status dropdown list to update the ticket status to one of Completed, New, Pending start, In progress, Delayed, or On hold.
Note that when a ticket is set to Completed, the associated project step is automatically set as Completed. The ticket cannot be reopened, or its status updated. However, you can log additional time to the ticket, if required.
-
In the text box, add rich text descriptions and comments, including images and other media files, up to a maximum of 25 MB (the supported formats and types are listed below under the Attach files link).
-
Click Attach files to upload files. Attachments can include any of the following formats and types (up to a maximum of 25 MB):
-
Media: .avi, .mp4, .mp3
-
Emails: .eml, .msg
-
Images: .png, .gif, .jpeg, .jpg, .heic, .bmp, .tiff, .svg
-
Document and log files: .doc, .docx, .xls, .xlsx, .ppt, .pptx, .txt, .log, .pdf
-
Archives: .zip, .rar
-
-
In the Canned response dropdown list, select the relevant canned response. The response is added to the text box.
-
Select the Schedule ticket checkbox if you want to schedule the ticket for a specific time and date. The time frame you set for the schedule does not affect the hours planned for the step, and is used to block some time on your calendar. You can view scheduled tickets in the Scheduler tab, which is accessed from the Service desk module.
-
In the lower section of the tab, you can view recent actions performed on the ticket. Click the arrow icon alongside each action to edit some of the fields, such as the time spent on the ticket, or add additional comments.
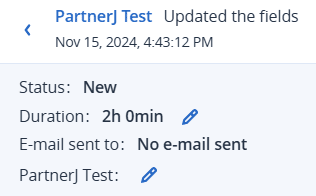
If the Duration field is updated, the Hours spent field is also recalculated.
-
-
In the ticket's Overview tab:
-
If you want to update the ticket details, click Edit project step. You can also access links to the project and the project step in the Project information section.
-
In the Attachments section, upload any files you want to add to the ticket.
-
-
Click Save changes.
Any updates to the ticket, such as additional logged time, is added to the project. The progress-related metrics are re-calculated to take into account the updated ticket.
Time logged on the ticket is also shown in the Time registration tab, accessed from the Service desk module. For more information, see Time entries.