Allocating licenses to a management server
To use a license, you must allocate its quota or part of its quota to a management server.
You can allocate more than one license to a management server. Also, you can split the license quota and allocate different parts of the quota to different management servers.
If there is only one management server in your Acronis account, all your licenses are automatically allocated to this server. To learn how to reallocate licenses to another management server, see Transferring license quota to another management server.
If you have more than one management server in your Acronis account, you can view the new licenses in the cloud console (https://cloud.acronis.com), under Available licenses. You must allocate these licenses manually.
All operations with licenses are automatically synced to the online management servers. To sync an allocation change to an offline management server, create a new activation file, and then repeat the allocation procedure. To learn more about the different management servers, see Types of management servers.
To allocate licenses to a management server
Online management server
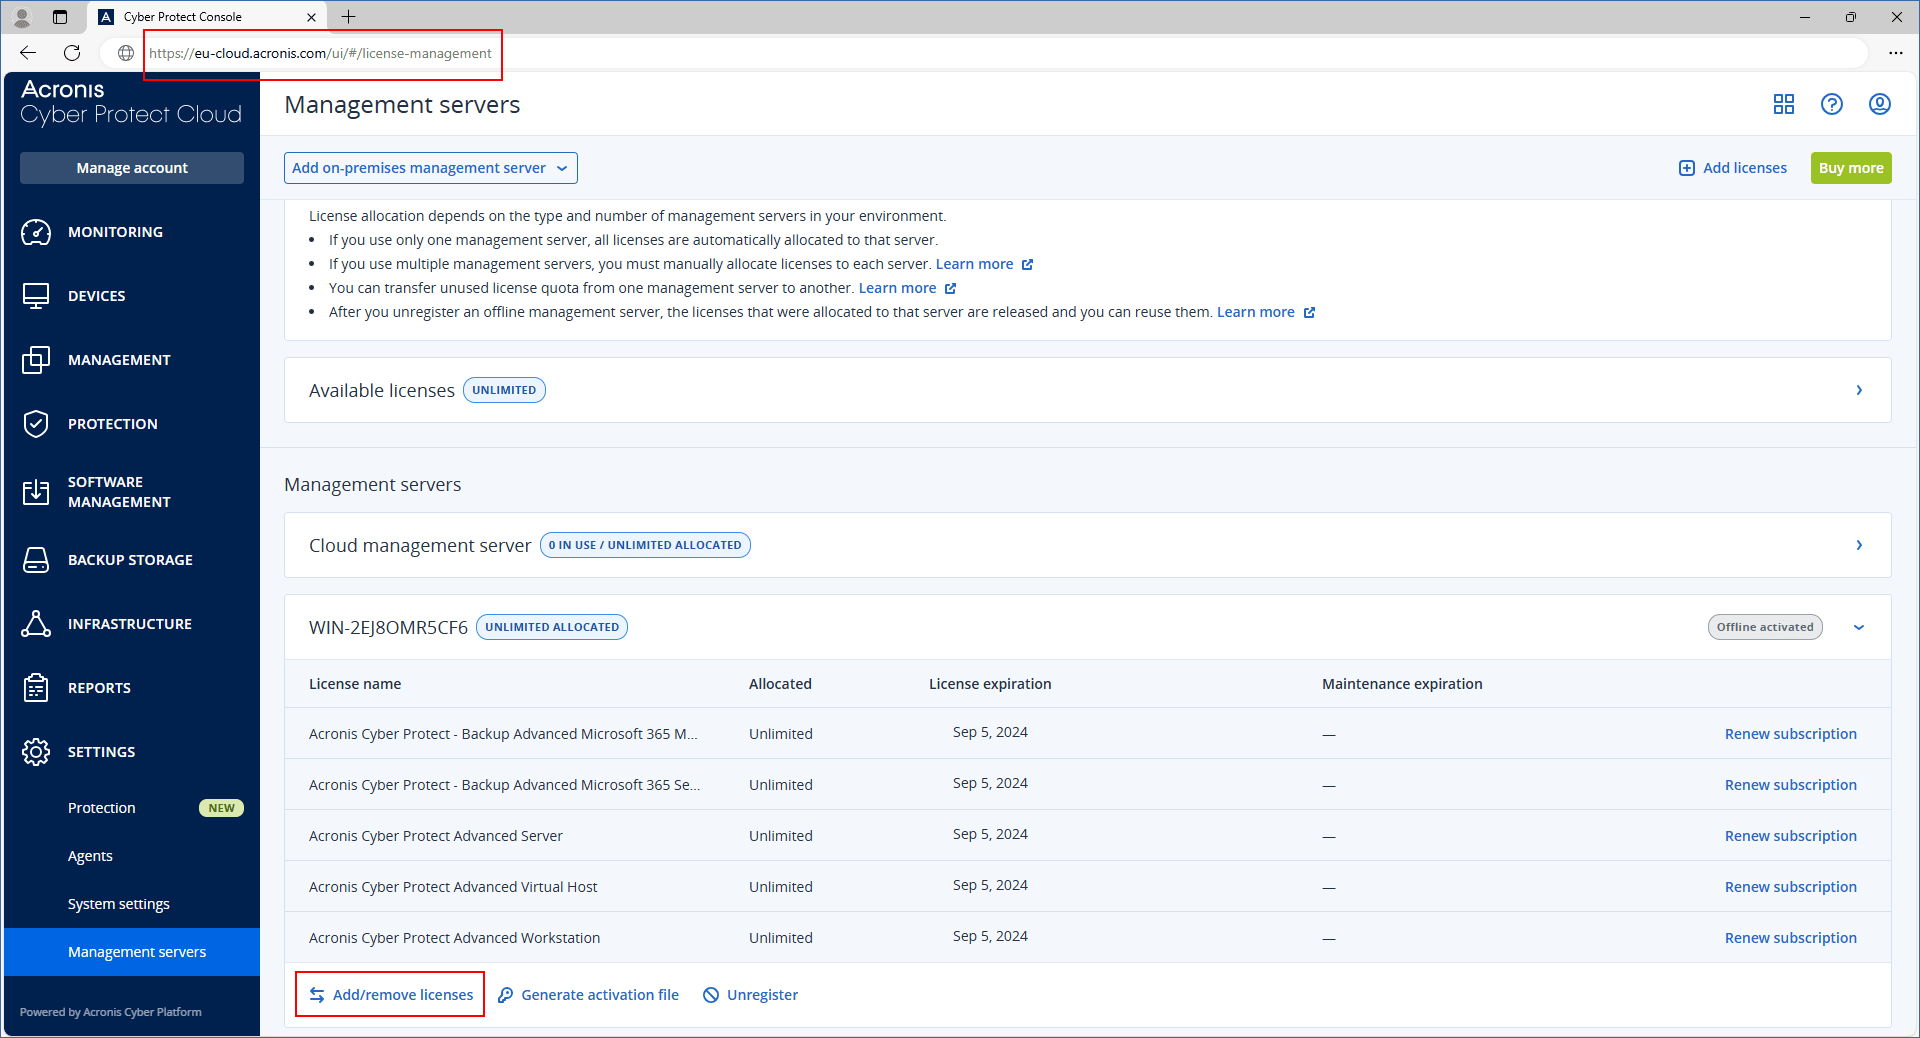
- In the cloud console (https://cloud.acronis.com), click Settings > Management servers.
- Go to the management server to which you want to allocate a license.
- Click Add/remove licenses.
- In the dialog that opens, specify the license and the license quota that you want to allocate to this server.
- Click Confirm.
As a result, the licensing information is automatically synced to the management server and you can use the allocated license to protect your workloads.
To modify the allocation, repeat the allocation procedure.
If the modified license quota is smaller than the number of protection agents, the least-loaded agents will stop working. This selection is automatic. If it does not fit your needs, reassign the available licenses manually.
Offline management server
For this operation, you must use both the cloud and the local consoles.
To access the cloud console, you need a second machine that is connected to the Internet.
- On the machine that is connected to the Internet, log in to the cloud console (https://cloud.acronis.com), and then go to Settings > Management servers.
- Go to the management server to which you want to allocate a license.
-
Click Add/remove licenses.
- In the dialog that opens, specify the license and the license quota that you want to allocate to this server.
- Click Confirm.
-
In the Allocate licenses to an offline management server dialog, click Download file.
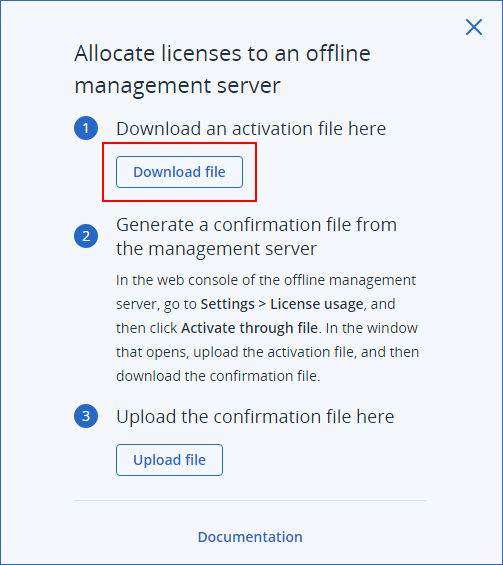
The activation file is downloaded to your machine.
- Copy the downloaded activation file to a drive that you can use on the offline management server. For example, you can use a USB flash drive.
-
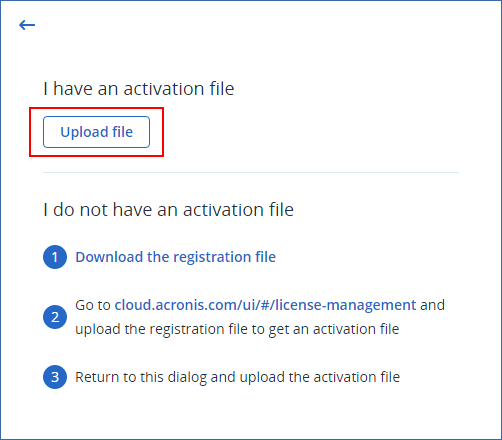
In the local console of the offline management server (https://<IP>:<port>), go to Settings > License usage, and then click Activate through file.
IP is the address of your management server, and port is the port on which the Cyber Protect console is available. By default, this port is 9877.
-
In the dialog that opens, under I have an activation file, click Upload file, and then select the activation file that you downloaded from the cloud console.
As a result, the licensing information is synced between your Acronis account and the offline management server.
To increase the allocated license quota, repeat the allocation procedure.
To decrease the allocated license quota, see Decreasing the license quota of an offline management server.