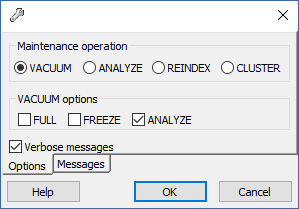
Warning! If your database is very large, the vacuum can take some time. This process should be run during periods of low load on the server.
The upgrade procedure from a previous version of Files Advanced is a simplified process and requires almost no configuration.
Note: If you are upgrading from a version of Acronis Access earlier than 7.0, please contact Acronis support at http://www.acronis.com/mobilitysupport/
Note: Before upgrading, please review the Minimum Hardware Requirements.
Note: Depending on your deployment, some of the paths used in this article might not be the same as yours. Upgrades from previous versions of Files Advanced and custom installations can affect the folder structures of your deployment.
Backup the vital components
The Apache Tomcat folder
On upgrade the Apache Tomcat may be upgraded and all of the current Tomcat configuration files and log files will be removed. We recommend you make a copy of the Apache Tomcat folder, which by default is found here: C:\Program Files (x86)\Acronis\Files Advanced\Common\.
We recommend that you backup the web.xml file before updating. Your web.xml file will be overwritten on upgrade. On versions 7.1.2 and newer, you can find a backup at C:\Program Files (x86)\Acronis\Files Advanced\Access Server\Web Application\WEB-INF\<timestamp>.previous.web.xml. If you have made any specific changes that you wish to retain (excluding Single Sign On, those changes are preserved) , you will have to manually copy and paste your changes from the old file.
Purge unnecessary audit logs
If you have not setup automatic log purging, your server may have a lot of logs which may slow-down the backup process. We recommend exporting and purging the older logs before proceeding with the database backup.
The PostgreSQL database
The following method creates an *.sql file containing a text representation of the source database.
Note: acronisaccess_production must be entered exactly as shown as it is the name of the Files Advanced database
Note: Typing the password will not result in any visual changes in the Command Prompt window.
Note: If you want to backup the entire PostgreSQL database set you can use the following command:
pg_dumpall -U postgres > alldbs.sql
Where alldbs.sql will be the generated backup file. It can include a full path specification, for instance D:\Backups\alldbs.sql
For full syntax on this command see: http://www.postgresql.org/docs/9.2/static/app-pg-dumpall.html
Info: For more information on PostgreSQL backup procedures and command syntax please read this: http://www.postgresql.org/docs/9.2/static/backup.html
The Gateway Server(s) database(s)
Note: The default location is: C:\Program Files (x86)\Acronis\Files Advanced\Gateway Server\database
The Files Advanced configuration file
Note: The default location is: C:\Program Files (x86)\Acronis\Files Advanced\Access Server
Vacuum the database before upgrading
Warning! If your database is very large, the vacuum can take some time. This process should be run during periods of low load on the server.
Upgrade
Read and accept the license agreement.