Configuring the virtual appliance
After deploying the virtual appliance, you must configure it so that it can access vCenter Server or the ESXi host and the Cyber Protection service.
To configure the virtual appliance
- In the vSphere Client, open the console of the virtual appliance.
-
Ensure that the network connection is configured.
The connection is configured automatically via Dynamic Host Configuration Protocol (DHCP).
To change the default configuration, under Agent options, in the eth0 field, click Change, and then specify the network settings.
-
Connect the virtual appliance to vCenter Server or the ESXi host.
- Under Agent options, in the vCenter/ESX(i) field, click Change, and then specify the following.
- [If you use vCenter Server] The vCenter Server name or IP address.
[If you do not use vCenter Server] The name or IP address of the ESXi host on which you want to back up and recover virtual machines. For faster backups, deploy the virtual appliance on the same host.
The credentials required for the appliance to connect to vCenter Server or the ESXi host.
We recommend that you use a dedicated account for accessing vCenter Server or the ESXi host, instead of using an existing account with the Administrator role. For more information, see Required privileges for Agent for VMware.
-
Click Check connection to verify that the settings are correct.
-
Click OK.
- Under Agent options, in the vCenter/ESX(i) field, click Change, and then specify the following.
-
Register the appliance in the Cyber Protection service by using one of the following methods.
-
Register the appliance in its graphical interface.
- Under Agent options, in the Management Server field, click Change.
-
In the Server name/IP field, select Cloud.
The Cyber Protect service address appears. Do not change this address unless instructed otherwise.
- In the User name and Password fields, specify the credentials for your Cyber Protect account. The virtual appliance and the virtual machines that the appliance manages are registered under this account.
- [Only if two-factor authentication is enabled] Enter the TOTP code from your authenticator app, and then click OK.
- Click OK.
-
Register the appliance in the command-line interface.
With this method, you need a registration token. For more information about how to generate one, see Generating a registration token.
- Press CTRL+SHIFT+F2 to open the command-line interface.
-
Run the following command:
register_agent -o register -t cloud -a <service address> --token <registration token>
When you use a registration token, you must specify the exact data center address. This is the URL that you see after you log in to the Cyber Protect console. For example,
https://eu2-cloud.company.com.
Do not usehttps://cloud.company.comhere. - To return to the graphical interface of the appliance, press ALT+F1.
-
-
Add local storage.
-
In the vSphere Client, attach a virtual disk to the virtual appliance. The virtual disk must have at least 10 GB of free space.
-
In the graphical user interface of the appliance, click Refresh.
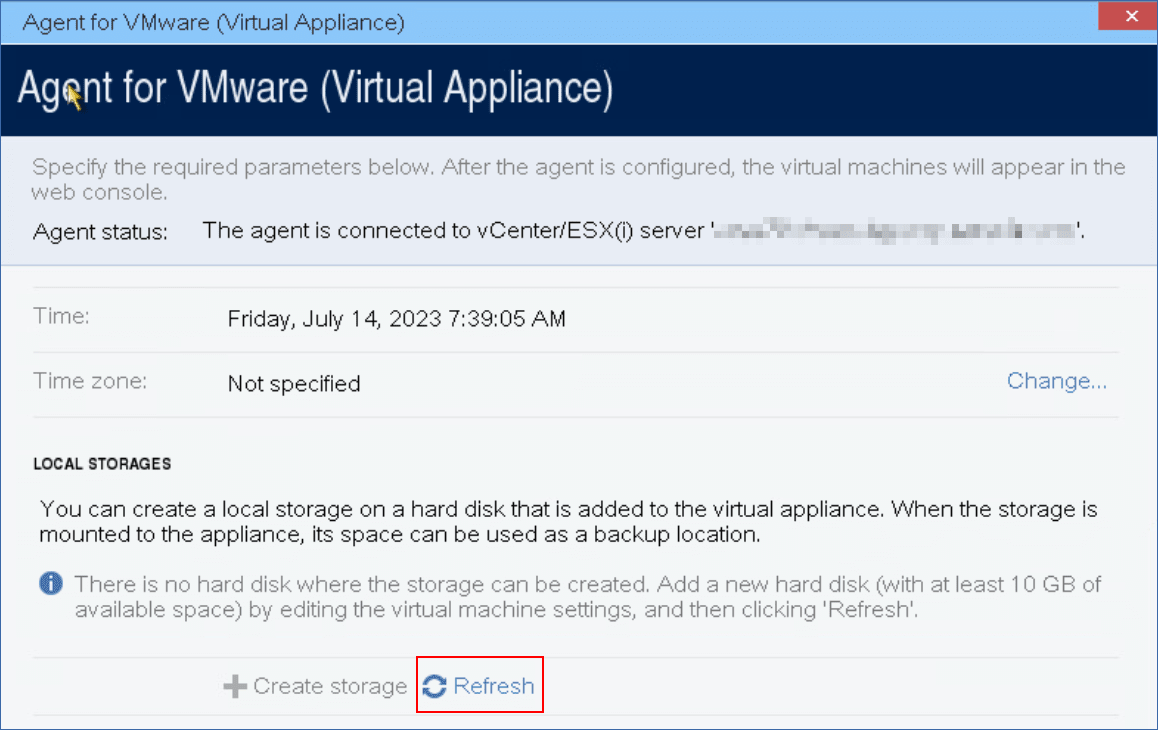
The Create storage button becomes active.
-
Click Create storage.
-
Specify a label for the storage, and then click OK.
-
Confirm your choice by clicking Yes.
-
-
[If a proxy server is enabled in your network] Configure the proxy server.
- Press CTRL+SHIFT+F2 to open the command-line interface.
- Open the file /etc/Acronis/Global.config in a text editor.
- Do one of the following:
- If the proxy settings were specified during the agent installation, find the following section:
<key name="HttpProxy">
    <value name="Enabled" type="Tdword">"1"</value>
    <value name="Host" type="TString">"ADDRESS"</value>
    <value name="Port" type="Tdword">"PORT"</value>
    <value name="Login" type="TString">"LOGIN"</value>
    <value name="Password" type="TString">"PASSWORD"</value>
</key> - Otherwise, copy the above lines and paste them into the file between the
<registry name="Global">...</registry>tags.
- If the proxy settings were specified during the agent installation, find the following section:
- Replace ADDRESS with the new proxy server host name/IP address, and PORT with the decimal value of the port number.
- If your proxy server requires authentication, replace LOGIN and PASSWORD with the proxy server credentials. Otherwise, delete these lines from the file.
- Save the file.
- Open the file /opt/acronis/etc/aakore.yaml in a text editor.
-
Locate the env section or create it and add the following lines:
env:
    http-proxy: proxy_login:proxy_password@proxy_address:port
https-proxy: proxy_login:proxy_password@proxy_address:port - Replace proxy_login and proxy_password with the proxy server credentials, and proxy_address:port with the address and port number of the proxy server.
- Run the
rebootcommand.
To be able to update a virtual appliance deployed behind a proxy, edit the appliance config.yaml file ( /opt/acronis/etc/va-updater/config.yaml), by adding the following line to the bottom of that file, and then entering values specific to your environment:
httpProxy: http://<proxy_login>:<proxy_password>@<proxy_address>:<port>
For example:
httpProxy: http://mylogin:mypassword@192.168.2.300:8080