Add or remove a process, file or network in the protection plan blocklist or allowlist
As part of your prevention response to an attack, you can add a node to your protection plan allowlist or blocklist.
You can add a node to an allowlist if you consider the node safe and want to prevent any future detections for it. Add a node to a blocklist to stop the node from running in the future.
You can also remove a node from the allowlist or blocklist to allow or prevent any future access to the node.
This option is available for the following cyber kill chain nodes:
- Process
- File
- Network
To add or remove a process, file or network in the protection plan blocklist
- In the cyber kill chain, click the process, file, or network node you want to remediate.
- In the displayed sidebar, click the Response Actions tab.
-
In the Prevent section, click the arrow icon next to Blocklist.
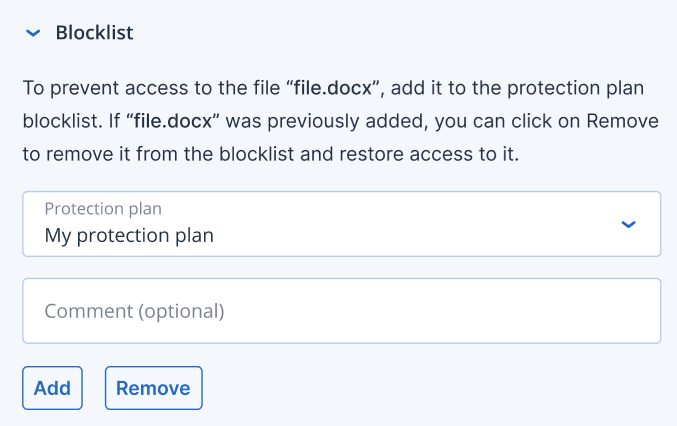
- Select the relevant protection plan(s) you want to apply this action to.
- [Optional] Add a comment. This comment is visible in the Activities tab (for a single node or the entire incident), and can help you (or your colleagues) recall why you took the action when you revisit the incident.
-
Click Add.
The action is implemented, and the process, file, or network will be prevented from launching in the future.
Alternatively, if the process, file, or network was previously added to the blocklist and you now want to remove it from the blocklist, click Remove. This will allow future access to the node.
The add or remove action can also be viewed in the Activities tabs of both the individual node and the entire incident. For more information, see Understand the actions taken to mitigate an incident.
To add or remove a process, file or network in the protection plan allowlist
- In the cyber kill chain, click the process, file, or network node you want to remediate.
- In the displayed sidebar, click the Response Actions tab.
-
In the Prevent section, click the arrow icon next to Allowlist.
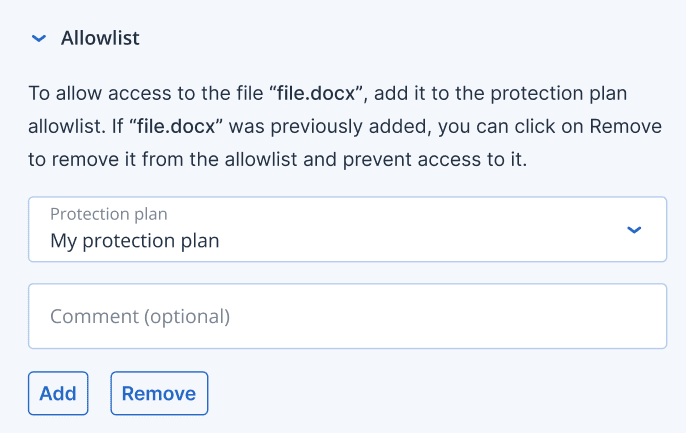
- Select the relevant protection plan(s) you want to apply this action to.
- [Optional] Add a comment. This comment is visible in the Activities tab (for a single node or the entire incident), and can help you (or your colleagues) recall why you took the action when you revisit the incident.
-
Click Add.
The action is implemented and the process, file, or network will be prevented from detection in the future.
Alternatively, if the process, file, or network was previously added to the allowlist and you now want to remove it from the allowlist, click Remove. This will prevent any future access to the node.
The add or remove action can also be viewed in the Activities tabs of both the individual node and the entire incident. For more information, see Understand the actions taken to mitigate an incident.