Configuring an automated Endpoint Detection and Response (EDR) workflow
You can configure any of the predefined EDR workflows according to your requirements.
To configure an EDR workflow
- In the Cyber Protect console, go to Management > Workflows.
-
In the far right column, click the ellipsis icon (...) in the row of the workflow you want to configure, and then select Open.
Alternatively, click on the relevant workflow, and in the displayed pane, click Open.
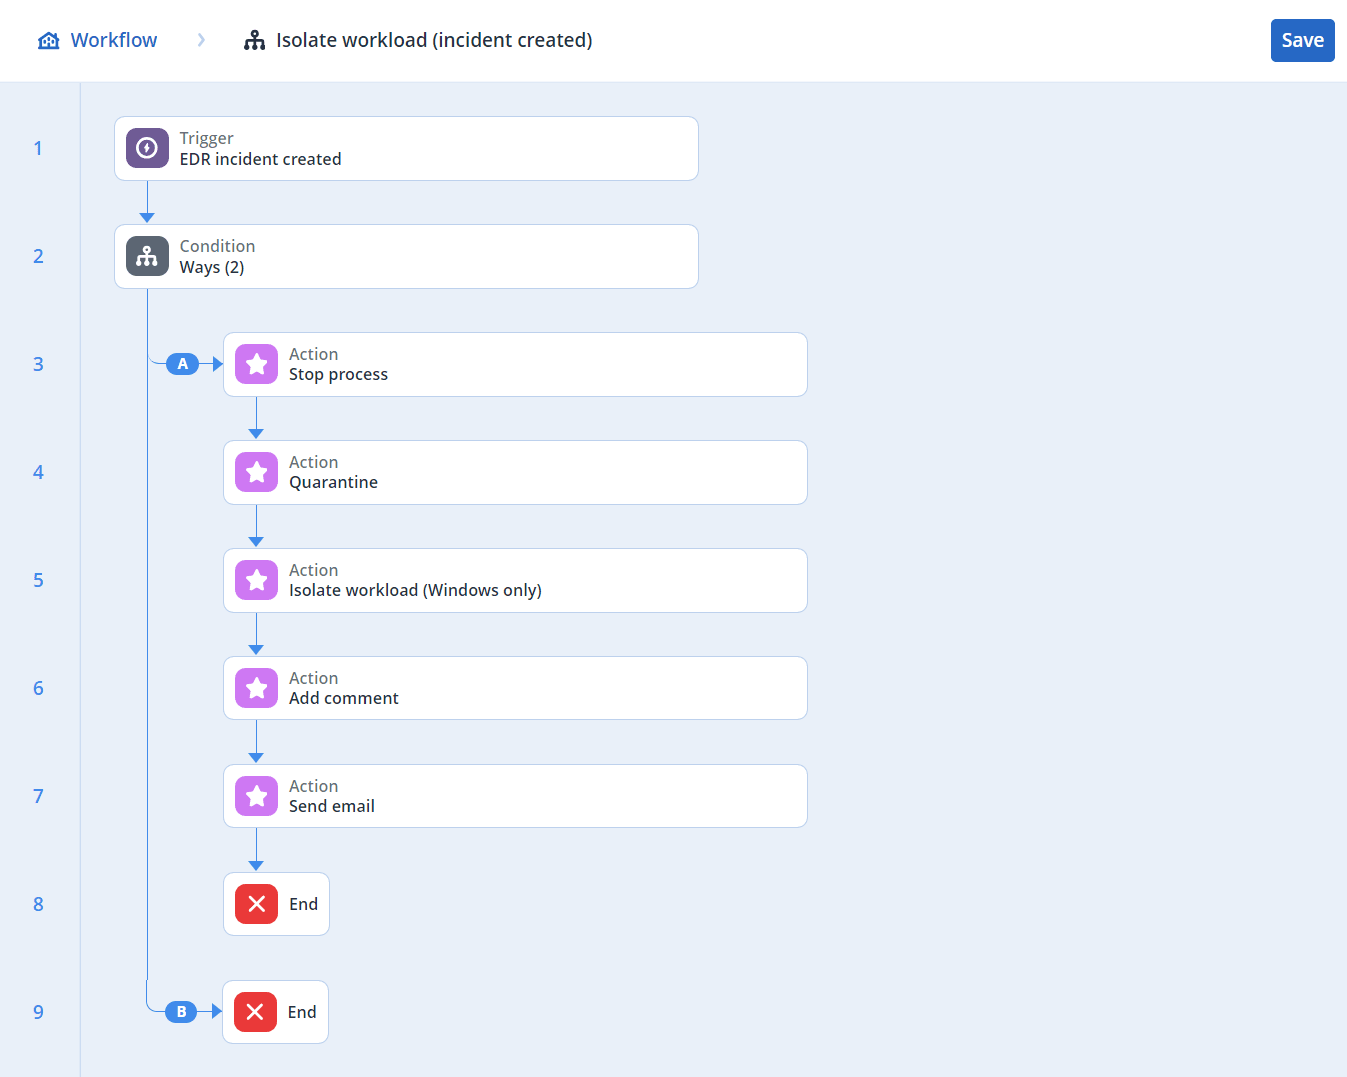
The workflow's conditions and actions are displayed.
-
To view and modify any of the workflow's conditions, click the Condition block.
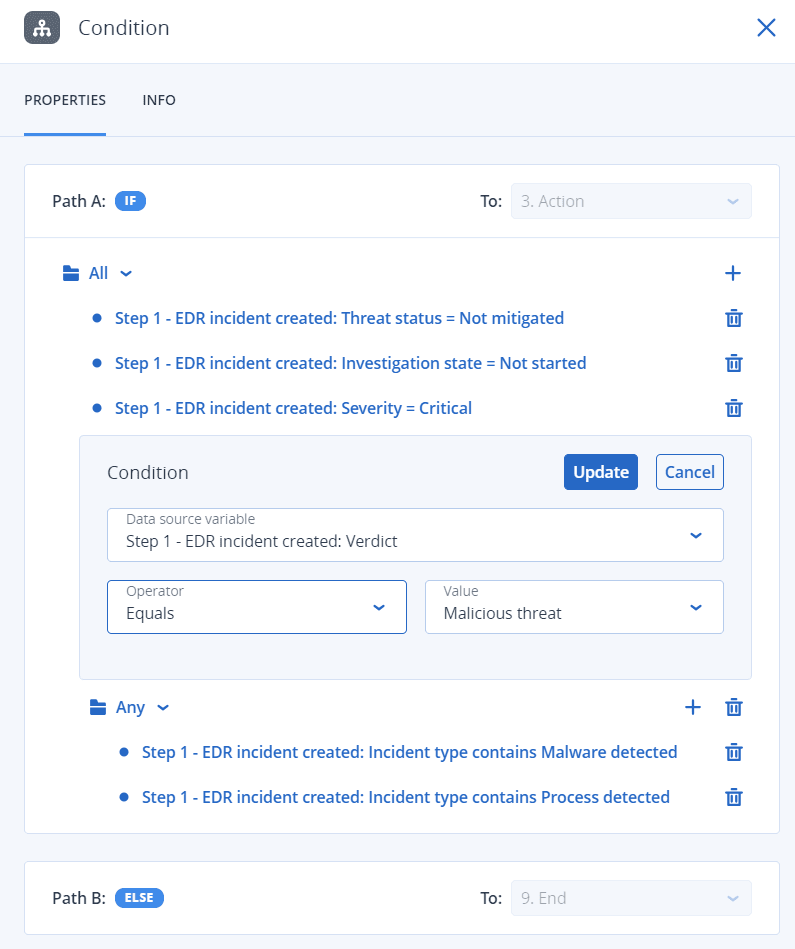
The condition block defines a set of conditions that must be executed as part of the workflow, and consists of two block types:
-
All: All of the conditions in this block should be met to proceed with the next step of the workflow.
-
Any: At least one of the conditions in this block must be met to proceed with the next step of the workflow.
-
-
To modify a condition, click the condition and modify the relevant values. When done, click Update.
Note that you can also delete a condition, by clicking the trash can icon next to it.
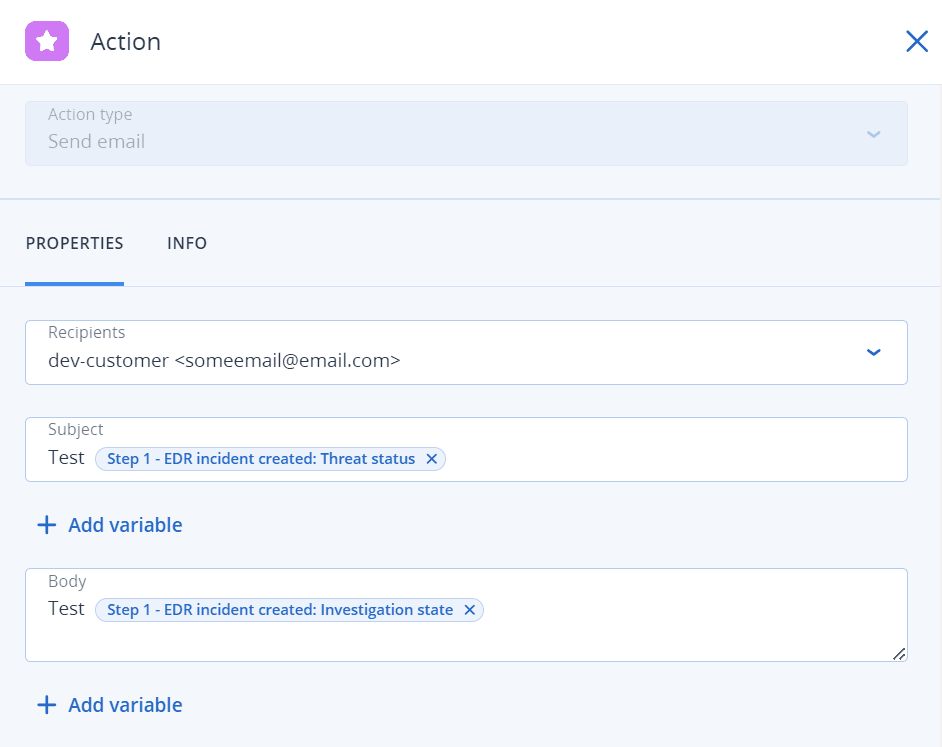
- To modify an action, click the action you want to modify.
-
In the displayed pane, make the relevant changes.
For example, click the action Send email, and then modify the selected recipients, body, and subject of the email that is sent as part of this workflow.
-
Modify the additional actions.
-
Click Save.
If the workflow was not previously enabled and in Draft state, click Save and enable to enable it. Alternatively, click Save to leave the workflow Disabled.
Note that you can enable and disable a workflow from the main workflow screen by clicking on the relevant workflow and selecting Enable or Disable, as required.