Notarized backup
By using Blockchain technology, Acronis True Image can protect your files from unauthorized modification. This gives you a guarantee that you can recover your data from the same file that was backed up. We recommend that you use this type of backup to protect your legal document files or any other files that require proved authenticity. See Using Blockchain technology for details.
To create a notarized backup of your files and folders
- Open Acronis True Image.
-
Perform one of the following:
- If this is your first backup, skip this step.
-
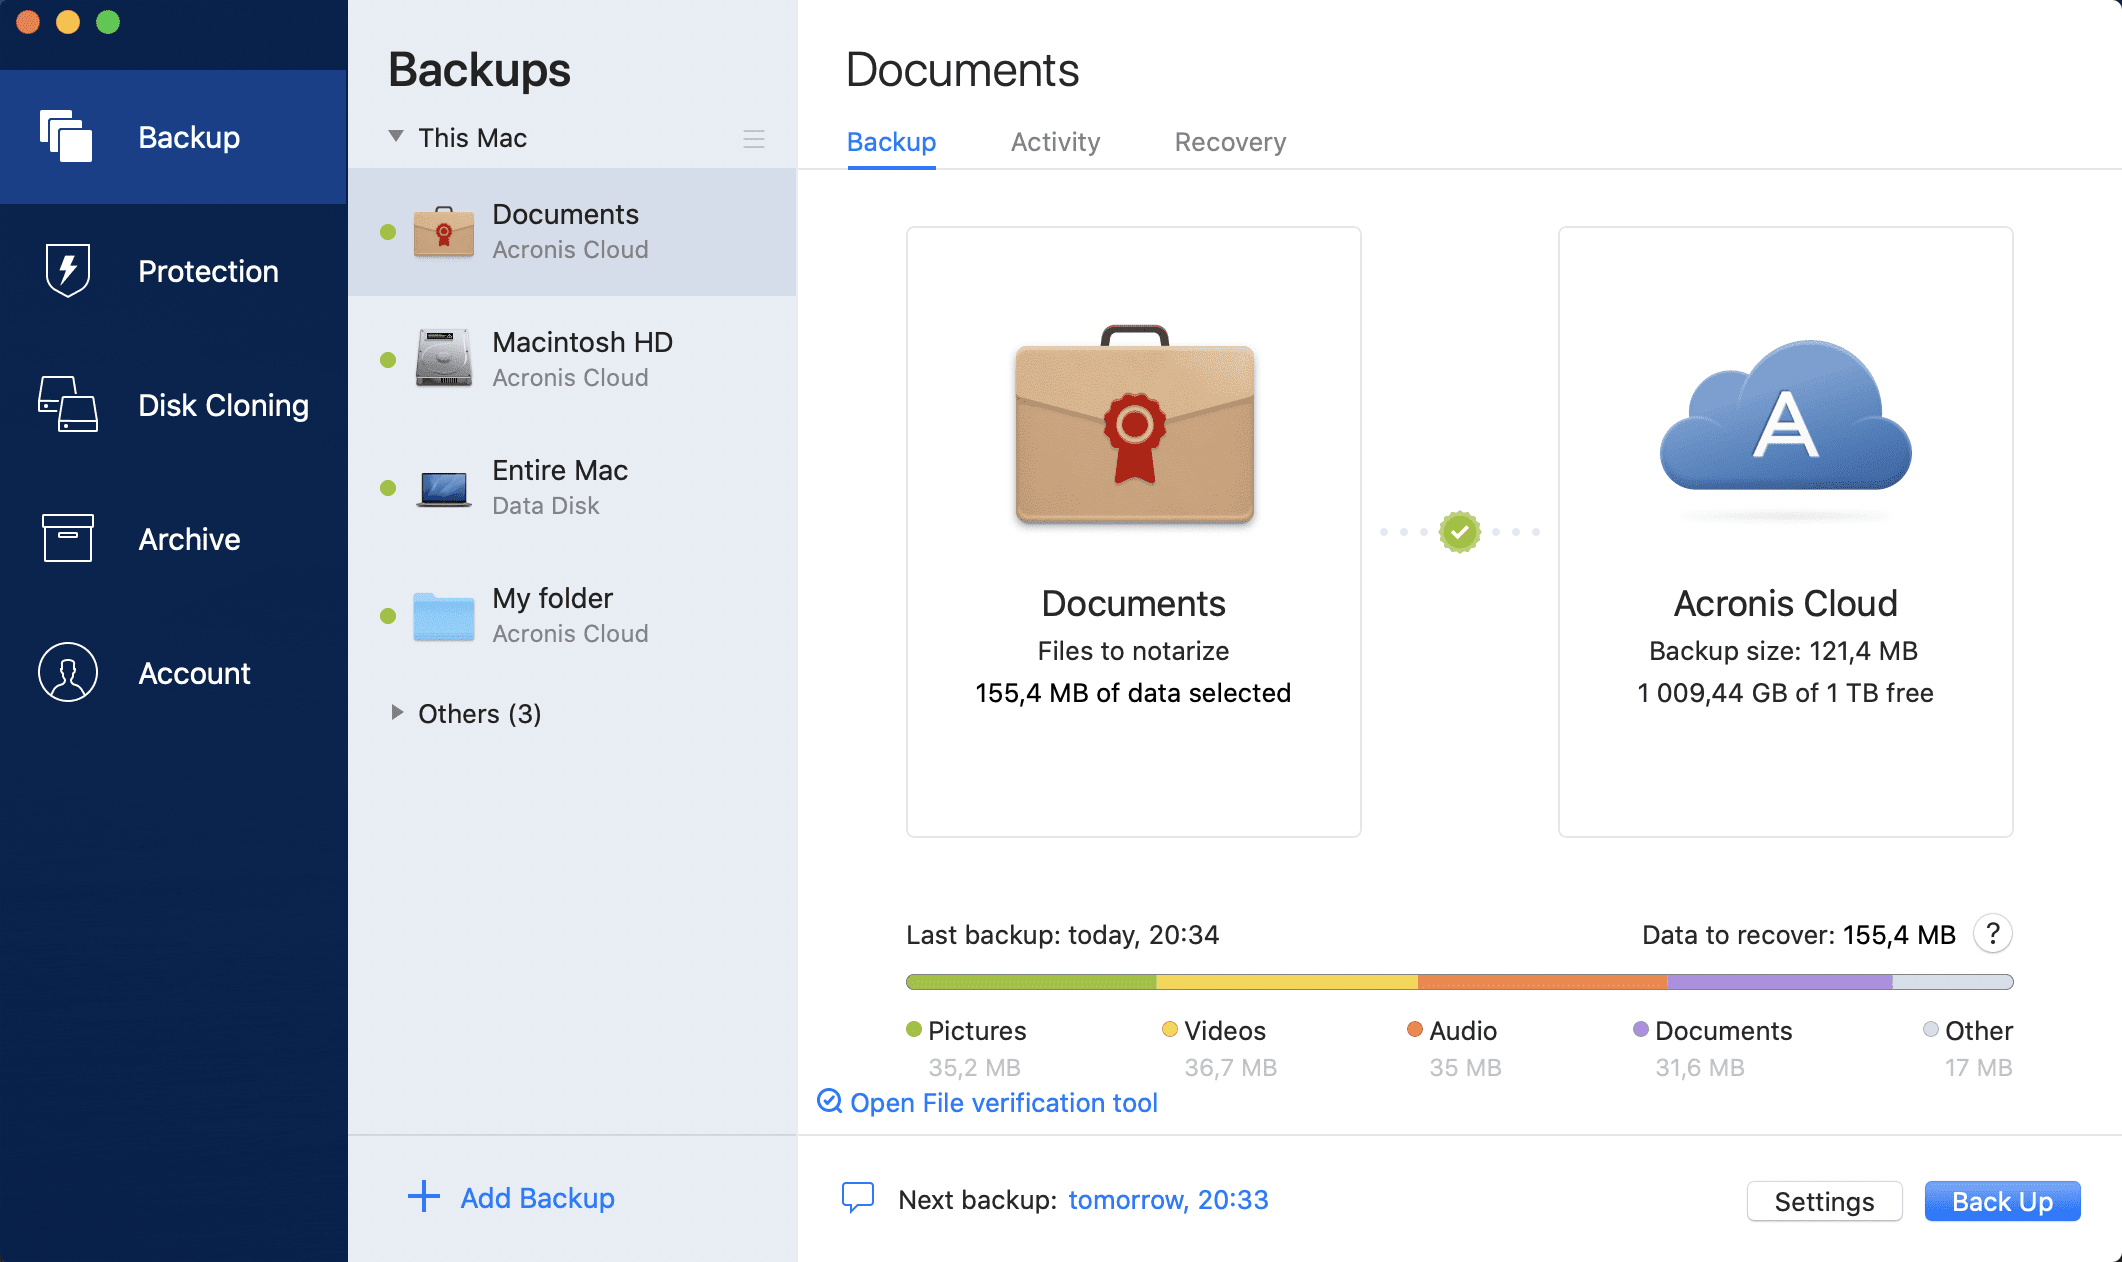
If you already have a backup and you want to create a new one, click Add Backup at the bottom of the backup list.
To delete a backup, right-click it, and then click Delete. The backup will be removed from the list, and the backup files will be deleted from the backup storage.
-
Click the backup source icon, click Files to notarize, and then select the files and folders that you want to back up.
-
Click the backup destination icon, select where you want to save the backup file to, and then click OK. If the location is not listed, click Browse, and then select a location.
If you have an NAS device, it will be automatically detected and listed along with other locations.
-
[Optional step] Configure additional settings. You can:
-
Exclude files and folders manually at Settings → Exclusions. See Excluding items from backups for details.
To exclude files with a digital signature from the backup, select the Do not notarize digitally signed files check box. See Excluding items from backups for details.
- Configure the backup schedule at Settings → Schedule. See Scheduling for details.
- Protect your backup with a password and encryption at Settings → Encryption. See Backup encryption for details.
- Select a preferred data center and configure the upload speed at Settings → Network. See Network settings for backup for details.
-
- After you have configured all settings and you are ready to start a backup, click Back Up.