Note This functionality is available only with the Acronis Backup Advanced license.
A report can include any set of the dashboard widgets. You can use predefined reports or create a custom report.
The reports can be sent via email or downloaded on a schedule. To send the reports via email, ensure that the Email server settings are configured.
If you want to process a report by using third-party software, schedule saving the report in the .xlsx format to a specific folder.
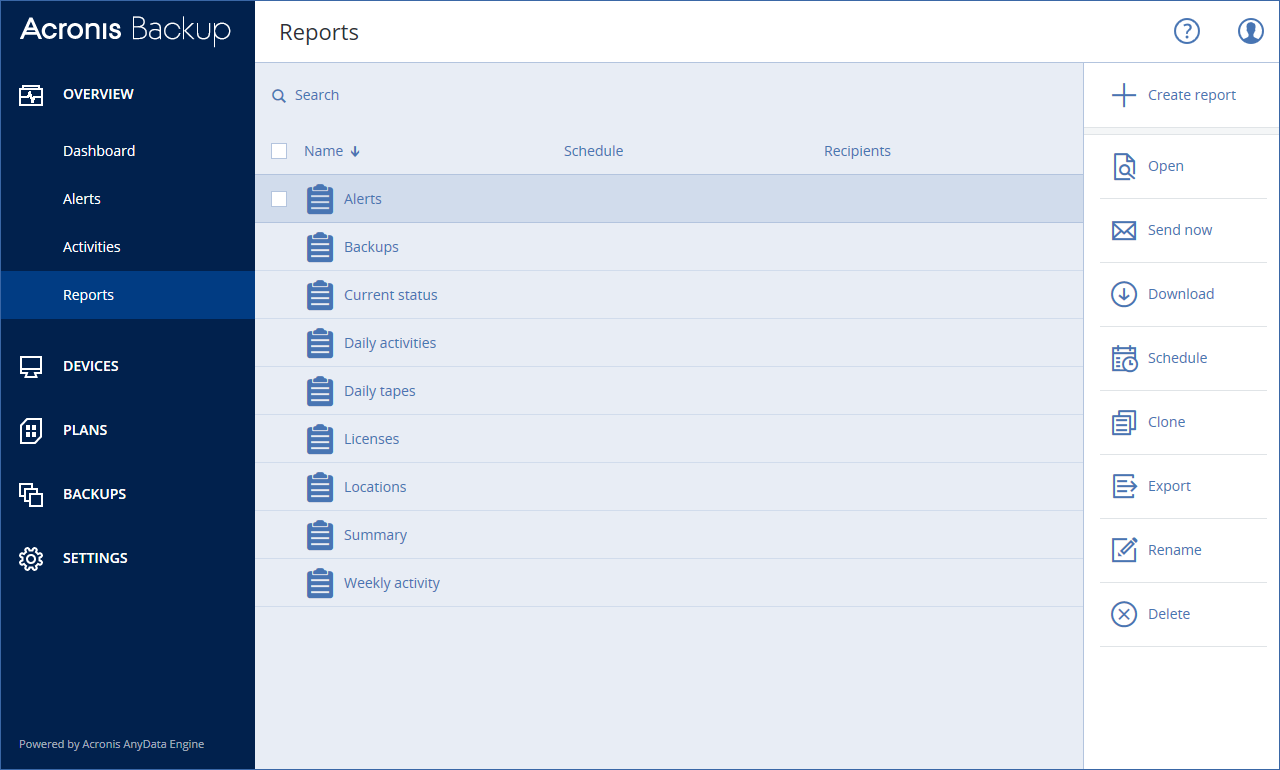
Basic operations with reports
Click Overview > Reports, select a report, and then do one of the following:
Scheduling a report
Exporting and importing the report structure
You can export and import the report structure (the set of widgets and the schedule settings) to a .json file. This may be useful in case of the management server re-installation or for copying the report structure to a different management server.
To export the report structure, select a report, and then click Export.
To import the report structure, click Create report, and then click Import.
Dumping the report data
You can save a dump of the report data to a .csv file. The dump includes all of the report data (without filtering) for a custom time range.
The software generates the data dump on the fly. If you specify a long period of time, this action may take a long time.
To dump the report data