Generating a NinjaOne Client App ID
To generate a NinjaOne Client App ID
-
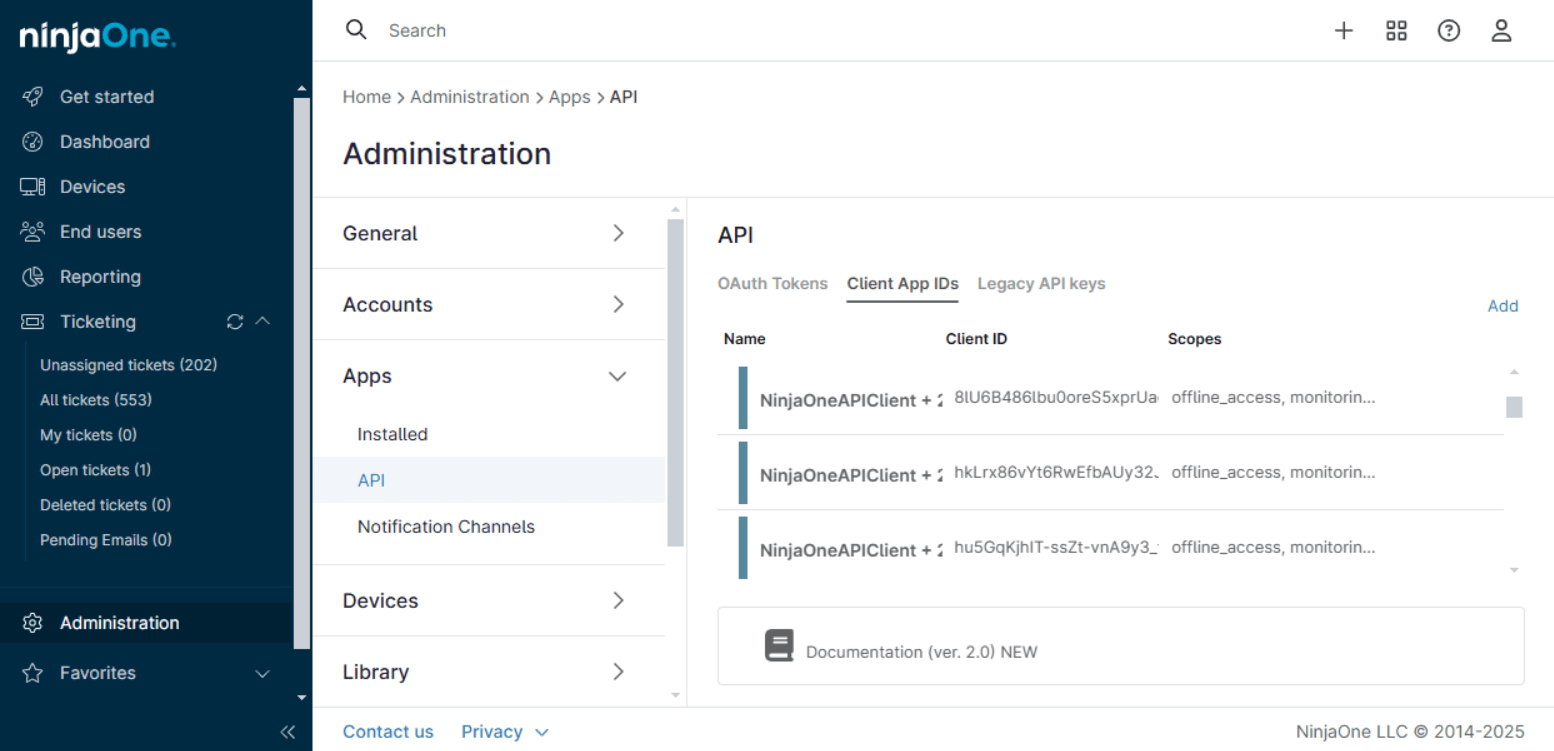
Log in to NinjaOne.
-
Select Administration > Apps > API.
-
Select the Client App IDs tab.
-
Click Add.
-
Select Single Page (Angular, React, Vue, etc.) from the Application platform dropdown list.
-
Enter a Name for the client application. For example, Acronis application.
-
In Redirect URIs, provide the redirect address https://<acronis_url>/api/integration_management/v1/oauth2/code/ninja, where <acronis_url> is your Acronis Cyber Protect Cloud console URL.
An example of a valid redirect url for the Acronis US5 datacenter is:
https://us5.acronis.cloud/api/integration_management/v1/oauth2/code/ninja
-
In Scopes, enable Monitoring, Management, and Control.
-
Select the Authorization Code checkbox in the Allowed Grant Types field.
-
Click Save.
-
Verify your MFA and click Continue.
-
Enable Refresh token and click Save.
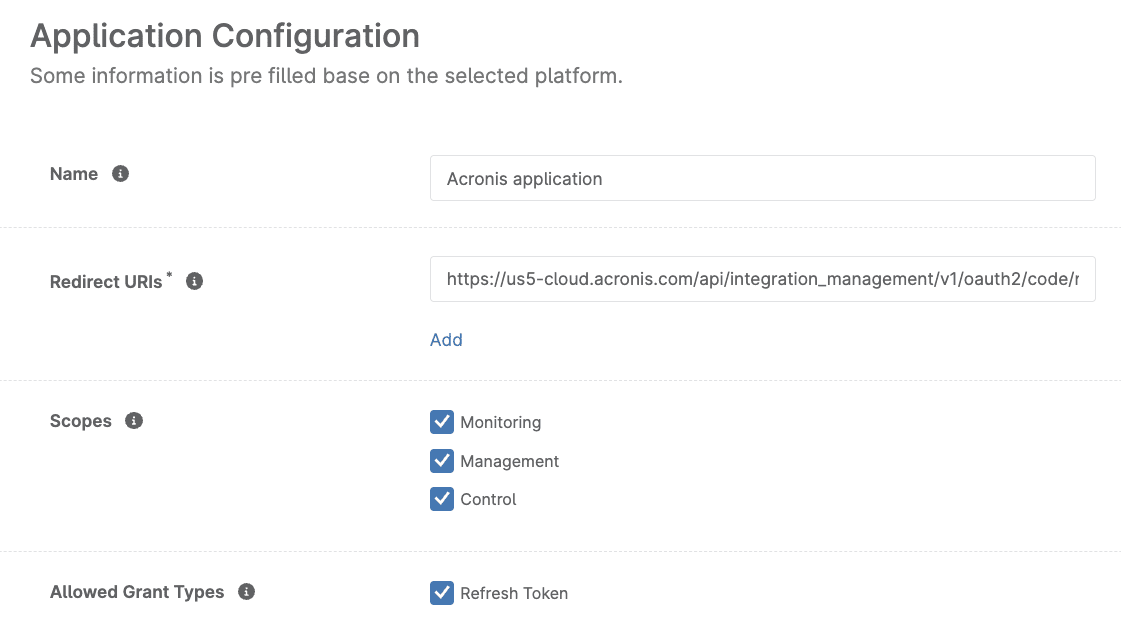 If this option is not available to configure in the Application configuration form, save it, find it in the list and click Edit. Then enable Refresh token and save again.
-
Copy Client ID for the client app and note it down somewhere safe.
You need this value to activate the integration.