Scenario 1 - Upgrading a single mobilEcho server without Client Management configured
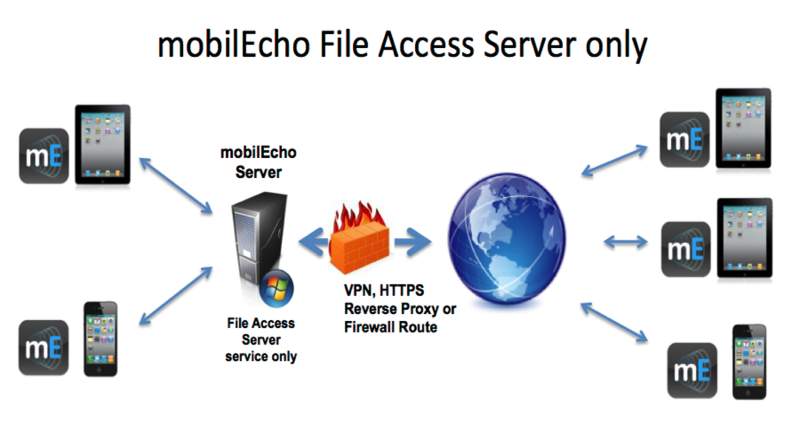
In this scenario, you have a single Windows Server running just the mobilEcho File Access Server service. With this architecture, you have not enabled the optional mobilEcho Client Management Administrator web console and are not using mobilEcho’s policy and remote management features. When your users set up mobilEcho, they manually enter their server name, username, and password into the mobilEcho app.
When upgrading to Acronis Access, your mobilEcho File Access Server is upgraded to an Acronis Access Gateway Server. This service will continue to accept connections from mobilEcho clients and to act as the gateway to any file server, NAS or SharePoint data sources your users are accessing.
The upgrade will also install the Acronis Access Server web console. This new console replaces the mobilEcho Administrator Windows program previously used to administer your mobilEcho server. The Acronis Access Server web console allows you to administer your mobilEcho servers from one unified web interface and will allow you to take advantage of additional client management features if you desire.
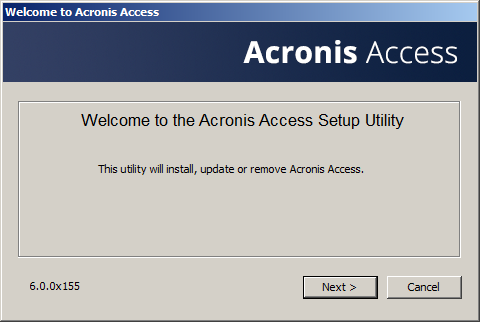
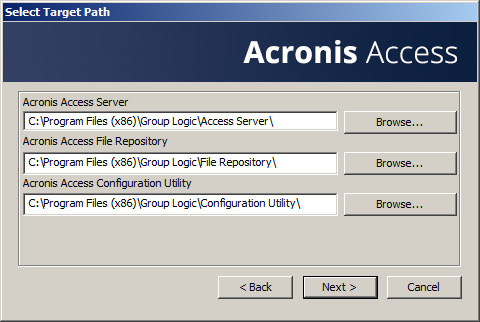
To perform an upgrade to Acronis Access:
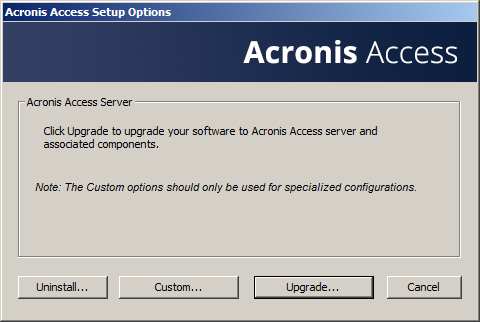
Note: Do not choose Custom and install only the Acronis Access Gateway Server. The Acronis Access Server is the new web console that replaces the mobilEcho Administrator Windows program. It is required to administer your mobilEcho server. If you do not install it, you will have no means to change your mobilEcho settings or to give access to new file shares.
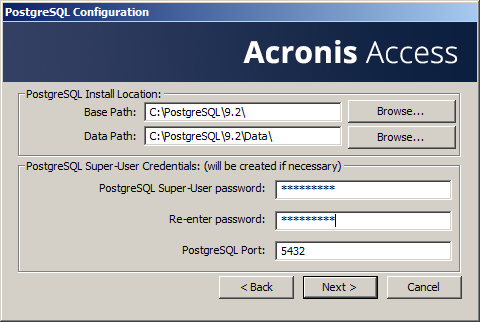
Note: Please enter and confirm a Super-User password for the “postgres” administrative account. Be sure to record this password in a safe place.
Note: It is not recommended that you alter the PostgresSQL install location or port.
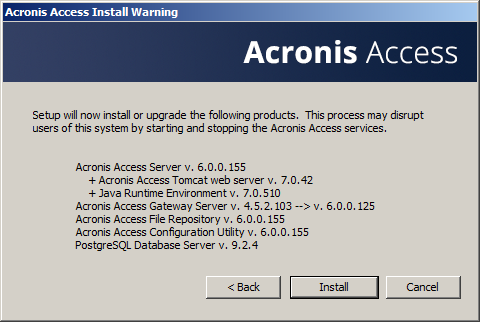
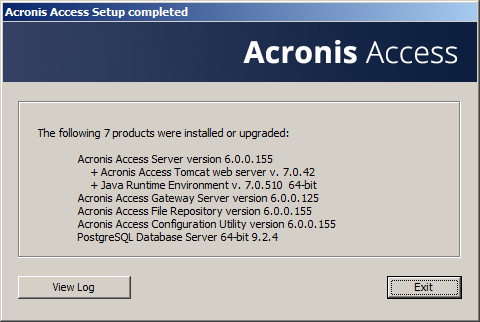
Note: All required components will be automatically installed in sequence. This may take 5 to 15 minutes depending on your server. Future upgrade installs will be quicker.
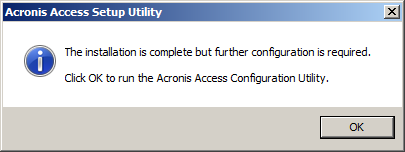
IMPORTANT NOTE: If you do not proceed with this configuration step, your mobilEcho server will not be functional. This step is mandatory.
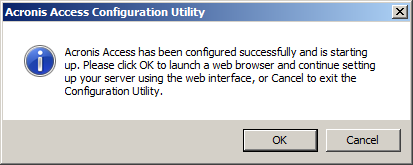
When exiting the installer, you will be prompted to run the Acronis Access Configuration Utility. Click OK to continue.
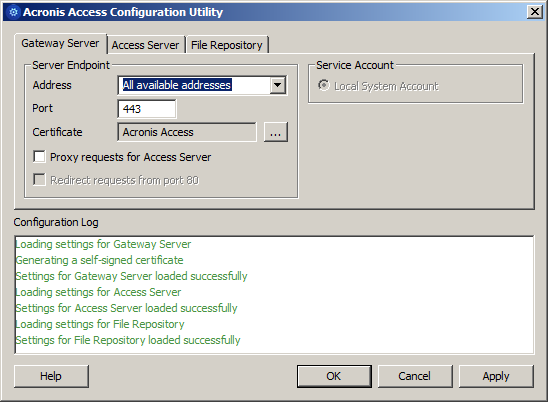
If you accidently skip this step or need to change your network interfaces, ports, or certificates in the future. You can manually run the configuration utility at any time.
On upgraded mobilEcho servers, the utility’s default location is:
C:\Program Files (x86)\Group Logic\Configuration Utility\AcronisAccessConfiguration.exe
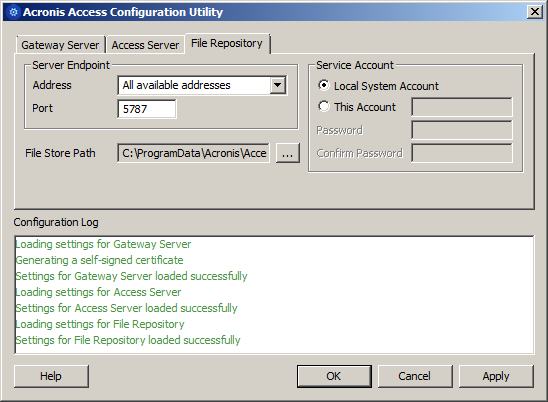
Note: You existing settings are retained. Please confirm that these settings match your existing mobilEcho File Access Server settings. This service typically runs on all available network addresses on port 443. If you have an existing SSL server identity certificate, it will be automatically selected. If you do not, a self-signed certificate will be generated.
Note: Please review the settings for the Access Server. The default settings are recommended. This web console typically runs on all available network addresses on port 3000. If you have an existing SSL server identity certificate, it will be automatically selected. If you do not, a self-signed certificate will be generated.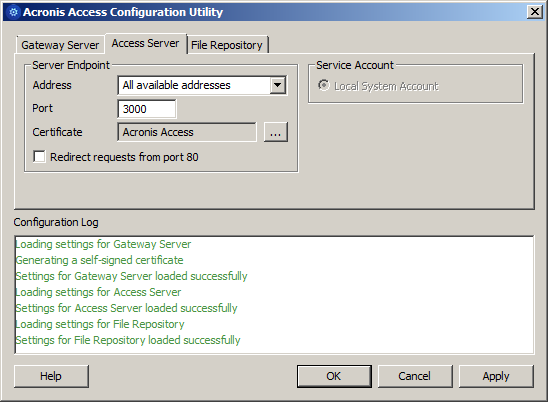
This repository is used by Acronis’ activEcho file sync and share features. These features will not be enabled if you are upgrading a server that does not already have them installed, but you can chose to enable them at a later time, if desired.
The default location for the File Repository is:
C:\ProgramData\Acronis\Access\FileStore
If you would like to try out activEcho in the future, you may want to select a location on a data drive instead of the C: drive. This location can be modified post-install, too.
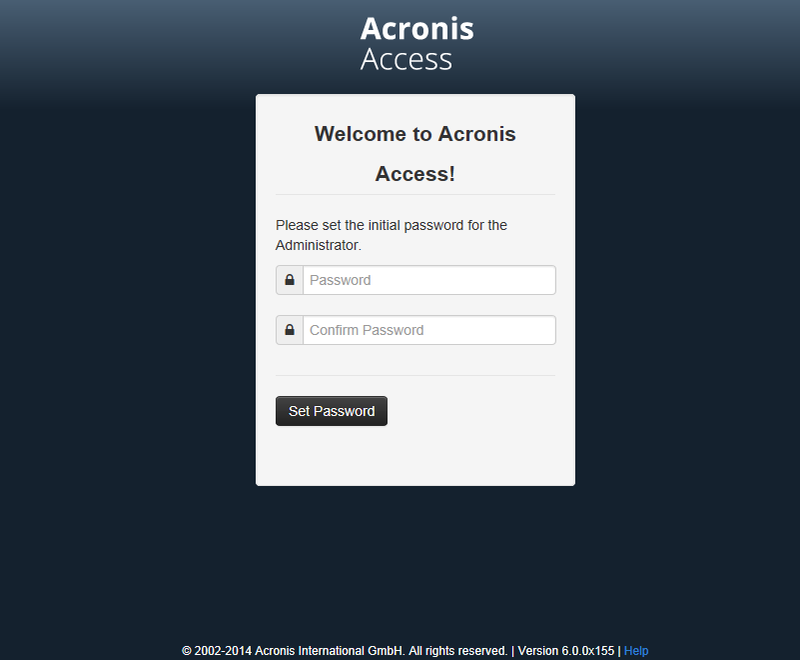
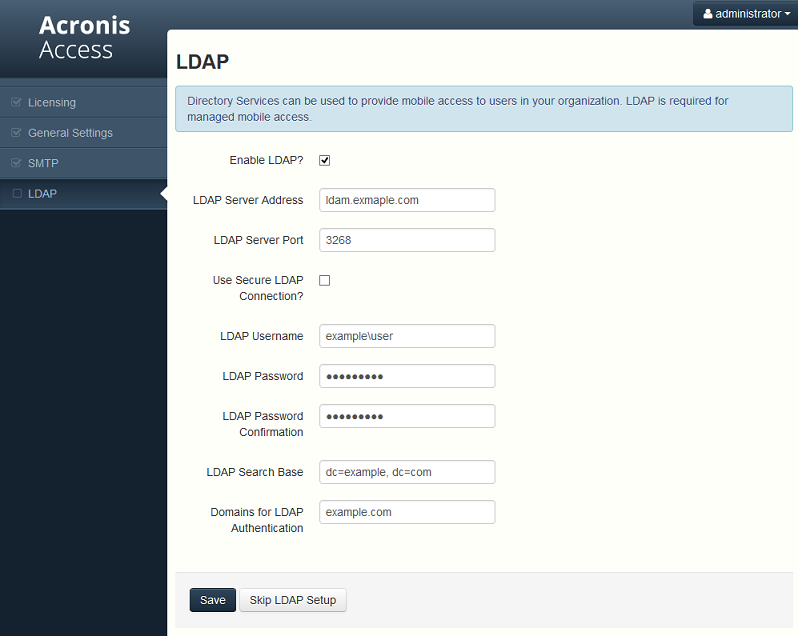
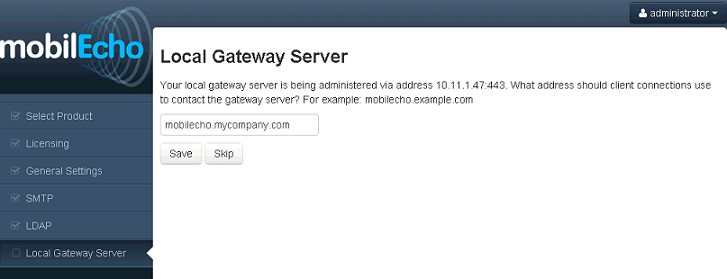
Required initial configuration of Acronis Access:
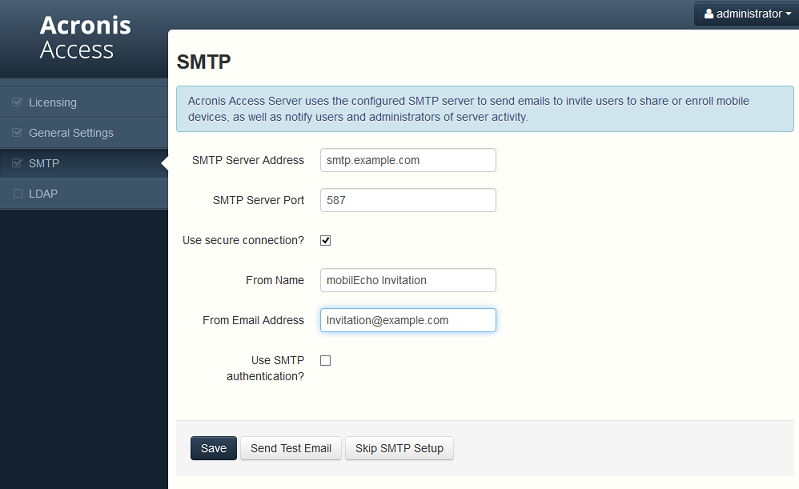
Note: Most of the settings in the SMTP, General Settings and LDAP pages should already be present from your mobilEcho installation.
Upgrading Acronis Access 6.0 to 7.x or newer:
Once you have confirmed that the upgrade is successful, you can continue the upgrade to the latest version by following the steps below..The upgrade procedure from a previous version of Acronis Access is a simplified process and requires almost no configuration.
Backup the vital components:
The Apache Tomcat folder
On upgrade the Apache Tomcat may be upgraded and all of the current Tomcat configuration files and log files will be removed. We recommend you make a copy of the Apache Tomcat folder, which by default is found here: C:\Program Files (x86)\Acronis\Access\Common\.
We recommend that you backup the web.xml file before updating. Your web.xml file will be overwritten on upgrade. On versions 7.1.2 and newer, you can find a backup at C:\Program Files (x86)\Acronis\Access\Access Server\Web Application\WEB-INF\<timestamp>.previous.web.xml. If you have made any specific changes that you wish to retain (excluding Single Sign On, those changes are preserved) , you will have to manually copy and paste your changes from the old file.
The PostgreSQL database
The following method creates an *.sql file containing a text representation of the source database.
Note: acronisaccess_production must be entered exactly as shown as it is the name of the Acronis Access database
Note: Typing the password will not result in any visual changes in the Command Prompt window.
Note: If you want to backup the entire PostgreSQL database set you can use the following command:
pg_dumpall -U postgres > alldbs.sql
Where alldbs.sql will be the generated backup file. It can include a full path specification, for instance D:\Backups\alldbs.sql
For full syntax on this command see: http://www.postgresql.org/docs/9.2/static/app-pg-dumpall.html
Info: For more information on PostgreSQL backup procedures and command syntax please read this: http://www.postgresql.org/docs/9.2/static/backup.html
The Gateway Server(s) database(s)
Note: The default location is: C:\Program Files (x86)\Acronis\Access\Gateway Server\database
The Acronis Access configuration file
Note: The default location is: C:\Program Files (x86)\Acronis\Access\Access Server
Upgrade
Verify that none of the settings in the Configuration Utility have changed. After you have verified all of your settings are as expected, press OK to close the Configuration Utility and start the Acronis Access services.
Working with your mobilEcho Gateway Server
Your Gateway Server is automatically registered during the setup process and will appear in the Gateway Servers list, where you can adjust its settings and view its details and status.
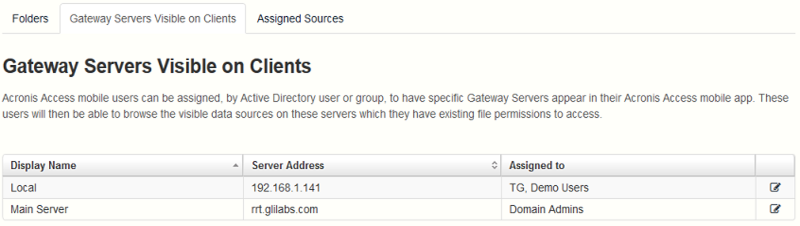
When it was registered, the Volumes that existed on the mobilEcho Gateway Server prior to being upgraded to Acronis Access were imported into the Data Sources – Folders list.
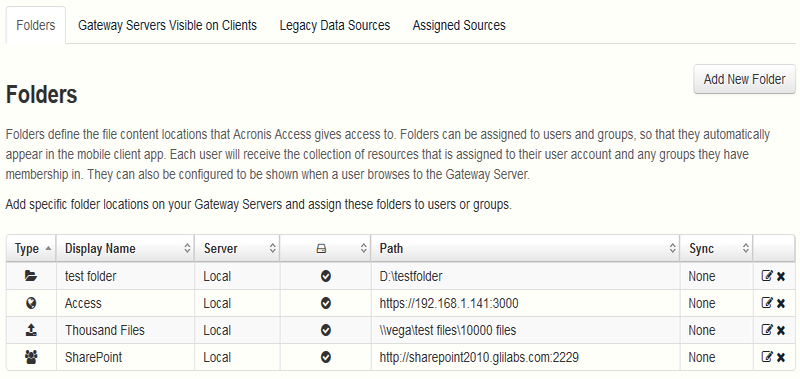
There are no longer “Volumes” in mobilEcho 5.0. Instead of using Volumes to share data sources, you will now create Folders. These Folders have an optional “Show when browsing server” property. When this option is enabled, the Folder will appear when a user browses the root of the Gateway Server in their mobilEcho app, just as Volumes were displayed in mobilEcho 4.5 or earlier.
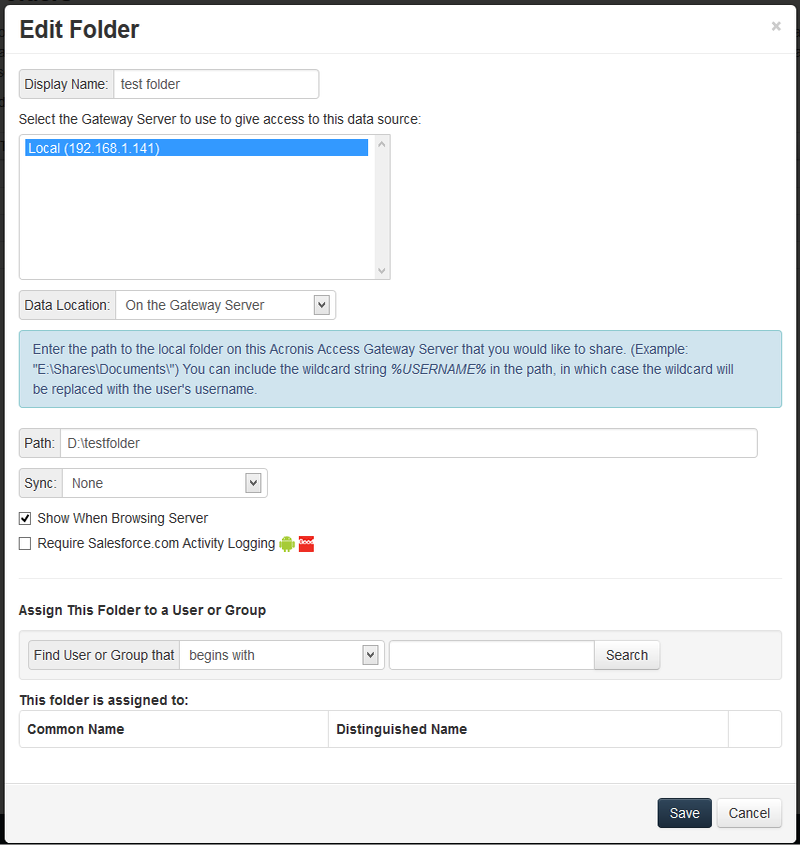
All the Volumes from your mobilEcho 4.5 or earlier server were imported into to the Acronis Access console as Folders with the “Show when browsing server” property enabled. So, they will continue to appear when your users browse the root of a mobilEcho Gateway Server. Any Folders added later can be configured to act like Volumes be enabling this setting. You can also begin using advanced client management features, such as the ability to add Folders that automatically appear in the mobilEcho client app for the list of Active Directory user or groups you assign them to.
As shown below, the 4 existing Volumes from this mobilEcho 4.5 server were imported into the Folders list after Gateway Server registration, and they continue to appear when browsing the server from the mobilEcho app.
You can also begin to create and use client policies and officially enroll users with your server so that they are managed by these policies. A Default policy that applies to all users can be enabled and configured, or you can add custom policies based on Active Directory users and groups.
Once policies have been configured, you can use the Enroll Users page to send enrollment invitation emails to your users so that they can enroll as managed users.