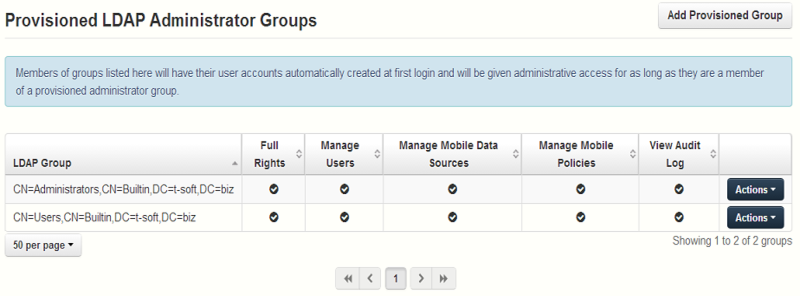
This section allows you to manage your administrative groups. Users in these groups will automatically receive administrative privileges.
Using the Actions button you can delete or edit the group.
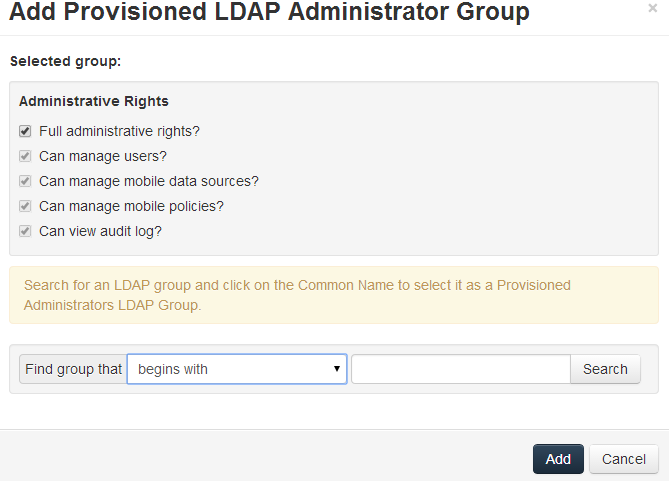
To add a provisioned LDAP administrator group:
Press the Add Provisioned Group.
Mark if the group should have Sync & Share functionality.
Find the group.
Click on the group name.
Press Save.
Administrative Users
This section lists all your Users with administrative rights, their authentication type (Ad-Hoc or LDAP), whether they have Sync & Share rights and their status (Disabled or Enabled).
You can invite a new user with full using the Add Administrator button. Using the Actions button you can delete or edit the user. You can edit his administrative rights, status, email address and password.
Inviting a single administrator
Open the Acronis Access Web Interface.
Log in with an administator account.
Expand the General Settings tab and open the Administrators page.
Press the Add Administrator button under Administrative Users.
Select either the Active Directory/LDAP or Invite by Email tab depending on what type of user you are inviting and what you want them to administer. LDAP users without emails cannot be given Sync & Share functionality.
To invite via Active Directory/LDAP do the following:
Search for the user you want to add in the Active Directory and then click on their Common Name to select a user.
Note: The LDAP User and Email fields will fill in automatically.
Enable/Disable the Sync & Share functionality.
Select which administrative rights the user should have.
Press Add.
To invite by Email do the following:
Enter the email address of the user you want to add as an administrator.
Note: Ad-hoc users invited by email will always have Sync & Share functionality.
Select whether this user should be licensed.
Select the language of the Invitation email.
Press Add.
To give a user administrative rights:
Open the Sync & Share tab
Open theUsers tab
Press the Actions button for the User you want to edit.