Contact Acronis Technical Support at https://support.acronis.com/mobility in order to obtain the additional Dashboard files that you need to copy to your local system.
Put the Hub and UI folders in a folder of your choice, for example C:\Program Files (x86)\Acronis\Dashboard.
Install J2SE(TM) Runtime Environment 7 or 8. Use the Typical installation.
If you have MTWeb running on the same machine, skip to the Confirm that the PHP installation directory has appropriate system permissions.
Extract the zip file into a new folder called php—for example, C:\php. It is strongly recommended that you create the PHP folder on the same drive where your operating system is installed. Installing PHP on a different drive will prevent MassTransit Dashboard from working properly.
Warning: Don't use the PHP installer; only extract the zip package as stated above.
Note: If you don't see all the required PHP files mentioned below after using Stufflt Expander, try extracting the zip file with another application.
Open the the PHP installation folder. In this example, C:\php.
Verify that the php_mysqli.dll library file is included in the C:\php\ext\ folder.
Rename the php.ini-production file located in your PHP folder to php.ini.
Open the php.inifile by using a text editor and change it according to the steps below.
Note: All lines beginning with а semicolon (;) in the php.ini file are considered commented and therefore ignored. Ensure that you delete the semicolons (;) at the beginning of the lines from the php.ini file mentioned below.
Change the line beginning with display_errors = as shown below.
display_errors = Off
Change the line beginning with extension_dir = as shown below.
extension_dir = "C:\php\ext"
Change the line beginning with cgi.force_redirect = as shown below.
cgi.force_redirect = 0
Delete the semicolon in the beginning of the line extension=php_mysqli.dll in the Dynamic Extensions section of the php.ini file:
extension=php_mysqli.dll
Change the line beginning with session.cache_limiter = to blank, as shown below.
session.cache_limiter =
Change the line beginning with cgi.fix_pathinfo= as shown below.
cgi.fix_pathinfo = 1
Change the line beginning with fastcgi.impersonate= as shown below.
fastcgi.impersonate = 1
Edit the following lines to enable PHP logging for troubleshooting purposes:
Note: The Windows user account associated with the IIS website that MassTransit will use (generally, IUSR) needs to have write access to the log file. By default, if you don't specify a folder, the log file location will be your webroot folder (for example, C:\Program Files (x86)\Acronis\Dashboard\UI\webroot). If you don‘t want to grant this user account full access to a folder, you may create an empty log file with this name manually, and then grant the Windows user account Write access to that file only.
3. Confirming that the PHP directory has appropriate system permissions
Locate the PHP installation folder. In this example, C:\php.
Right-click this folder, and select Properties.
In PHP Properties window, select the Security tab.
Confirm that the machine's Network Service user has Read, Execute, and List permissions for the PHP installation folder.
Note: The Network Service user rarely shows up explicitly, but is a member of the Users group. Depending on the security structure for the particular machine, you may want to add the Users group to the PHP folder (and propagate permissions to the contained files and folders), or add only the Network Service user.
4. Configuring IIS
Verify that IIS is installed on your machine. For more information on how to install IIS, depending on your Windows Server version, refer to:
4.1. Configuring the MassTransit Hub web interface without creating a virtual directory
Open the IIS Manager from Windows Start>Administrative Tools>IIS Manager.
In the IIS Manager Connections pane, expand the server name, expand Sites, and then click Default Web Site.
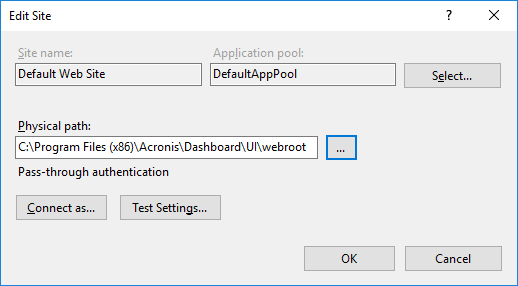
Go to the Actions pane on the right, and under Edit Site, click Basic Settings…
Click the … button next to Physical path, and select the webroot folder. By default, the Dashboard webroot folder is: C:\Program Files (x86)\Acronis\Dashboard\UI\webroot.
Click OK.
In the Default Web Site Home pane, double-click the Handler Mappings icon.
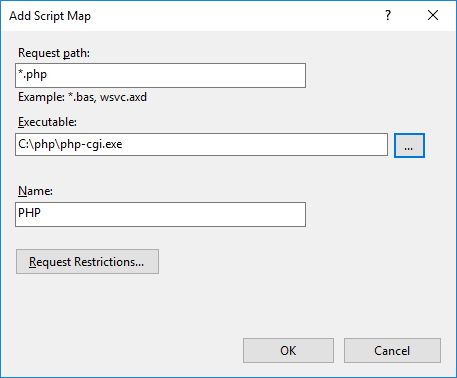
In the Actions pane, click Add Script Map...
In the Request path field, enter:*.php.
In the Executable field, select the path to the php-cgi.exe file. The default path is: C:\php\php-cgi.exe.
In the Name field, enter: PHP.
Click OK.
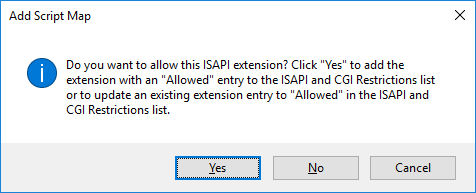
If the following dialog appears, click Yes.
In the IIS Manager Connections pane, click Default Web Site. Then double-click Default Document in the Default Web Site Home pane.
In the Actions pane, click Add…
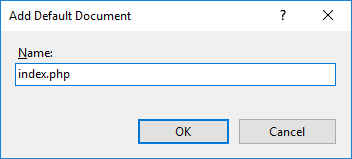
In the Name field, enter: index.php.
Click OK.
Move the index.php file to the top by clicking Move Up in the Actions pane.
4.2. Configuring the MassTransit Hub web interface by using a virtual directory
Open the IIS Manager from Windows Start>Administrative Tools>IIS Manager.
In the IIS Manager Connections pane, expand the server name, expand Sites, and then click Default Web Site.
Go to the Actions pane on the right, and click View Virtual Directories.
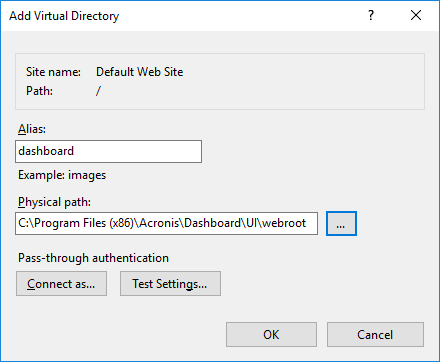
In the Actions pane, click Add Virtual Directory…
In the Alias field enter: dashboard.This name will be added to the default website, for example, http://<default website>/dashboard.
Click the … button next to Physical path field, and select the webroot folder, which is located within the UI folder. For example, C:\Program Files (x86)\Acronis\Dashboard\UI\webroot.
Click OK.
In the IIS Manager Connections pane, below the Default Web Site, highlight the virtual directory that you have just created. Then double-click Default Document in the Home pane.
Check the Actions pane. If you see an alert that the default document is disabled, click Enable in the Actions pane. If you don't see this alert, continue with the next step.
In the Actions pane, click Add…
In the Name field, enter: index.php.
Click OK.
Move the index.php file to the top by clicking Move Up in the Actions pane.
In the IIS Manager Connections pane, below Default Web Site, highlight the virtual directory that you created. Then, double-click Handler Mappings in the Home pane.
In the Actions pane, click Add Module Mapping…
In the Request path field, enter:*.php.
In Module field, select:FastCgiModule.
In the Executable (optional) field, select the path to the php-cgi.exe file. The default path is: C:\php\php-cgi.exe.
In the Name field, enter: PHP.
Click OK.
If the following dialog appears, click Yes.
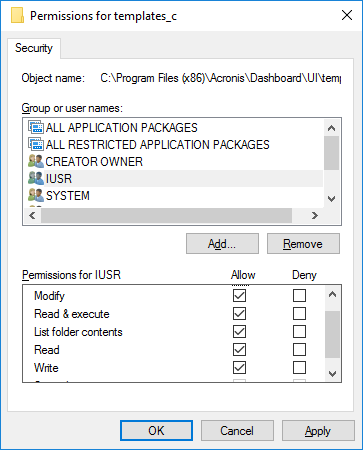
Grant the Internet guest user account (IUSR) Read, Write, and Modify permissions for the UI\parsed and UI\templates_c folders, located in the Dashboard installation folder (for example, C:\Program Files (x86)\Acronis\Dashboard).
manager.png)
manager.png)
manager.png)
manager.png)
manager.png)
manager.png)
manager.png)