Once you install and configure Files Advanced, it will automatically create a Data Source called "Sync&Share" and will add the Domain Users group to the assigned users and groups list by default. At any time the administrator(s) can change or remove this Data Source folder.
This default Data Source will be available to all newly created users who are part of the Domain Users group and it is reachable via mobile, desktop and web clients.
Sharing existing content only requires that you setup a Data Source for it and assign that Data Source to the desired users or groups.
Creating a Data Source
Open the Files Advanced Web Interface.
Open the Mobile Access tab.
Open the Data Sources tab.
Go to Folders.
Press the Add New Folder button.
Enter a display name for the folder.
Select the Gateway Server which will give access to this folder.
Select the location of the data. This can be on the actual Gateway Server, on another SMB server, on a SharePoint Site or Library or on a Sync & Share server.
Note: When selecting Sync & Share, make sure to enter the full path to the server with the port number. e.g.: https://mycompany.com:3000
Based on your choice of location, enter the path to that folder, server, site or library.
Select the Sync type of this folder.
Enable Show When Browsing Server if you want this Data Source to be visible when Files Advanced mobile clients browse the Gateway Server.
Note: When creating SharePoint Data Sources, you will have the option to enable the displaying of SharePoint followed sites.
Press the Save button.
Allowing Web client users to access File Servers and more
By default, users cannot open NAS, File Servers and SharePoint resources from the Web client. However, enabling it is simple and grants more possibilities to the web users.
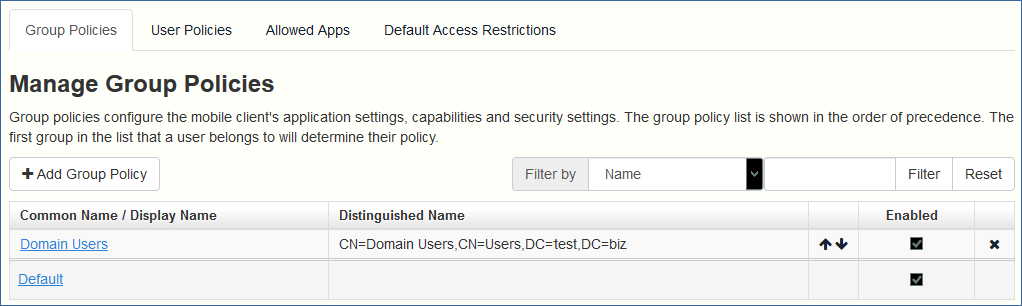
Open the Web Interface and browse to Mobile Access --> Policies. (Note even though policies primarily relate to the mobile app, the setting for web access is there too.)
Select the policy you want to change. If you haven't made any new ones, select the Default policy.
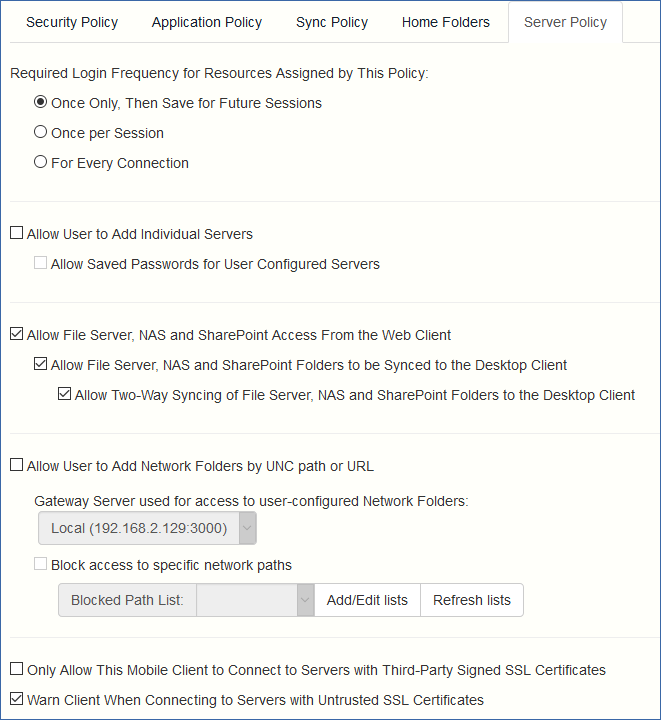
On the Server Policy tab, select the box Allow File Server, NAS, and SharePoint Access from the Web Client.
Consider whether you want to also enable desktop syncing, for the chosen policy, using the sub-options Allow File Server, NAS and SharePoint Folders to be Synced to the Desktop Client and Allow Two-Way Syncing of File Server, NAS and SharePoint Folders to the Desktop Client.
Click Save.
This is implemented as a per-policy setting to provide more flexibility. You may want to enable the setting for another group or some individual policies.