Booting the target machines
You need to manually boot the target machines into Agent in the following cases:
- To perform deployment to any ready machines
- To perform deployment to the specific machines that do not support the Wake-on-LAN functionality
You can boot the machines by using a bootable media or Acronis PXE Server.
Alternatively, you can configure online deployment to the target machines.To boot a target machine
Do one of the following:
- Create a bootable media with Agent.
OR
- Connect the management console to Acronis PXE Server and upload Agent.
When creating the bootable media or uploading Agent to the PXE server, you can configure the agent to start automatically after a time-out.
Boot the target machine into Agent from the bootable media or the PXE Server.
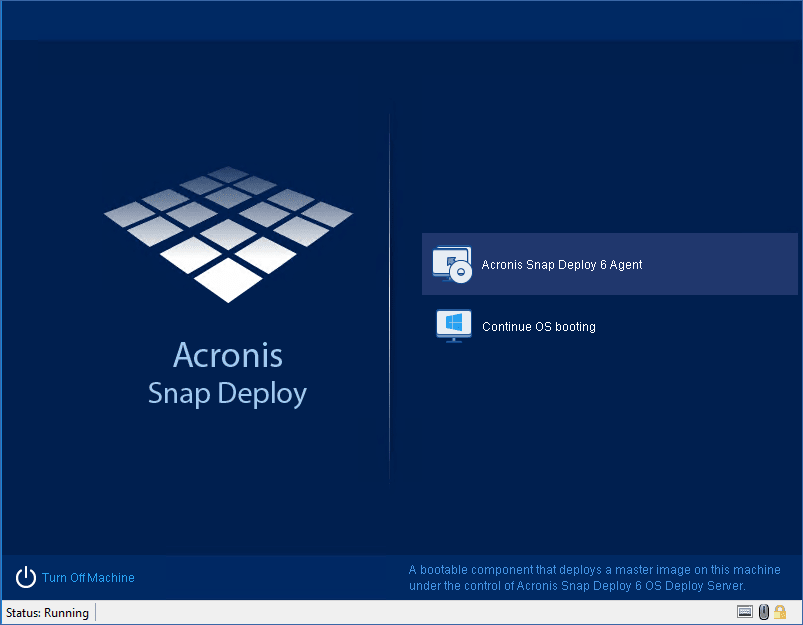
The boot menu on the target machine’s side
- Select Agent in the boot menu. You can skip this step if you configured the agent to start automatically.
[Optional.] Choose whether you want to configure the agent. The agent configuration includes the network settings and the address of OS Deploy Server. A dialog box comes up suggesting that you configure the agent.
To load the agent with the default configuration (recommended in most cases), click Cancel or wait until the dialog box disappears after the time-out. To configure the agent before loading (recommended if your network does not have a DHCP server), click OK.
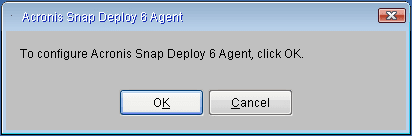
Prompt for configuring the agent on the target machine’s side
With the default configuration, the agent:
- Takes the network settings, such as the IP address, from the DHCP server (uses DHCP auto configuration).
- Connects to the OS Deploy Server that you specified when creating the bootable media or uploading the agent. If you did not specify a deployment server, the agent connects to the first deployment server it finds on the network.
You can load the agent with the default configuration if there is a DHCP server and only one OS Deploy Server on the network.
To configure the agent
You can configure the following settings for the agent.
Configuring the OS deployment server
- In the Server address field, enter the DNS name or IP address of the deploy server the agent will connect to.
This option enables you to have multiple deployment servers that perform different functions on the same network. If you leave this field empty, the software will search for the deployment server automatically.
Acronis bootable media uses NetBIOS networking protocol to resolve OS Deploy Server in a network. NetBIOS protocol uses ANSI characters for host names. So, machines that have non-English characters in their names cannot be accessed from Acronis bootable media. If the name of the OS Deploy Server machine contains non-English characters, use the machine's IP address to specify it in the network.
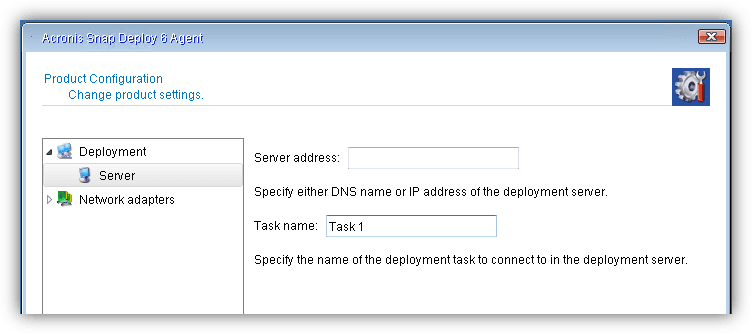
Configuring a deployment task name
To configure the agent to allow deployments by a specific deployment task only, enter the name of that deployment task in the Task name field. See Creating the deployment task.
The option Deploy only to agents that have 'Task name' parameter configured must be enabled in the deployment task with that name.When the deployment task runs, the server checks the Task name value retrieved from all agents connected to the OS Deploy Server. The deployment is performed only on machines where the Task name value matches the name of the deployment task.
If you leave the Task name field empty, all deployment tasks that do not have the option Deploy only to agents that have 'Task name' parameter configured enabled will perform deployment of the master image to this machine.
This functionality is not supported for online deployments.
Configuring the network settings
You can configure the network settings for each network adapter of the target machine. This option enables you to manually specify network configuration if automatic configuration is not possible (for example, if no DHCP server is present on your network).
- To change the network settings for a current session, click Acronis Snap Deploy 6 Agent in the startup window. The Product configuration window that appears will allow you to configure network settings for each network interface card (NIC) of the machine.
Changes made during a session will be lost after the machine reboots.
Adding VLANs
- In the Product configuration window, you can add virtual local area networks (VLANs). Use this functionality if you need access to a backup location that is included in a specific VLAN.
VLANs are mainly used to divide a local area network into segments. A NIC that is connected to an access port of the switch always has access to the VLAN specified in the port configuration. A NIC connected to a trunk port of the switch can access the VLANs allowed in the port configuration only if you specify the VLANs in the network settings.
Configuring Wi-Fi settings
You can configure Linux-based media to connect to a Wi-Fi network after booting. Thus, on machines with no Ethernet connection, the media can connect the machine to an OS Deploy Server via Wi-Fi and start the deployment from there.
If the Wi-Fi connection details have been included in the Linux-based media during media creation the machine will connect to the specified WI-Fi network automatically.
- In the Product configuration window, click Wi-Fi settings and select one of the available Wi-Fi networks. A dialog will prompt you to enter the password. Enter the password and click Join.
To enable access to a VLAN via a trunk port
- Click Add VLAN.
- Select the NIC that provides access to the local area network that includes the required VLAN.
- Specify the VLAN identifier.
After you click OK, a new entry appears in the list of network adapters.
If you need to remove a VLAN, click the required VLAN entry, and then click Remove VLAN.
Configuring the agent on the target side
Set the preferable values, and then click OK.
When Agent starts and the target machine is ready for deployment, the target machine displays the following window:
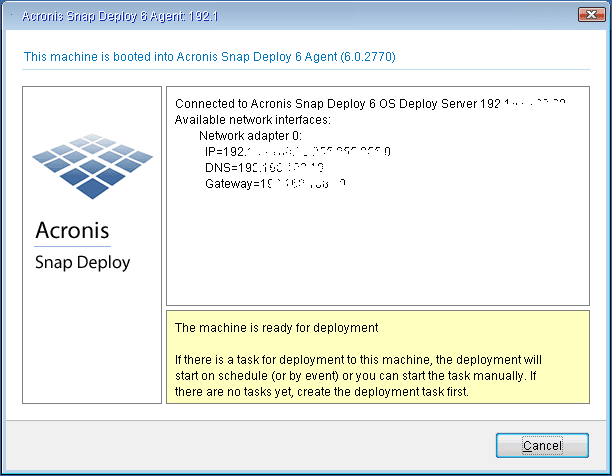
Agent: ready for deployment