With the exception of automatic registration of a Gateway Server running on the same machine as the management web application, registration of Gateway Servers is a multi-step, manual process.
Go to the computer on which you have the Gateway Server installed.
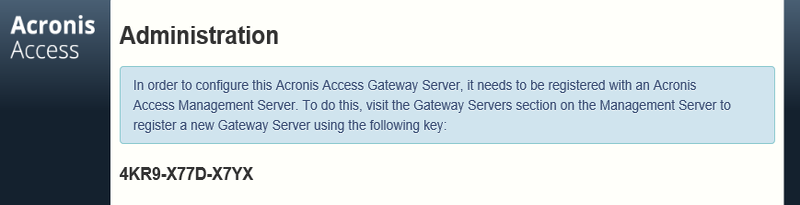
Open https://localhost/gateway_admin.
Note: The port 443 is the default port. If you have changed the default port, add your port number after localhost.
Write down the Administration Key.
Open the Acronis Access Web Interface.
Open the Mobile Access tab.
Open the Gateway Servers page.
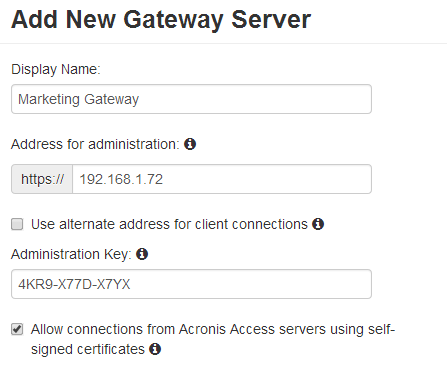
Press the Add New Gateway Server button.
Enter a Display Name for your Gateway Server.
Enter the DNS name or IP address of your Gateway Server.
Note: If your mobile clients connect to the gateway by going through a reverse proxy server or loadbalancer you should enable Use alternate address for client connections and enter the DNS name or IP address of your reverse proxy server or loadbalancer.
Enter the Administration Key.
If required, allow connections with self-signed certificates to this gateway by enabling Allow connections from Acronis Access servers using self-signed certificates.
Press the Save button.
After you've registered your Gateway Server, you may want to configure custom access restrictions for this Gateway Server. For more information on this, visit the Editing Gateway Servers section.