In this scenario, you have two (or more) Windows Servers with one running just the activEcho Server and another running the mobilEcho File Server and Management Server. This procedure will upgrade your activEcho server and mobilEcho Client Management Server to the unified Acronis Access Server web console. The new console also replaces the mobilEcho Administrator Windows program previously used to administer mobilEcho servers. The Acronis Access Server web console allows you to administer both activEcho and mobilEcho from one unified web interface.
Write down the current IP Address of your server running mobilEcho and give the computer a different IP address (You will need the new one as well).
Go to the server running activEcho and add the IP address of your server running mobilEcho to a separate network adapter.
Disable any anti-virus software you have or it may interrupt the installation procedure resulting in a failed installation.
Download the Acronis Access Server installer to your activEcho server and run the installer.
To access the latest installer, please visit: http://support.grouplogic.com/?page_id=3598
You will need to enter your product serial number for verification before downloading the installer.
The installer file is named: AcronisAccessSetup.exe
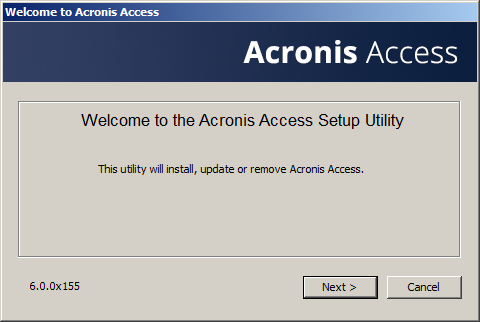
Click Next on the Welcome Screen.
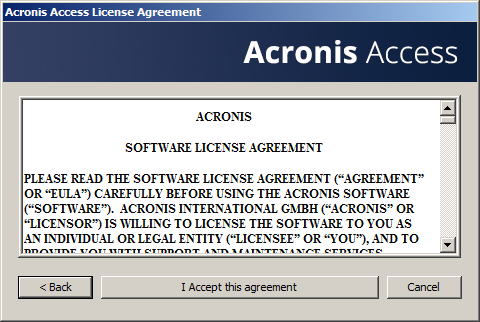
Please accept the license agreement.
Click Upgrade to automatically upgrade your activEcho Server to the new Acronis Access Server. In the upgrade process, a Gateway Server and it's required services will also be installed.
If you have a mobilEcho Client Management Server, press Yes. If you don't have a mobilEcho Client Management Server, go to the first article on upgrading without a mobilEcho installation present.
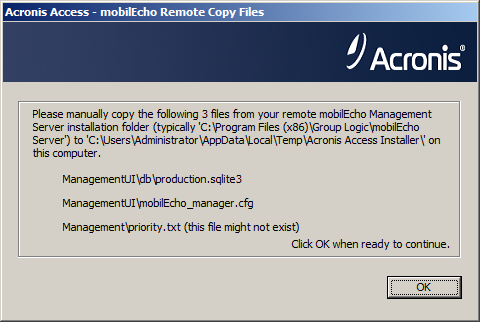
Go to the server on which you have the mobilEcho Client Management server running and locate these 3 files: production.sqlite3, mobilEcho_manager.cfg, priority.txt (this file might not exist) and copy them to the machine on which you've started the upgrade to the folder location shown to you on the dialog on your computer. This path is custom for each installation. (i.e. C:\Users\Administrator\AppData\Local\Temp\Acronis Access Installer\) When all of the files have been copied, press OK to continue.
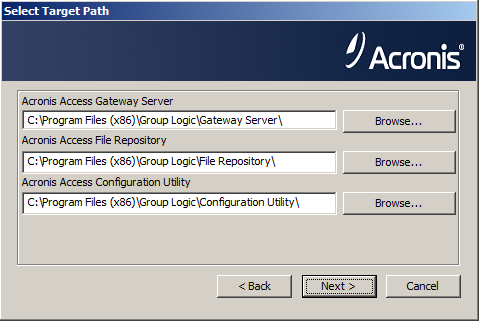
Select an installation location for the Acronis Access components being installed. If you are upgrading an existing activEcho server, these paths will default to your existing installation location. We recommend you do not change these installation paths. Click Next.
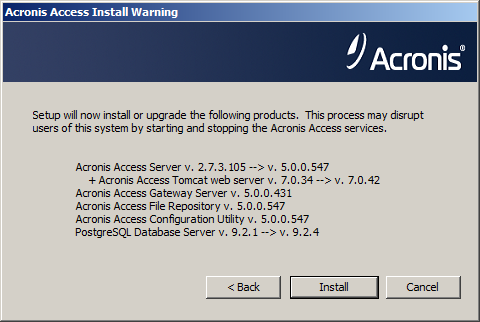
Please review the services being installed and upgraded.
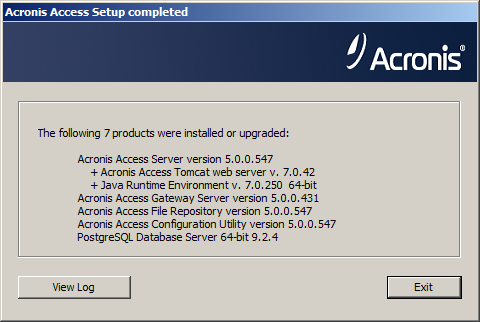
Press Install to begin the upgrade. Once the installation is complete, you will be shown a summary of the installed components. Press Exit.
Note: All required components will be automatically installed in sequence. This may take 5 to 15 minutes depending on your server. Future upgrades will be quicker.
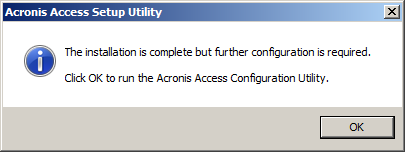
At this point in the upgrade process, all necessary software has been installed, but you must now configure the network interfaces, ports, and certificates that will be used. This step is mandatory. When exiting the installer, you will be prompted to run the Acronis Access Configuration Utility. Click OK to continue.
Using the Configuration Utility
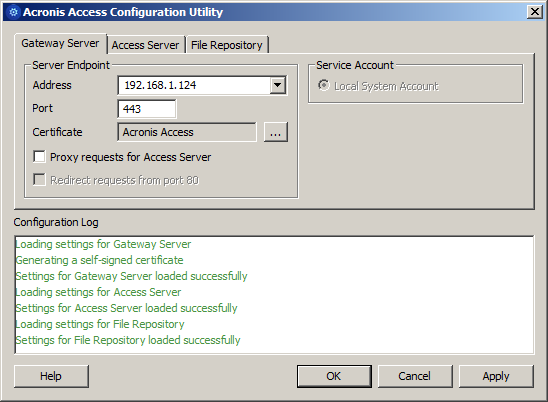
On the Gateway Server tab
For the Address field, enter the IP address of your server that was running mobilEcho. This is the address you wrote down at the beginning.
For the Port field, enter the port number that your mobilEcho File Server used.
Add the certificate you have been using for the mobilEcho File Server.
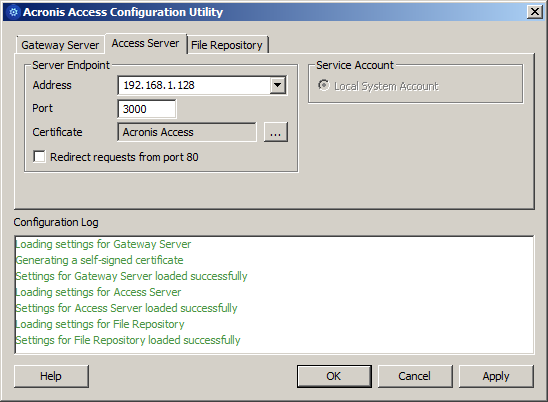
On the Access Server
For the Address field, enter the IP address you've been using for your activEcho server until now. This should be the default.
For the Port field, enter the port number you've been using for your activEcho server until now. This should be the default.
Add the certificate you have been using for your activEcho server.
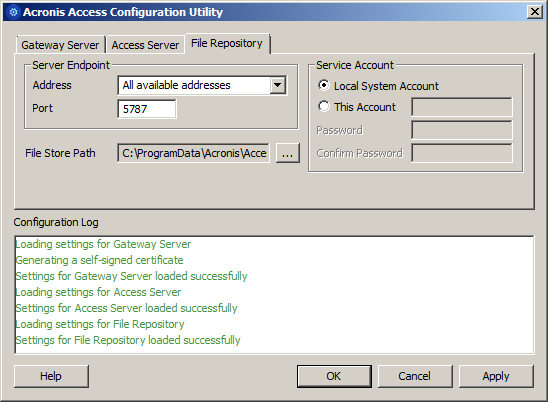
On the File Repository tab
For the Address field, enter the IP address or DNS name of your Repository Service. This should be the default.
For the Port field, enter the port number for your Repository Service. This should be the default.
Select the path to your FileStore folder. This should be the default.
After you have made all the necessary configurations, press OK to exit the Configuration Utility.
Configuring your local Gateway Server
Copy the Acronis Access Installer and place it on the server with mobilEcho.
Stop the mobilEcho Management Server service.
Run the installer and press Next on the Welcome Screen.
Read and accept the license agreement.
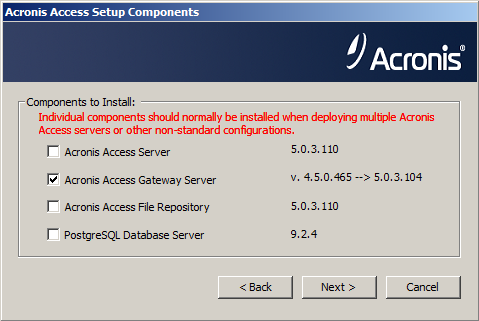
Press Custom.
Select only the Gateway Server component and press Next.
Review the installation path and press Next. This should be the default.
Review the components which will be installed and press Install.
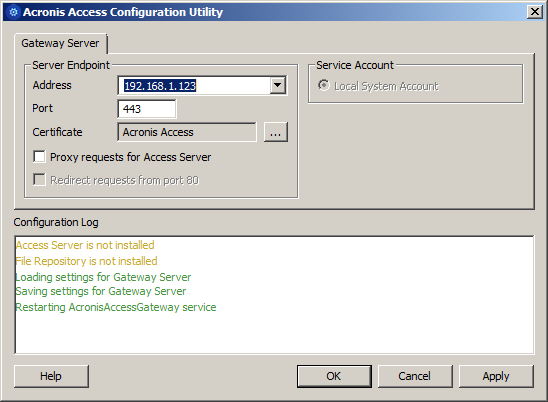
After the installation finishes, close the installer and start the configuration utility (if it doesn' start automatically, it can generally be found at: C:\Program Files (x86)\Group Logic\Configuration Utility).
For the Address field, specify the new IP you gave to your machine hosting mobilEcho.
For the Port field, specify the port number your mobilEcho File Server previously used (this should be the default).
Press OK to complete the configuration and close the utility.
Open the Acronis Access web interface and login.
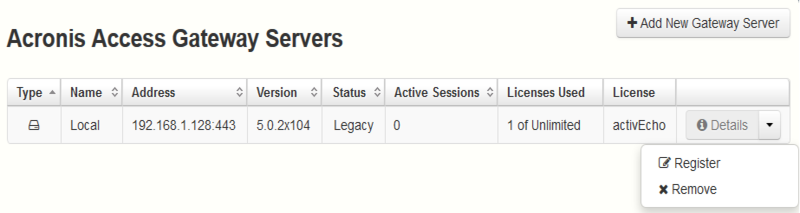
Expand the Mobile Access tab and open the Gateway Servers page.
Locate the Gateway Server with a Legacy status,open the drop down menu for that gateway and select Register.
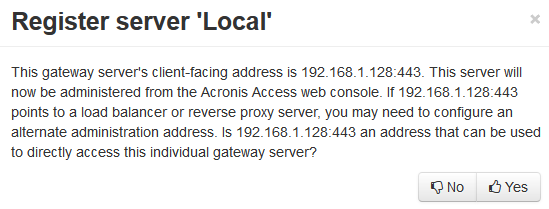
A dialog will appear, press Yes.
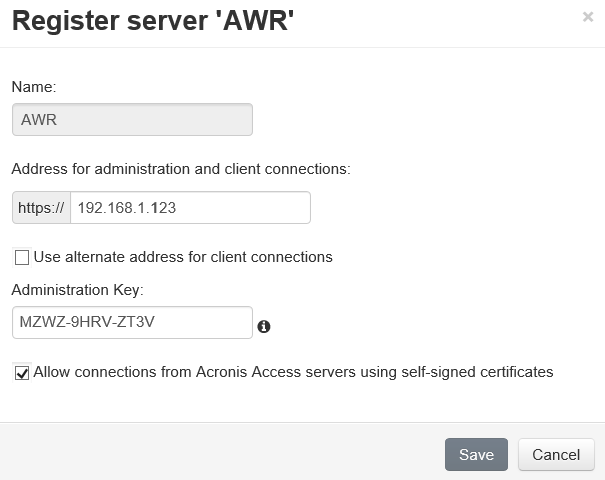
In the Address for administration and client connections field, enter the IP address of your upgraded Gateway Server. This is the new IP address you gave to the machine previously hosting mobilEcho.
In the Administration Key field, enter the key of your Gateway Server. To obtain it, open the IP address of the Gateway in a browser. (e.g. https://192.168.1.1). This should be done on the machine which previously had mobilEchoinstalled.
Register your Gateway by pressing Save.
Registering your local Gateway server
While on the Gateway Servers page:
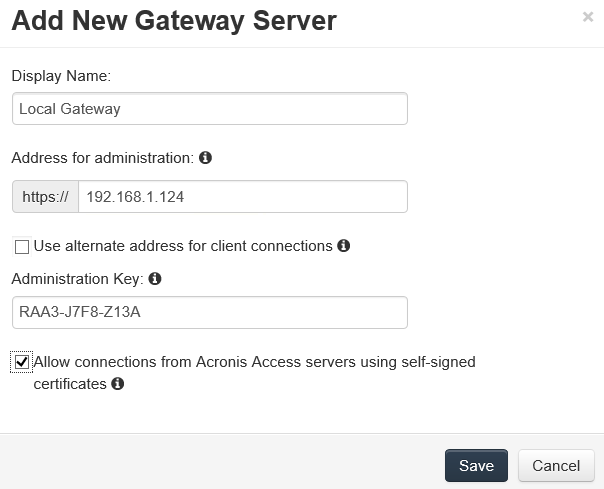
Press the Add Gateway Server button.
Enter a display name for your new Gateway Server.
Enter the IP address of the Gateway. This is the IP address that was previously used by your mobilEcho server (this is the IP you wrote down at the beginning).
Enter the administration key for that Gateway. To obtain it, open the IP address of the Gateway in a browser. (e.g. https://192.168.1.1). This should be done on the machine that is now hosting your Acronis Access Server.
Register your Gateway by pressing Save.
Upgrading Acronis Access 6.0 to 7.x or newer:
Once you have confirmed that the upgrade is successful, you can continue the upgrade to the latest version by following the steps below.The upgrade procedure from a previous version of Acronis Access is a simplified process and requires almost no configuration.
Backup the vital components:
The Apache Tomcat folder
On upgrade the Apache Tomcat may be upgraded and all of the current Tomcat configuration files and log files will be removed. We recommend you make a copy of the Apache Tomcat folder, which by default is found here: C:\Program Files (x86)\Acronis\Access\Common\.
The PostgreSQL database
The following method creates an *.sql file containing a text representation of the source database.
Open a Command Prompt window and navigate to the 9.2\bin folder located in the PostgreSQL installation directory. e.g. cd "C:\PostgreSQL\9.2\bin"
Once your current Command Prompt directory is the bin folder, enter the following line:
pg_dump -U postgres -f mybackup.sql acronisaccess_production where mybackup.sql is the desired file name for the produced backup file. It can include a full path to the location where you want the backup file to be created, for instance: D:\Backups\mybackup.sql
Note:acronisaccess_production must be entered exactly as shown as it is the name of the Acronis Access database
A "Password: " line appears. Enter the postgres password that you set during the Acronis Access installation process.
Note: Typing the password will not result in any visual changes in the Command Prompt window.
Your backup file will appear in the bin folder by default unless the output file specification contains a full path to a different directory.
Note: If you want to backup the entire PostgreSQL database set you can use the following command:
pg_dumpall -U postgres > alldbs.sql
Where alldbs.sql will be the generated backup file. It can include a full path specification, for instance D:\Backups\alldbs.sql
Go to the server on which you have your Acronis Access Gateway Server installed.
Navigate to the folder containing the database.
Note: The default location is:C:\Program Files (x86)\Acronis\Access\Gateway Server\database
Copy the mobilEcho.sqlite3 file and paste it in a safe location.
The Acronis Access configuration file
Navigate to the Acronis Access installation folder containing the configuration file.
Note: The default location is: C:\Program Files (x86)\Acronis\Access\Access Server
Copy the acronisaccess.cfg file and paste it in a safe location.
Upgrade
Disable any anti-virus software you have or it may interrupt the installation procedure resulting in a failed installation.
Double-click on the installer executable.
Press Next to begin.
Read and accept the license agreement.
Press Upgrade.
Review the components which will be installed and press Install.
Review the installed components and close the installer.
You will be prompted to open the Configuration Utility, press OK.
Verify that none of the settings in the Configuration Utility have changed. After you have verified all of your settings are as expected, press OK to close the Configuration Utility and start the Acronis Access services.