Configuring branding and white labeling
The Settings > Branding section enables partner administrators to customize the user interface of the management portal and the Cyber Protection service for their child tenants to remove any association with the higher-level partners.
Branding can be configured on the partner and the folder levels. The branding is applied to all direct and indirect child partners/folders and customers of the tenant where the branding is configured.
Other services provide separate branding capabilities in their service consoles. For more information, refer to the user guides of the corresponding services.
Branding items
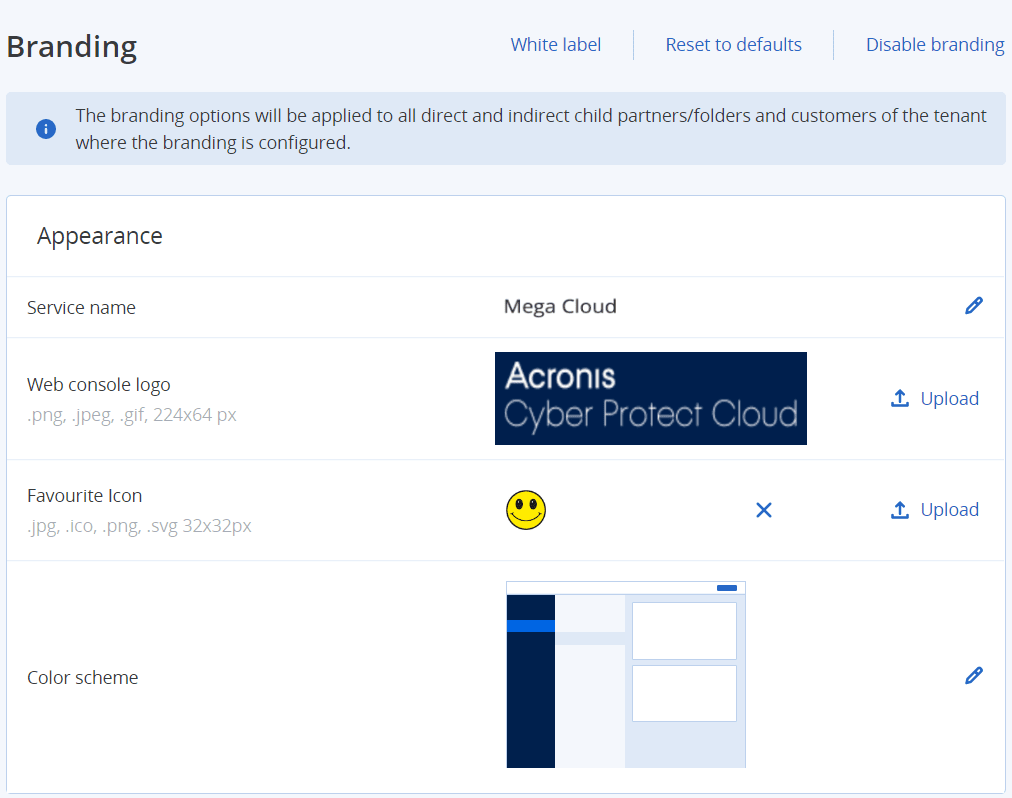
Appearance
- Service name. This name is used in all email messages that are sent by the management portal and Cloud services (account activation messages, service notification email messages), on the Welcome screen after the first login, and as the management portal browser tab name.
- Web console logo. The logo is displayed in the management portal and the services. Click Upload to upload an image file.
- Favourite Icon [Available only if a custom URL is configured]. The favicon is displayed next to the page title in the browser tab. Click Upload to upload an image file.
-
Color scheme. The color scheme defines the combination of colors that is used for all user interface elements.
Click Preview scheme in a new tab to preview what the interface will look like to your child tenants. The branding will not be applied until you click Done on the Choose color scheme panel.
Agent and installer branding
You can customize the branding of agent installation files and tray monitor for Windows and macOS.
- Agent installer filename. The name of the installation file that is downloaded on protected workloads.
- Agent installer logo. The logo that is displayed in the Setup wizard during agent installation. Click Upload to upload an image file.
- Agent name. The name that is displayed in the Setup wizard during agent installation.
- Tray monitor name. The name that is displayed on top of the tray monitor window.
Documentation and support
- Home URL. This page is opened when a user clicks the company name on the About panel.
- Support URL. This page is opened when a user clicks the Contact support link on the About panel or in an email message that is sent by the management portal.
- Support phone. This phone number is shown on the About panel.
- Knowledge base URL. This page is opened when a user clicks the Knowledge base link in an error message.
- Management Portal administrator's guide. This page is opened when a user clicks the question mark icon in the upper-right corner of the management portal user interface, and then clicks About > Administrator guide.
- Management Portal administrator's help. This page is opened when a user clicks the question mark icon in the upper-right corner of the management portal user interface, and then clicks Help.
URL for Cyber Protect Cloud services
You can make Cyber Protect Cloud services available from your custom domain. Click Configure to set a custom URL for the first time, or click Reconfigure to change the existing one. To use the default URL (https://cloud.acronis.com), click Reset to default. For more information about custom URLs, refer to "Configuring custom web interface URLs".
Legal documents settings
- End-user License agreement (EULA) URL. This page is opened when a user clicks the End-user license agreement link on the About panel, on the Welcome screen after the first login, and on File Sync & Share Upload Request landing pages.
- Platform terms URL. This page is opened when a partner administrator clicks the Platform terms link on the About panel or the Welcome screen after the first login.
- Privacy statement URL. This page is opened when a user clicks the Privacy statement link on the Welcome screen after the first login, and on File Sync & Share Upload Request landing pages.
Upsell
- Buy URL. This page is opened when a user clicks Buy now to upgrade to a more advanced edition of the Cyber Protection service. For more information about upsell scenarios, refer to "Configuring upsell scenarios for your customers".
Mobile apps
- App Store. This page is opened when the user clicks Add > iOS in the Cyber Protection service.
- Google Play. This page is opened when the user clicks Add > Android in the Cyber Protection service.
Email server settings
You can specify a custom email server that will be used to send email notifications from the management portal and the services. To specify a custom email server, click Customize, and then specify the following settings:
- In From, enter the name that will be shown in the From field of the email notifications.
- In SMTP, enter the name of the outgoing mail server (SMTP).
- In Port, enter the port of the outgoing mail server. By default, the port is set to 25.
- In Encryption, select whether to use SSL or TLS encryption. Select None to disable encryption.
- In User name and Password, specify the credentials of an account that will be used to send messages.
Configuring branding
- Log in to the management portal.
- Navigate to the tenant in which you want to configure branding.
- Click Settings > Branding.
- [If branding has not been enabled yet] Click Enable branding.
- Configure the branding items described above.
Restoring the default branding settings
You can reset all branding items to their default values.
- Log in to the management portal.
- Navigate to the tenant in which you want to reset the branding.
- Click Settings > Branding.
- In the upper right, click Restore to defaults.
Disabling the branding
You can disable the branding for your account and all child tenants.
- Log in to the management portal.
- Navigate to the tenant in which you want to disable the branding.
- Click Settings > Branding.
- In the upper right, click Disable branding.
White labeling
You can control if the Cyber Protection agent (for Windows, macOS, and Linux), Cyber Protection Monitor (for Windows, macOS, and Linux), and Connect Client will be branded or white-labeled for all your child partners and customers. If you enable white labeling, the agent, Connect Client, and tray monitor will be white-labeled. This setting will also affect the names and logos used in the installer and the Cyber Protection Monitor.
Applying white labeling
- Log in to the management portal.
- Navigate to the tenant in which you want to apply white labeling.
- Click Settings > Branding.
- In the upper end of the window, click White label to clear all branding items, except for Service name, End-user License agreement (EULA) URL, Management portal administrator's guide, Management portal administrator's help, and Email server settings.