Installing Agent for Synology
To install Agent for Synology, run the SPK file in Synology DiskStation Manager.
Agent for Synology supports only NAS devices with x86_64 processors. ARM processors are not supported. See the Synology knowledge center.
Agent for Synology 7.x
Prerequisites
- The NAS device runs DiskStation Manager 7.x.
- You are a member of the administrators group on the NAS device.
- There are at least 200 MB of free space on the NAS volume on which you want to install the agent.
- An SSH client is available on your machine. This document uses Putty as an example.
Limitations
- You cannot register Agent for Synology via QuickConnect. To register the agent, access the NAS device directly.
To install Agent for Synology
- Log in to Synology DiskStation Manager.
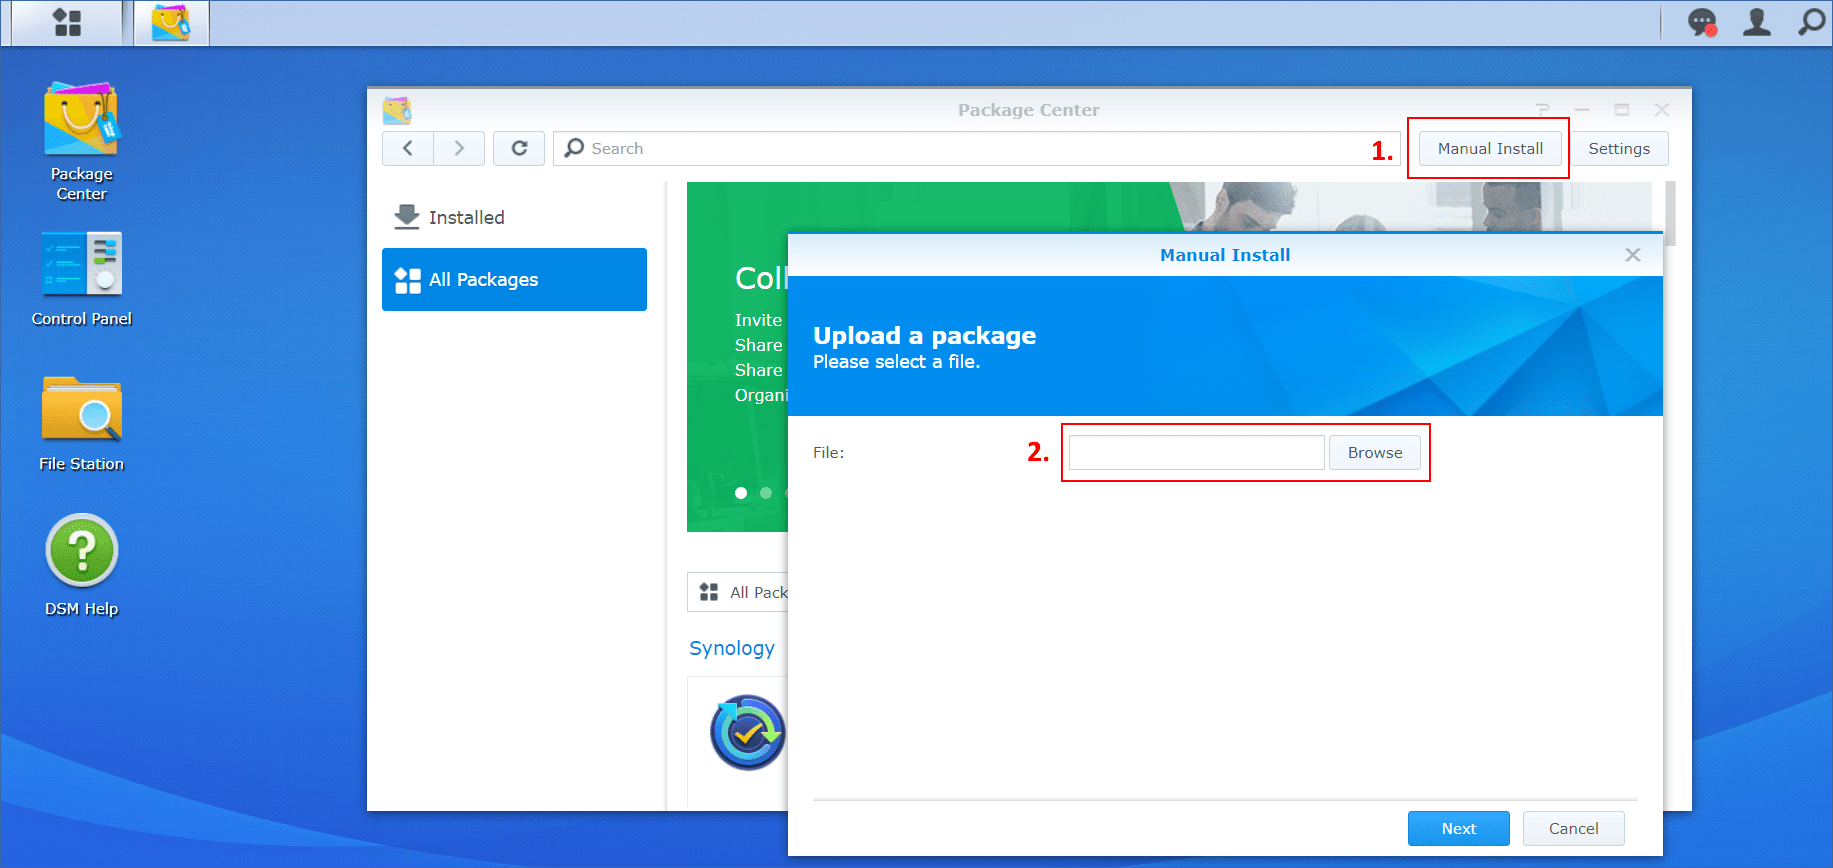
- Open Package Center.
-
Click Manual Install, and then click Browse.
-
Select the SPK file that you downloaded from the Cyber Protect console, and then click Next.
A warning that you will install a third-party software package is shown. This message is part of the standard installation procedure.
- To confirm that you want to install the package, click Agree.
- Select the volume on which you want to install the agent, and then click Next.
- Check the settings, and then click Done.
-
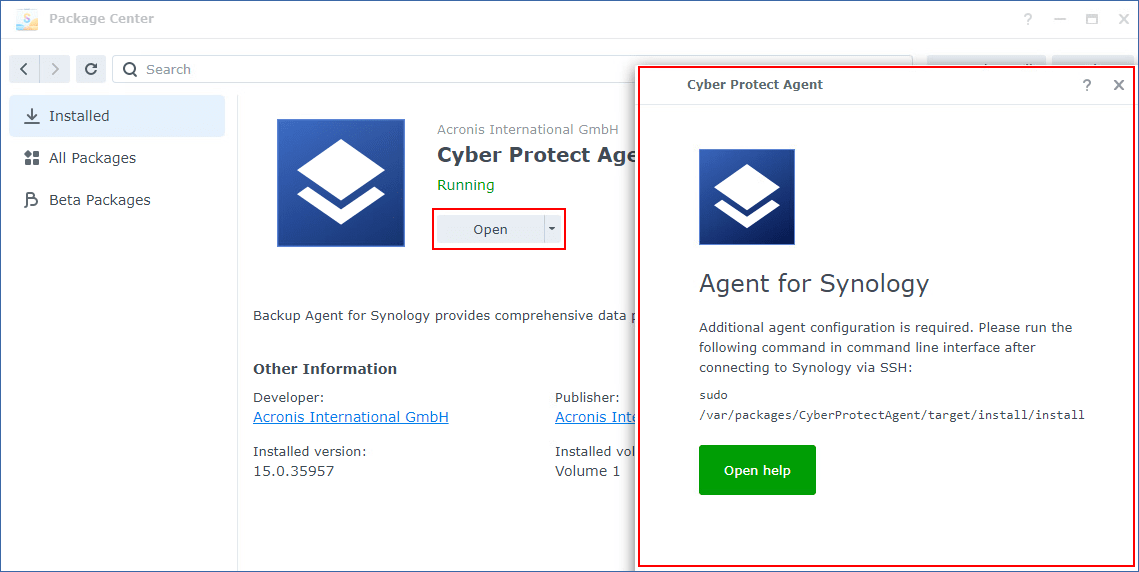
In Synology DiskStation Manager Package Center, open Cyber Protect Agent for Synology, and then verify that you see the following screen.
-
In Synology DiskStation Manager Control Panel, go to Terminal & SNMP, and then enable the SSH access to the NAS device.
-
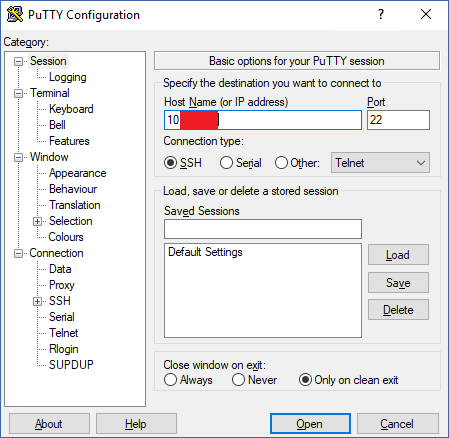
Run the install script on the NAS device by using an SSH client (in this example, Putty).
The script enables the root access to DSM 7.0 or later, which is required to configure the agent.
-
Start Putty, and then specify the IP address or host name of your Synology NAS device.
-
Click Open, and then log in as a Synology DSM administrator.
-
Run the following command.
sudo /var/packages/CyberProtectAgent/target/install/install
After the script starts, wait for 15 seconds during which the Cyber Protect services initialize.
-
-
In Synology DiskStation Manager Control Panel, go to Terminal & SNMP, and then disable the SSH access to the NAS device. The SSH access is no longer required.
-
In Synology DiskStation Manager Package Center, open Cyber Protect Agent for Synology.
-
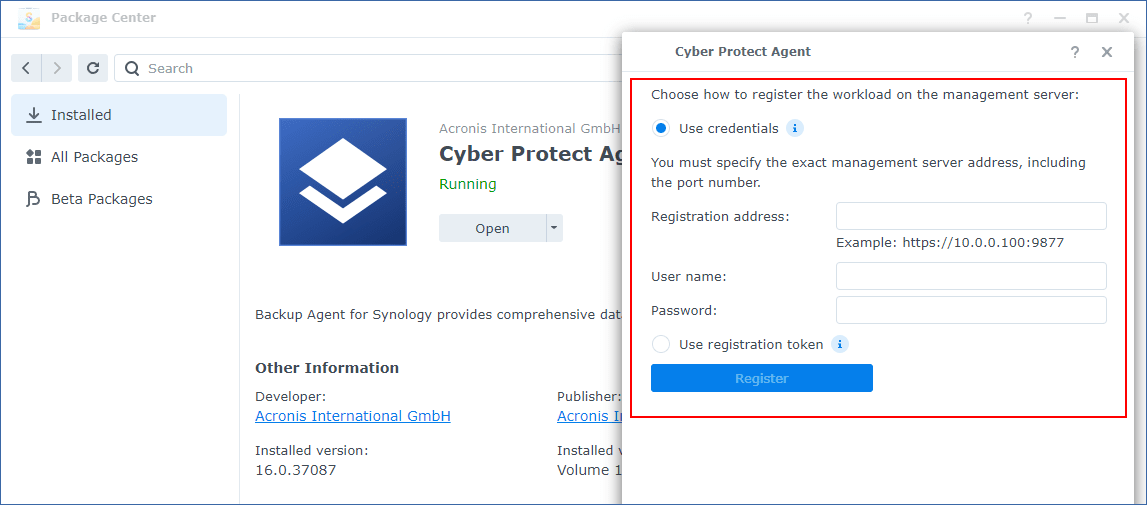
Select the registration method.
-
[To register the agent by using credentials]
-
[Only for on-premises deployment] In Registration address, specify the management server address and port.
-
In the User name and Password fields, specify credentials for the account under which the agent will be registered. This account cannot be a partner administrator account.
-
-
[To register the agent by using a registration token]
-
[For on-premises deployment] In Registration address, specify the management server address.
-
[For cloud-deployment] In Registration address, specify the exact data center address. The exact data center address is the URL that you see after you log in to the Cyber Protect console. For example, https://us5-cloud.acronis.com.
Do not use a URL format without the data center address. For example, do not use https://cloud.acronis.com. -
In the Token field, specify the registration token.
For more information on how to generate a registration token, see Generating a registration token.
-
- Click Register.
Agent for Synology 6.x
Prerequisites
- The NAS device runs DiskStation Manager 6.2.x.
- You are a member of the administrators group on the NAS device.
- There are at least 200 MB of free space on the NAS volume on which you want to install the agent.
To install Agent for Synology
- Log in to Synology DiskStation Manager.
- Open Package Center.
-
Click Manual Install, and then click Browse.
-
Select the SPK file that you downloaded from the Cyber Protect console, and then click Next.
A warning that you will install a package without a digital signature is shown. This message is part of the standard installation procedure.
-
To confirm that you want to install the package, click Yes.
- Select the volume on which you want to install the agent, and then click Next.
- Check the settings, and then click Apply.
-
In Synology DiskStation Manager Package Center, open Cyber Protect Agent for Synology.
-
Select the registration method.
-
[To register the agent by using credentials]
-
[Only for on-premises deployment] In Registration address, specify the management server address and port.
-
In the User name and Password fields, specify credentials for the account under which the agent will be registered. This account cannot be a partner administrator account.
-
-
[To register the agent by using a registration token]
-
[For on-premises deployment] In Registration address, specify the management server address.
-
[For cloud-deployment] In Registration address, specify the exact data center address. The exact data center address is the URL that you see after you log in to the Cyber Protect console. For example, https://us5-cloud.acronis.com.
Do not use a URL format without the data center address. For example, do not use https://cloud.acronis.com. -
In the Token field, specify the registration token.
For more information on how to generate a registration token, see Generating a registration token.
-
- Click Register.
When the registration completes, the Synology NAS device appears in the Cyber Protect console, on the Devices > Network Attached Storage tab.
To back up the data on the NAS device, apply a protection plan.