Note: Forward To is available only for Server and Web client contacts on MassTransit HP Servers.
The Forward To service is a configured output folder in the To send directory of a contact's mailbox which serves to specify to whom the files should be forwarded to. If you have a Forward To directory, you can put files for sending in it and when the connection with the files receiver is established, they will be transferred. The Web client contacts do not need to browse the Forward To folder. They can just select the files receiver in the Send Files tab of their MassTransit web account and the files will be placed in the Forward To folder when received on the server, then MassTransit will automatically forward them to the selected contact.
This forwarding method is configurable per contact. You need to perform the steps below for each contact that you want to use the Forward To feature.
Configure Forward To
Follow these steps to configure Forward To for a particular contact:
There are two ways to create the Forward To folder:
in Windows Explorer – create a folder manually in the To Send mailbox folder of a contact that you want to use the feature; the folder name should be Forward To ContactName, where ContactName should be the contact to whom the files will be forwarded to (e.g. Forward To Mary – in this example, the ContatName is Mary); when the folder is created, follow the steps below to complete the configuration of the feature for the selected contact;
in MassTransit Administrator – using the interface of the application, you can create the folder automatically – follow the steps bellow to create the folder and complete the configuration of the Forward To feature.
Using the MassTransit Administrator:
In the MassTransit Administrator, open the Contacts window by clicking on the Contacts button from the Navigation Bar or by selecting the Contacts option from the Window main menu.
Highlight the contact you want to configure Forward To for and click on the Edit... button. If you have created the Forward To folder manually in Windows Explorer, you should select the same contact in whose mailbox the folder was created.
In the Contact Information window that appears, open the Mailbox tab.
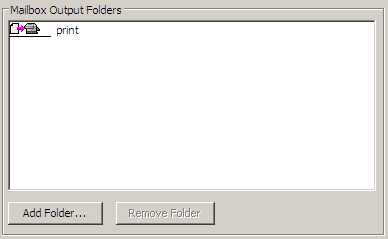
Under the "Mailbox Output Folders" area, you can configure the output folder which will appear in the To Send directory of the contact's mailbox. The configured output folder serves to specify to whom the files should be forwarded to. The name of the folder must be identical to the contact you want to forward files to.
To set the folder, click on the Add Folder... button:
Enter a name identical to the contact you want to forward files to in the Folder Name field.
Select the Forward To option from the Folder Type drop-down menu.
When the folder name and type are configured, click on the OK button to save this setting.
Note: If the contact you are configuring is NOT a Web client contact, skip to step 6. Otherwise, you need to:
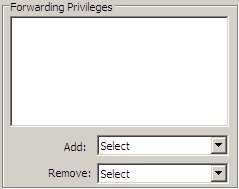
- Open the Security tab of the Contact Information window;
- In the Forwarding Privileges area, select the users the Web client contact will forward files to from the Add drop-down menu. The selected users should appear in the list above the drop-down menu. To remove users from the forwarding list, select them from the Remove drop-down menu.
When you are ready with the configuration, click OK in the Contact Information window. The newly configured output folder should appear automatically in the To Send mailbox directory of the contact, if not present.
Now, you can put files into the configured output folder of the edited contact and they will be forwarded to the configured contact the next time a connection between them is established.