Note: Groups of contacts are available only in MassTransit HP.
If you are using MassTransit HP, you can send files to a group of contacts at the same time by creating a Group entry in your Contacts window. A group can include anyone in your Contacts window including those who are using the Forward Via communication method.
Info: See Forwarding Via for an explanation of the Forward via feature.
Note: The name you choose for the Group appears in your Contacts window. Since Groups are composed of existing entries in your Contacts window, they do not count toward your total number of entries.
Adding a Group Entry
To add a new Group entry in the Contacts window, follow these steps:
General Steps
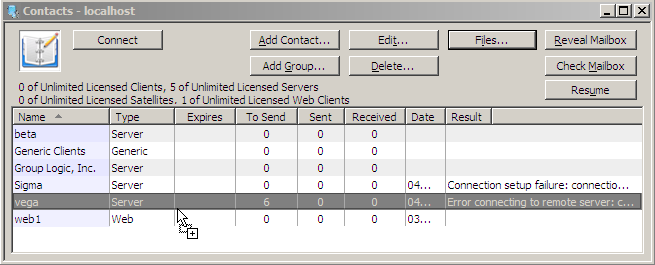
Open the Contacts window by clicking on the Contacts button from the Navigation Bar or by selecting the Contacts option from the Window main menu.
In the Contacts window, click on the Add Group... button.
The Group Information window appears. In the General tab, enter a name for the Group under the "Name" area.
Under the "Group Settings" area, there is a Make group members available to web clients instead of group checkbox. By default, Web client contacts can send files to the Group contact (if the correct privileges are granted) but not to each of the Group members. If you click that checkbox, it will disable Web client contacts to send files simultaneously to the Group members.
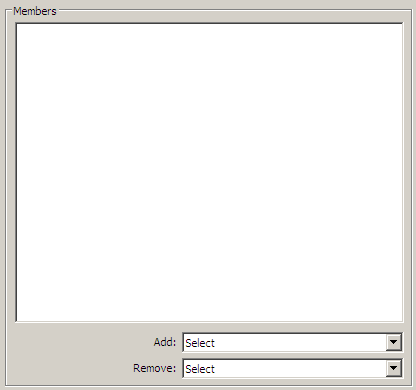
Under the "Members" area, click on the Add drop-down menu to add new members in the group. To remove members, use the Remove drop-down menu.
Setting Mailbox Options
When you add a new contact, MassTransit creates a folder for that contact called mailbox. MassTransit uses this folder to store all the incoming files for that contact.
Open the Mailbox tab of the Group Information window.
Select a location for the Group's mailbox. The default location is:
for MassTransit HP 7.0:
on 32-bit machines: C:\Program Files\Group Logic\MassTransit Server 7\User Mailboxes
on 64-bit machines: C:\Program Files (x86)\Group Logic\MassTransit Server 7\User Mailboxes
for MassTransit HP 7.1 to 7.6:
on 32-bit machines: C:\Program Files\Group Logic\MassTransit Server\User Mailboxes
on 64-bit machines: C:\Program Files (x86)\Group Logic\MassTransit Server\User Mailboxes
for MassTransit HP 7.6 and newer:
on 64-bit machines: C:\Program Files (x86)\Acronis\MassTransit Server\User Mailboxes To configure a different directory for the mailbox, select the Use Custom Mailbox option and click on the Select... button next to it to browse for a custom location.
Note: If you are changing from a custom mailbox to a default mailbox, or changing from one custom mailbox to another, MassTransit does not affect your original custom mailbox. To delete or move its contents, you must do so manually using the Windows Explorer.
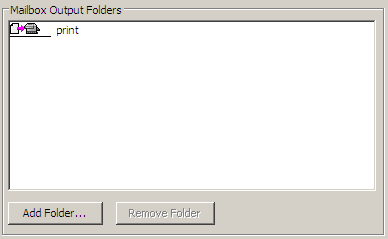
Under the "Mailbox Output Folders" area, you can configure an output folder which will appear in the To Send directory of the group's mailbox. The configured output folders serve to specify the service that the files are a subject of at the receiver. Using these folders, you can print on a remote printer or a hot folder. The names of the folders must be identical to those of devices such as printers or hot folders that the remote contact has defined.
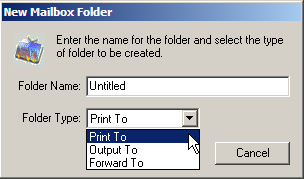
To set a folder, click on the Add Folder... button. Then, enter a name identical to those of devices such as printers or hot folders that the remote contact has defined and type for the folder. There are three folder types available:
Print To – this folder type specifies that the files in the folder will be printed at the receiver side.
Output To – for files that will be moved to a different folder at the receiver.
Forward To – for files that will be forwarded to another contact at the receiver side.
When the folder name and type are configured, click on the OK button to save this setting.
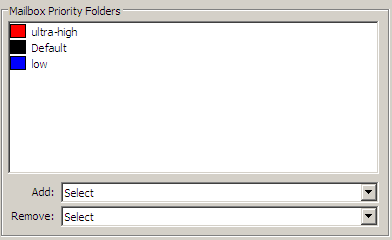
Under the "Mailbox Priority Folders" area, you can specify a folder for each set priority. The specified folders appear in the To Send directory of the group's mailbox. They define the priority for sending the files.
You can add and remove priority folders using the Add and Remove drop-down menus.
Note: To set priority folders, you need to configure priorities first. Find detailed information about how to do that on the Transferring Files page.
Completing the Group Creation
Click on the OK button in the right bottom corner of the Group Information window.
The group creation is complete. The newly created Group contact should appear in the Contacts window.
Using a Group
You use a Group contact to send files just as you do an ordinary entry in the Contacts window including forwarding files to a group.
Info: See Forwarding for information about forwarding files.
Files are sent to every member of the group.
You do not set triggers for sending files when you create a Group. Instead, the triggers for each individual group member affect when files are sent for each member of the group.
You may drag files to a Group contact in the Contacts window to designate the file for sending to the Group.
When you display the Group entry in the User Filter, the files you have designated to send to the whole Group are listed in the To Send tab. They are listed, as well, for each individual member in the Group.
In the To Send tab of the Files window, you may select the Group entry and click Add Files or drag files to the Group entry.
Files queued to a group are not marked as Sent until all members of the group have received the files.
Log entries are entered for the Group and each individual member just as they are for other entries.
In MassTransit 7.1 and later, the MassTransitEngine.cfg file contains a new section called "Group Send Settings" with the following option available: ORIGINATING_USER_EXCLUDED_FROM_GROUP_SEND= If this setting is set to true, when a member of a group forwards files to the group, everyone in the group except the originating sender will have the file queued for them. The default value is false.
Note: All lines beginning with "%%" in the MassTransitEngine.cfg file are considered commented and therefore ignored. Please ensure that all settings you change are uncommented (if you see "%%" characters at the beginning of any of the settings you modify, delete them).
The MassTransitEngine.cfg file is located:
for MassTransit 7.6 and later:
on 64-bit machines:
C:\Program Files (x86)\Acronis\MassTransit Server
for MassTransit 7.1 to 7.6:
on 32-bit machines:
C:\Program Files\Group Logic\MassTransit Server
on 64-bit machines:
C:\Program Files (x86)\Group Logic\MassTransit Server
for MassTransit 7.0.x:
on 32-bit machines:
C:\Program Files\Group Logic\MassTransit Server 7
on 64-bit machines:
C:\Program Files (x86)\Group Logic\MassTransit Server 7