Creating a Task
Tasks are created with a wizard. To create a task, do the following:
1. Open the task creation wizard:
•In the DeviceLock Management Console, expand DeviceLock Content Security Server > Discovery Server > Tasks, right-click Tasks, and then click Create Task on the shortcut menu.
2. In the Select Units dialog box that appears, select the units that will be scanned by the task:
•Select one or more units in the Available Units list, and then click Add. To select multiple units, click while holding down the Shift or Ctrl key. The units you have added appear in the Selected Units list.
For each unit, the list indicates the unit’s name and type. The name serves to identify the unit. The type identifies the unit’s intended purpose: scan computers (
Computers unit type) or scan Elasticsearch nodes (
Elasticsearch nodes unit type). For the
Computers unit type, in brackets it is indicated what kind of computer list the given unit has:
Static list or
Dynamic list.
To review the settings of the selected unit, click the View button. In the dialog box that appears, you can view but not change the unit’s settings.
3. Click Next to continue.
4. In the Select Rules & Actions dialog box that appears, select the rules that will be applied by the task:
•Select one or more rules in the Available Rules & Actions list, and then click Add. To select multiple rules, click while holding down the Shift or Ctrl key. The rules you have added will appear in the Selected Rules & Actions list.
For each rule, the list provides the following rule information:
•Rule Name - The name that identifies the rule.
•Rule Type - The type of the content group used by this rule for content discovery.
•Applies To - The unit types for which this rule can be used.
•Action(s) - The identifiers of the actions this rule performs during content discovery.
The list of available rules is limited to the rules that apply to the type of the units selected for this task. For example, when only Elasticsearch units are selected, the list contains the rules that apply to Elasticsearch nodes only or to Computers and Elasticsearch nodes, and does not contain the rules that apply to Computers only. When units of all types are selected, the list contains all existing rules.
To review the settings of the selected rule, click the View button. In the dialog box that appears, you can view but not change the rule’s settings.
5. Click Next to continue.
6. In the Set Task Schedule & Advanced Settings dialog box that appears, you can change the name of the task, configure the task to run on a scheduled basis, and specify additional settings that affect execution of the task:
•Task Name - Identifies the name of the task. The task will appear under that name in the management console.
•Active - Select this check box to activate the task according to the schedule, or clear to deactivate it.
If the Active check box is not selected, the task will not be executed by the schedule.
•Schedule - To configure a schedule for the task, use the following options:
•One Time - The task will be launched once on the time and date specified. Choose the date and time to run the task, or select the Now check box to run the task right after it has been created or modified.
Note: If you specify a date/time in the past, the following message is displayed when you click Next: “The specified date is earlier than the current date.” |
•Hourly - The task will be executed on an hourly basis. The task will recur after the specified number of hours. You will be able to specify the number of hours to pass between scheduled scanning attempts.
•Daily - The task will be executed on a daily basis. The task will recur after the specified number of days. You will be able to specify the number of days to pass between scheduled scanning attempts.
•Weekly - The task will be executed on a weekly basis. The task will recur after the specified number of weeks. You will be able to specify the number of weeks to pass between scheduled scanning attempts, and set days of weeks on which the scanning task will be executed.
•Monthly - The task will be executed every month on a specified day. You will be able to specify calendar months on which the task will be executed. You will be also able to specify calendar days of month or days of week on which the scanning task will be executed.
Note: If you configure a recurrent task, the task will run periodically according to a set schedule. If, however, a task execution does not finish before a next run of the task upon schedule, the next run of that task is delayed until the preceding execution of the task has finished. |
•Advanced Settings - Use these settings to control the task’s behavior during execution:
•Stop task if runs longer than - Specifies that the task will be force stopped if it takes longer than a specified period of time to complete.
This setting is used to ensure successful automated operation even if the rules are too complex or the scanned data set too big to complete on a timely basis.
•Scan priority - Specifies process priority and sets the amount of simultaneous scanning threads depending on the number of available processors and/or processor cores.
•The Below Normal or Low setting will only use one processor/core for scanning and set the “Below Normal” or “Low” process priority, respectively.
•The Above Normal or Normal setting will use one half of all available processors/cores and set the “Above Normal” or “Normal” process priority, respectively.
•The High setting will use all available processors/cores except one, and set the “High” process priority.
•The Realtime setting will devote all available processors/cores to the scanning task, and set “Realtime” priority to the process.
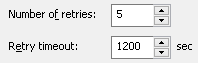
•Number of retries - The number of times that will be performed if the scanning attempt returns status indicating an error. The value of 0 means that no retries will be performed if the first attempt fails.
•Retry timeout - Specifies how many seconds DeviceLock waits before attempting to perform the next scanning attempt in the case the previous attempt failed.
•Keep-alive timeout - Specifies the number of hours the server will wait for each agent to collect scanning logs. If no logs were collected after the timeout has passed, the server will stop waiting for that agent.
If the agent reports later on and after the timeout has passed, the logs will be collected and processed as usual.
7. Click Next. The confirmation dialog will appear listing parameters of the newly created task. Click Finish to complete the wizard. The newly created task will be saved and scheduled.
You can edit, delete, duplicate or run tasks, refresh task list or generate a new report by using the task’s shortcut menu. For description of the menu, see
Tasks Node earlier in this document.