Managing Units
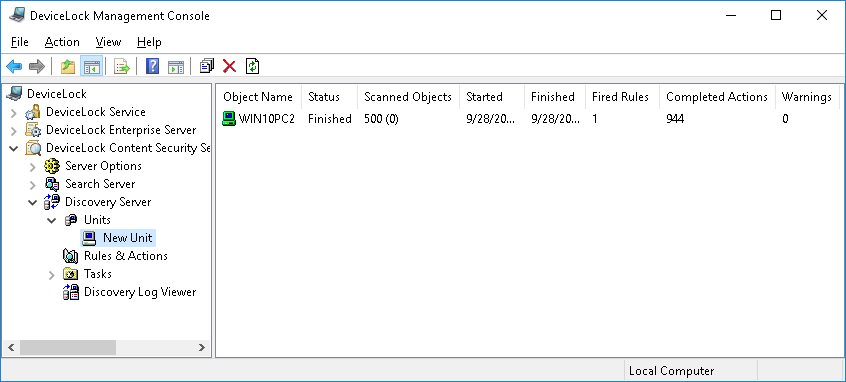
The console displays units in the console tree under DeviceLock Content Security Server > Discovery Server > Units.
When you select a unit in the console tree, the details pane displays the contents of that unit:
The details pane lists the following information about each computer held in the selected unit:
•Object Name - The name that identifies the computer.
•Status - The computer’s status. The status can receive one of the following values:
•Waiting - The computer is waiting for the scanning task to be run on that PC. This status is assigned when the applicable Task receives the status of Running.
•Scanning - The computer is currently being scanned.
•Finished - Indicates successful completion of the scanning task. The scanning of the computer has successfully completed.
•Expired - Indicates a problem that impedes a scan task. The computer became unavailable during the execution of the task (for example, the computer has disconnected from the network, the network settings have changed, or some other problem did not allow the Discovery agent to transfer data to the server), and the computer did not respond for the period of time specified by the
Keep-alive timeout parameter.
The
Expired status is also assigned if the scan task takes longer than specified by the
Stop task if runs longer than parameter, which forces it to terminate prematurely.
•Access is denied - Indicates a problem accessing the resource (e.g. computer). This can mean that the unit’s specified credentials did not work (certificate or startup account error depending on configuration).
•Installation failed - Indicates there was a problem installing Discovery Agent.
•No License - Indicates that you don’t have enough licenses to scan the computer.
•Canceling - Indicates that the scanning task is being canceled.
•Canceled - Indicates that the task has been canceled.
•Computer is unavailable - Indicates that either of the following issues has occurred after the number of attempts specified by the
Number of retries parameter or on the expiry of the time period determined by the
Retry timeout parameter:
•Failed to connect to a remote computer in order to begin scanning (in agentless mode).
•Failed to connect to a remote computer and communicate the scanning task to the Discovery agent. This can happen because the computer was unavailable (e.g. turned off or not connected to the network), or the Discovery agent was not installed or launched on that computer while the agent installation setting is not enabled in the unit properties (the Install Discovery Agent automatically flag is not set).
•Scanned Objects - Indicates the total number of scanned objects. The value in parentheses indicates the number of scanned nested objects.
Example: “1 (20)” means 1 container (archive) with 20 files inside.
For each unit, the list counts and displays the total number of objects inspected during the most recent scan of that unit. The counter of scanned objects is reset each time a new scan of the unit starts. The same applies to other counters in this list.
For Elasticsearch units, scanned objects are document fields rather than documents. The counter of scanned objects displays the total number of fields inspected when scanning the Elasticsearch unit.
•Started - Indicates the date and time when the server started scanning the unit.
•Finished - Indicates the date and time when the server finished scanning the unit.
•Fired Rules - The number of different rules that discovered a match. If a certain rule discovered more than one match, it will be still counted as 1.
•Completed Actions - Indicates the number of actions performed during the scan.
Example: If a rule discovers a match, deleted a file, logged the event and sent a notification, this will count as 3 actions.
•Warnings - Indicates the number of scanning errors. This counter is increased if a matching object was discovered but it was impossible to take an action, or if content analysis was impossible (e.g. an attempt to analyze a corrupted or password-protected archive).
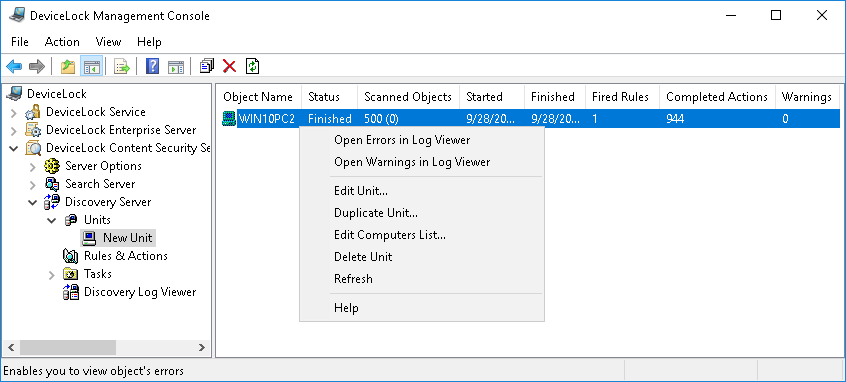
The shortcut menu on a unit in the console tree includes the following commands:
•Edit Unit - Opens a dialog box where you can view or change the settings of the selected unit.
•Duplicate Unit - Creates a new unit with the settings copied from the selected unit. You can view or change the settings of the new unit in the dialog box displayed by this command.
By default, the new unit name consists of the Copy of prefix followed by the name of the selected unit. When you create two or more copies of a unit, the new unit name includes a numeric suffix indicating the number of the copy.
•Edit Computers List - Opens a dialog box where you can view or change the list of computers included in this unit.
•Delete Unit - Deletes the selected unit.
•Refresh - Updates the list in the details pane with the latest information.
Since the console does not automatically update information displayed in the details pane, you need to update the list by using the Refresh command.
You can use the shortcut menu to manage computers held in the unit. To open the menu:
1. Expand DeviceLock Content Security Server > Discovery Server > Units in the console tree.
2. In the list under the Units node in the console tree, click the unit you want to manage.
A list of computers will appear in the details pane.
3. Right-click a computer in the details pane.
The shortcut menu will appear.
The shortcut menu on a computer in the details pane includes all commands that appear on the shortcut menu of the unit selected in the console tree as well as the following commands that apply to the selected computer:
•Open Errors in Log Viewer - Opens the Log Viewer with pre-defined filter settings to only display scanning errors for the selected computer. All errors occurred in all tasks and during the entire period of time will be displayed.
•Open Warnings in Log Viewer - Opens the Log Viewer with pre-defined filter settings to only display scanning warnings for selected computer. All warnings occurred in all tasks and during the entire period of time will be displayed.