Create/Edit Task
Each task contains its own set of computers, actions and configuration parameters.
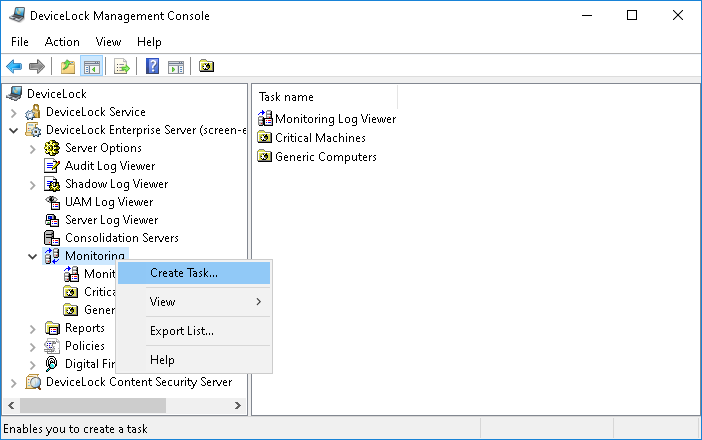
To create a new task, use Create Task from the shortcut menu of the Monitoring item. To edit an existing task, select this task in the console tree and use Edit Task from the shortcut menu. If you wish to delete the task permanently, select this task in the console tree and use Delete Task from the shortcut menu.
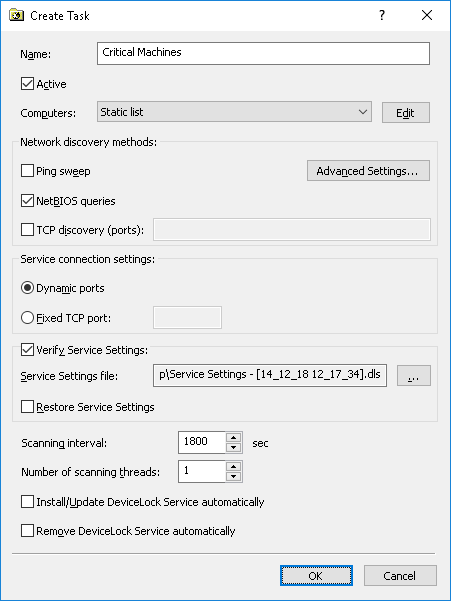
The following dialog box is used to create or edit a monitoring task:
•Name - The name of the task identifies this task in the tasks list and in the monitoring log (see
Monitoring Log Viewer).
•Active - If selected, allows DeviceLock Enterprise Server to execute this task. Clear this check box if you wish to disable the task but do not want to delete it permanently.
•Computers - The type of the computers list used to define what computers will be monitored by this task.
Click the Edit button to configure the list type selected in Computers.
Two computer list types are supported:
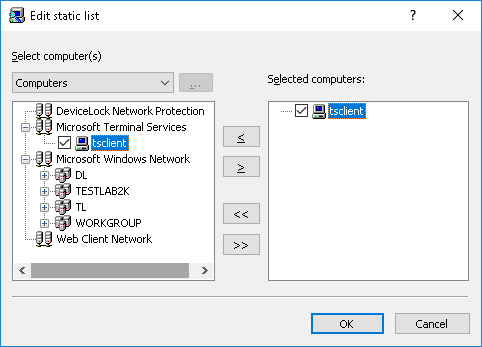
1. Static list - All of the computers are specified in the list by their names or IP addresses. Since this list is static, even if some computer no longer exists in the network, it will be monitored (and the error logged) until its record is deleted from the list manually.
Computers that will be monitored should be specified in the right list. You have to select needed computers in the left list and then move them to the right list by clicking the

button.
If you need to exclude some computers from the monitoring process, select them in the right list and then click the

button.
By using

and

buttons, you can add and remove all available computers at the same time (no need to select computers in the list).
There are several flexible ways to choose network computers from the left list:
•Active Directory - Browse and select computers from Active Directory organizational units (OUs).
•Computers - Browse and select computers from the network tree.
•LDAP - Browse and select computers from the tree of a LDAP (Lightweight Directory Access Protocol) compatible directory service.
•From File - Load the list of computers from a text file and then select computers form that list. To open a file, click the

button. The file must contain each computer’s name or IP address on a separate line.
•Manual - Type computer names to select computers. Each computer’s name or IP address must be typed on a separate line.
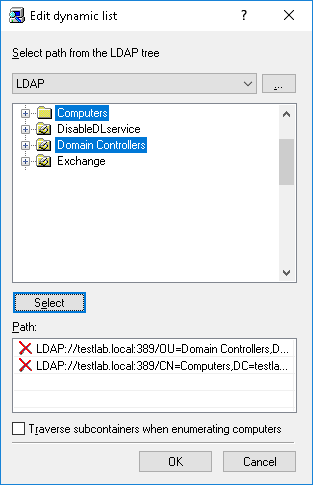
2. Dynamic list - Instead of computer names or IP addresses, the dynamic list contains a path to the container (for example, an organizational unit) in the directory service tree (such as Active Directory, Novell eDirectory, OpenLDAP and so on). Every time the task is executing, DeviceLock Enterprise Server retrieves all the computers that currently exist in this container. Hence, if some computer was removed from the directory tree or moved to another container it will not be monitored anymore. And vice versa, if there is some new computer that did not exist in the container at the time the task was created/modified, but was added to this container later, it will be retrieved and monitored at the time of executing the task. You can select one or more containers.
The path to the selected containers is specified in the Path field. Select containers in the tree by clicking while holding down the Shift or Ctrl key. Then click the Select button. To deselect the container, click the red X in the Path field.
Select the Traverse subcontainers when enumerating computers check box to allow DeviceLock Enterprise Server to retrieve computers from all the nested containers located inside the selected container. Otherwise, if this check box is unselected all nested containers are ignored, and only computers located directly in the selected container are retrieved at the time of executing the task.
There are two modes to work with the directory service:
•Active Directory - Browse and select a container from the Active Directory tree.
While the Active Directory tree can also be displayed by choosing the LDAP option (see below), the Active Directory mode results in greater efficiency between the directory service and DeviceLock Enterprise Server service and thus resource savings.
If you need to supply alternative credentials to access Active Directory, click the
button to open the
Credentials dialog box and specify the needed user account and its corresponding password.
Note: If no alternative credentials are specified when accessing Active Directory, DeviceLock Enterprise Server uses the credentials of the account under which its service started. For more information, see the
Log on as parameter description. |
Select the Synchonization check box to allow DeviceLock Enterprise Server to use the internal synchronization mechanisms provided by Active Directory. This will dramatically reduce the load on the domain controller and speed up the process of retrieving computers at the time of task execution.
Note: Administrative access to Active Directory is required to use the synchronization function. |
•LDAP - Browse and select a container from the tree of a LDAP (Lightweight Directory Access Protocol) compatible directory service.
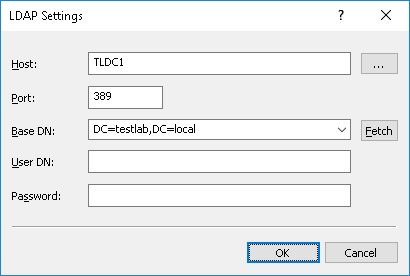
To configure a connection to the LDAP server, click the
button and open the
LDAP Settings dialog box.
•Host - The name or the IP address of the LDAP server to connect to.
•Port - The TCP port on which the LDAP server accepts connections. The default port is 389.
•Base DN - The starting point for you to browse the directory tree. You must use the LDAP string representation for distinguished names (for example, cn=qa,o=SMARTLINE,c=US). Leave the Base DN box blank to start browsing from the root.
By clicking the Fetch button, you can get all the published naming contexts.
•User DN - The distinguished name (DN) of the directory user that allows connection to the directory. You must use the LDAP string representation for distinguished names (for example, cn=admin,o=SMARTLINE,c=US).
Note: If no user is specified when accessing the LDAP server, DeviceLock Enterprise Server uses the credentials of the account under which its service started. For more information, see the
Log on as parameter description. |
•Password - The user’s password.
•Network discovery methods - Types of network scanning that will be used to determine the status (available or unavailable) of monitored computers.
Upon executing the task, DeviceLock Enterprise Server uses all selected discovery methods in their given order until the status available is returned for the target computer. If none of the selected methods returns the available status, then the target computer receives the unavailable status.
Three types of the network scan are supported:
•Ping sweep - DeviceLock Enterprise Server sends a regular ICMP ping to the target computer and then waits for its reply.
•NetBIOS queries - If the Client for Microsoft Networks is installed on the target computer, then this computer will answer the NetBIOS type query sent by DeviceLock Enterprise Server.
•TCP discovery (ports) - DeviceLock Enterprise Server checks for a particular open TCP port on the target computer. Using the comma (,) or semicolon (;) as a separator, you can specify several ports so they will be checked one by one in their given order.
Note: A firewall running on a target computer can block the sending of some or all network packets so such a computer will be detected as unavailable even if it is up and running. |
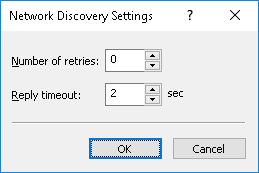
To define additional parameters for discovery methods, click the Advanced Settings button and open the Network Discovery Settings dialog box.
•Number of retries - The number of times that DeviceLock Enterprise Server will perform each type of scan when it returns the unavailable status. A value of zero (0) in this field means that no retries will be performed for that scan type after the first failed attempt.
•Reply timeout - The time in seconds DeviceLock Enterprise Server will wait for a response from the target computer for each type of scan. If DeviceLock Enterprise Server is running on a slow or busy network, you may need to increase this timeout.
•Service connection settings - These options define how DeviceLock Enterprise Server should connect to DeviceLock Services on the monitored computers to obtain service version, settings, etc. If the correct connection settings are not specified, DeviceLock Enterprise Server will not be able to connect to monitored services and their computers will not receive the available status.
There are two connection options:
•Dynamic ports - To instruct DeviceLock Enterprise Server to use dynamic ports for communication with DeviceLock Service, select this option.
•Fixed TCP port - If DeviceLock Service is configured to accept connections on a fixed port, then you should select this option and specify that port number.
Note: In order to successfully connect to monitored DeviceLock Services and obtain needed information from them, DeviceLock Enterprise Server must have at least Read-only access rights to these services. If this task also needs to write some settings to monitored DeviceLock Services, then DeviceLock Enterprise Server requires Full access rights to these services. To connect to monitored DeviceLock Services, DeviceLock Enterprise Server uses the credentials of the account under which its service started. It can also use DeviceLock Certificate authentication, if a private key is specified. For more information, see the description of parameters
Log on as and
Certificate Name. |
•Verify Service Settings - Select this check box if you want the monitoring task to check DeviceLock Service settings by comparing them with particular master settings.
When this check box is selected, the monitoring task on each monitored computer compares DeviceLock Service settings with those in the master policy. If any settings are detected that do not match the master policy, the status of the computer changes to “Settings are corrupted”. In addition, a “Settings are corrupted” event is recorded in the monitoring log. The non-matching settings are listed in the event record, and can be inspected by using the View details command on the “Settings are corrupted” event in the
Monitoring Log Viewer. One more way to view the non-matching settings is by using the View details command on a monitored computer that has the status of “Settings are corrupted” (for details, see
Task and Its Monitored Computers).
•Service Settings file - The path and name of the file that holds DeviceLock Service settings considered as the master policy. The button next to this field is used to select a file.
The master policy is assigned to the task by loading a particular file with DeviceLock Service settings. This file can be created in the DeviceLock Management Console, DeviceLock Group Policy Manager and/or DeviceLock Service Settings Editor.
When performing the check, the task gets the settings from the monitored computers and compares them with the settings file assigned as the master policy to that task.
All non-configured settings (those that have the Not Configured state) in the master policy are disregarded during the check. This feature can be used to selectively verify the settings of interest, while allowing other settings to differ from the master policy.
To load a file, click the
button. Since the signature of the file is not validated at this step, a signed or non-signed file can be selected. The path and name of the selected file are displayed in the
Service Settings file box. In the case of a signed file, the box displays the file’s path and name embraced in parentheses.
When editing a task to which a master policy has already been assigned, the master policy settings can be exported to a file by clicking the Save button.
•Restore Service Settings - Select this check box if you want the monitoring task to replace the corrupted settings on the monitored computers with the settings from the master policy. When this check box is selected, the task not only checks DeviceLock Service settings but also restores them in case of their change or corruption.
•Scanning interval - The time in seconds that should pass after a task completes and before DeviceLock Enterprise Server will start executing the same task again.
•Number of scanning threads - The maximum number of threads that can be used by this task simultaneously. You can increase this number to parallelize the process of computer scanning. However, a larger number of threads requires more hardware resources (especially RAM and network bandwidth) for DeviceLock Enterprise Server.
•Install/Update DeviceLock Service automatically - Select this check box if you want to install DeviceLock Service to monitored computers.
•Remove DeviceLock Service automatically - Select this check box if you want to remove DeviceLock Service from monitored computers.
Note: If the DeviceLock Enterprise Server service is configured to run under the Local System account, you cannot install, update or remove DeviceLock Services on remote computers using a Monitoring task on DeviceLock Enterprise Server. |