Note: The Server contacts are available in MassTransit HP only.
Server contacts are all MassTransit contacts created for connecting to other MassTransit servers. You can use various communication methods to connect to other MassTransit servers:
Info: For more information about communication methods, see Communications page.
Adding a New Client Entry
There are two options for adding an HP Server entry to your Contacts window:
Receive a call from a Server which automatically adds an entry in your Contacts window for that Server if security settings allow a connection.
Create a contact for another MassTransit Server and then place a successful call to that Server.
To create a Server contact, follow these steps:
General Steps
Open the Contacts window by clicking on the Contacts button from the Navigation Bar or by selecting the Contacts option from the Window main menu.
In the Contacts window, click on the Add Contact... button.
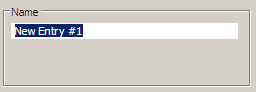
The Contact Information window appears. In the General tab, enter a name for the Client contact under the "Name" area.
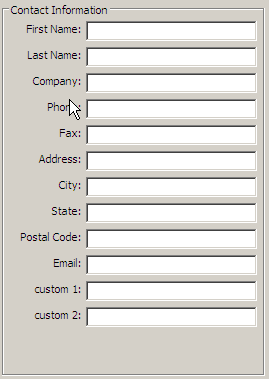
Enter the Server information in the "Contact Information" area of the General tab.
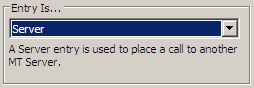
Under the "Entry Is..." area, select the Server option:
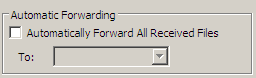
Under the "Automatic Forwarding" area, if you want to forward automatically all received files from that Server contact to another contact, check the Automatically Forward All Received Files checkbox. Then, select the contact that you want to forward all files to from the To drop-down menu.
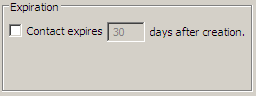
Under the "Expiration" area, select an expiration period if you want that contact to expire. After the contact is expired, he will be removed from the list in the Contacts window and his mailbox will be deleted.
Configuring a Communication Method and Automatic Calls
Open the Outgoing Calls tab of the Contact Information window.
Under the "Outgoing Calls" area, select and configure a communication method for connecting to the server.
Note: For detailed information about the communication methods, see the Communications page.
In the Password for initial connection to remote server field, enter the password of the remote server for receiving calls from unknown servers.
Note: See the Receiving a Call from an Unknown Server section for more information.
The "Multiple Stream Connection ID" area appears if you have selected one of the following communication methods: TCP/IP, TCP/IP Secure, and UDT. MassTransit allows you to divide the communication stream into a few streams. Enter the number of streams that you want the flow to be divided into in the field of this area.
In the "Automatically Place Calls" area below, you can set a trigger condition for placing an automatic call to that contact:
When number of files to send is at least __ – selecting this option places a call to the Server contact every time the specified number of files to send is reached.
Every __ Day(s)/ Minute(s)/ Hour(s) – this option allows you to set a period for placing an automatic call to the Server contact.
Every day at __ AM/PM – places an automatic call daily at the specified time.
After errors, retry in __ minute(s) and retry __ time(s) before giving up. – in case an error appears and the automatic call cannot be placed when the trigger condition is complete, you can configure the server to retry calling after the specified period. In addition, you can set the number of times the server would retry placing the call.
Setting Mailbox Options
When you add a new contact, MassTransit creates a folder for that contact called mailbox. MassTransit uses this folder to store all the incoming files for that contact.
Info: For detailed information about contacts' mailboxes, see the Mailboxes page.
Open the Mailbox tab of the Contact Information window.
Select a location for the Server's mailbox. The default location is:
for MassTransit HP 7.0:
on 32-bit machines: C:\Program Files\Group Logic\MassTransit Server 7\User Mailboxes
on 64-bit machines: C:\Program Files (x86)\Group Logic\MassTransit Server 7\User Mailboxes
for MassTransit HP 7.1 to 7.6:
on 32-bit machines: C:\Program Files\Group Logic\MassTransit Server\User Mailboxes
on 64-bit machines: C:\Program Files (x86)\Group Logic\MassTransit Server\User Mailboxes
for MassTransit HP 7.6 and newer:
on 64-bit machines: C:\Program Files (x86)\Acronis\MassTransit Server\User Mailboxes To configure a different directory for the mailbox, select the Use Custom Mailbox option and click on the Select... button next to it to browse for a custom location.
Note: If you are changing from a custom mailbox to a default mailbox, or changing from one custom mailbox to another, MassTransit does not affect your original custom mailbox. To delete or move its contents, you must do so manually using the Windows Explorer.
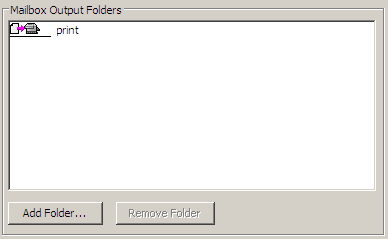
Under the "Mailbox Output Folders" area, you can configure an output folder which will appear in the To Send directory of the contact's mailbox. The configured output folders serve to specify the service that the files are a subject of at the receiver. Using these folders, you can print on a remote printer or a hot folder. The names of the folders must be identical to those of devices such as printers or hot folders that the remote contact has defined.
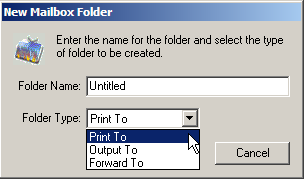
To set a folder, click on the Add Folder... button. Then, enter a name identical to those of devices such as printers or hot folders that the remote contact has defined and type for the folder. There are three folder types available:
Print To – this folder type specifies that the files in the folder will be printed at the receiver side.
Output To – for files that will be moved to a different folder at the receiver.
Forward To – for files that will be forwarded to another contact at the receiver side.
When the folder name and type are configured, click on the OK button to save this setting.
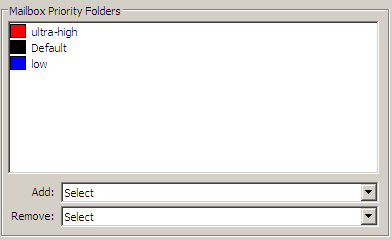
Under the "Mailbox Priority Folders" area, you can specify a folder for each set priority. The specified folders appear in the To Send directory of the contact's mailbox. They define the priority for sending the files.
You can add and remove priority folders using the Add and Remove drop-down menus.
Note: To set priority folders, you need to configure priorities first. Find detailed information about how to do that on the Transferring Files page.
Setting Contact Privileges
Open the Security tab of the Contact Information window.
Info: For a detailed information about privileges, see the Contact Privileges section of this page.
Completing the Contact Creation
Click on the OK button in the right bottom corner of the Contact Information window.
The contact creation is complete. The newly created Server contact should appear in the Contacts window.
Receiving a Call from an Unknown Server
A calling Server is considered unknown until added to the receiving Server's Contacts window.
To accept a call from an unknown HP Server, follow these steps:
Open the Setup window by clicking on the Setup button from the Navigation Bar or by selecting the Setup... option from the Window main menu.
In the Setup window, click the Special tab.
In the Server-to-Server Connctions area, click the option Accept Calls from Unknown MassTransit Servers.
If you check the Require Password checkbox, you can enter a password (in the field next to the Require Password checkbox) which will be required for the calling server the first time they call you. Thereafter, a password will not be required, because MassTransit will recognize the calling Server.
Note: For security, MassTransit encrypts passwords before storing them. As a result, scripts cannot access passwords.
Note: Before calling another Server, make sure that the contact running the software has chosen to receive calls from unknown Servers and ask if a password is required.
If you do NOT want to accept calls from unknown servers, follow the steps above but click the Decline Calls from Unknown MassTransit Servers option in step 3 (Require Password checkbox will be disabled).
Identifying Your Server
Before connecting to another HP Server, you may want to verify the name to be used by MassTransit to identify yourself to the remote Server.
Note: This name will be used to identify you at all contacts you have.
Open the Setup window by clicking on the Setup button from the Navigation Bar or by selecting the Setup... option from the Window main menu.
In the Setup window, select the Outgoing Calls tab.
Verify or change the name you want to use to identify yourself to the other Servers in the Server Name area of the window.
Connecting to Other Servers
When you have created a Server entry, you can connect to it by following these steps:
Open the Contacts window by clicking on the Contacts button from the Navigation Bar or by selecting the Contacts option from the Window main menu.
In your Contacts window, select the name of the other Server and click on the Connect button. You may need to type a password if the other server has required one.
Note:Before calling another Server, make sure that the contact running the software has chosen to receive calls from unknown Servers and ask if a password is required.
When the connection is made, the calling Server is automatically added to the receiving Server's Contacts window.
Info: See the Transferring Files page for information about sending files to a Server.