Power User Insights are guest blogs written by advanced users who share their tips, tactics and techniques so you can get the most out of Acronis products.
Paul Larini has been using Acronis True Image and making it work in WinPE for many years. He developed MustangPEBuilder to make customizing WinPE with Acronis software easy for thousands of users.
Upgrading your hard drive or getting a new computer should be a good thing, something to be excited about… not a chore to be dreaded. Yet changing hardware can be a challenge, unless you’re using Acronis Universal Restore.
When it comes to moving an existing Windows system to a new computer, Acronis Universal Restore is a tremendously helpful tool. In many cases Windows will not boot when the system is loaded on a new computer with dissimilar hardware. Universal Restore solves that problem and makes booting the system in the new hardware environment seamless.
Universal Restore is also helpful when switching disk types in the same computer. Let’s say you’re upgrading from a hard drive connected to the SATA bus to a fast PCI-based NVMe M.2 drive. If the change in hardware causes a bootability problem, Universal Restore is there to solve the issue.
The first step to using Universal Restore is to prepare the bootable media for your Acronis product. Acronis True Image 2017 makes that easy by providing a separate download for the Universal Restore Media Builder. You can download it from your Acronis Account by clicking the “Acronis Universal Restore” link...
...or by downloading it from the Tools menu of Acronis True Image 2017’s main window.
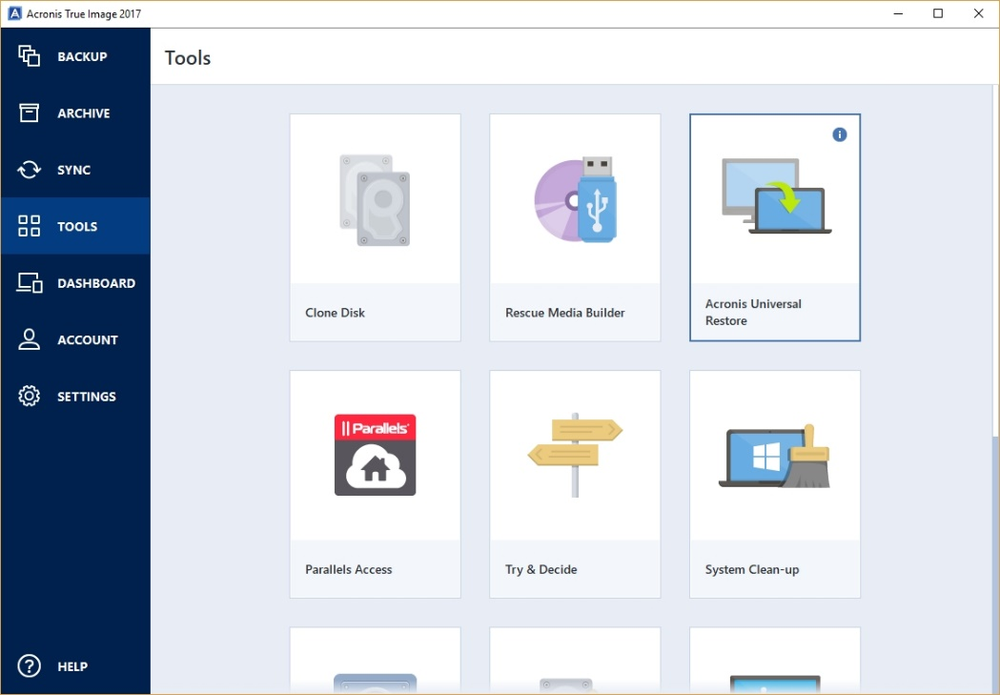
If you select Tool/Acronis Universal Restore before installing the Universal Restore component, you will first be directed to the download. After you have installed the Universal Restore component, selecting Tool/Acronis Universal Restore will start the Universal Restore Media Builder.
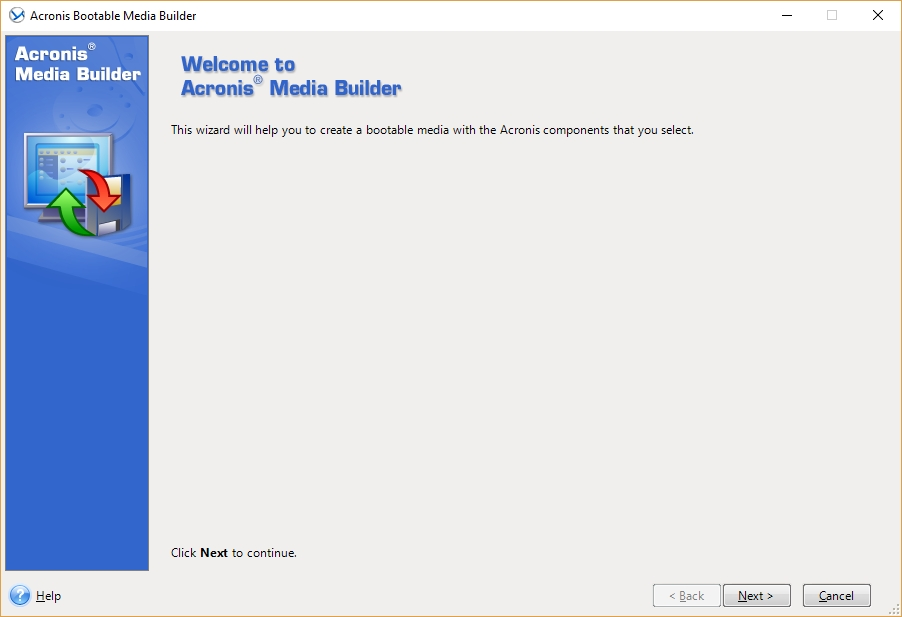
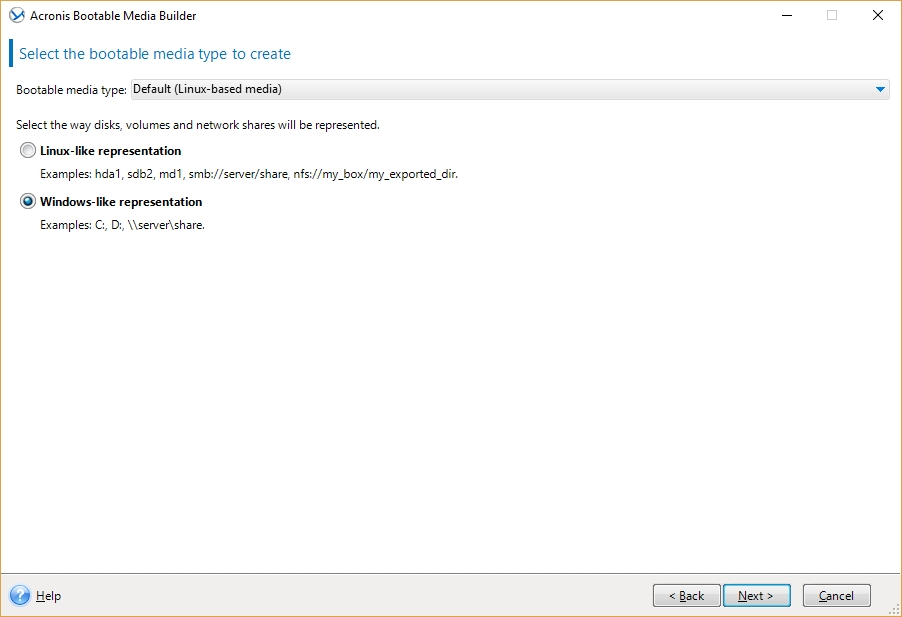
Once you click “Next” to start the process, you’ll select your preferred default – either Linux or WinPE media – in the “Bootable media type” field. It is recommended that you create both types of Universal Restore media. Simply follow the instructions on the screen to create the media.
Restoring Windows to New Hardware
Using Universal Restore to boot a Windows system on new hardware involves two steps.
First, you’ll need to introduce Windows to the new hardware. You can do that by moving an existing Windows system drive from an old computer to a new one, or you can restore a full image backup of a Windows system to a new disk. If Windows does not boot correctly, you can boot the new computer using the Universal Restore media you created earlier. Universal Restore should start and detect the operating system.
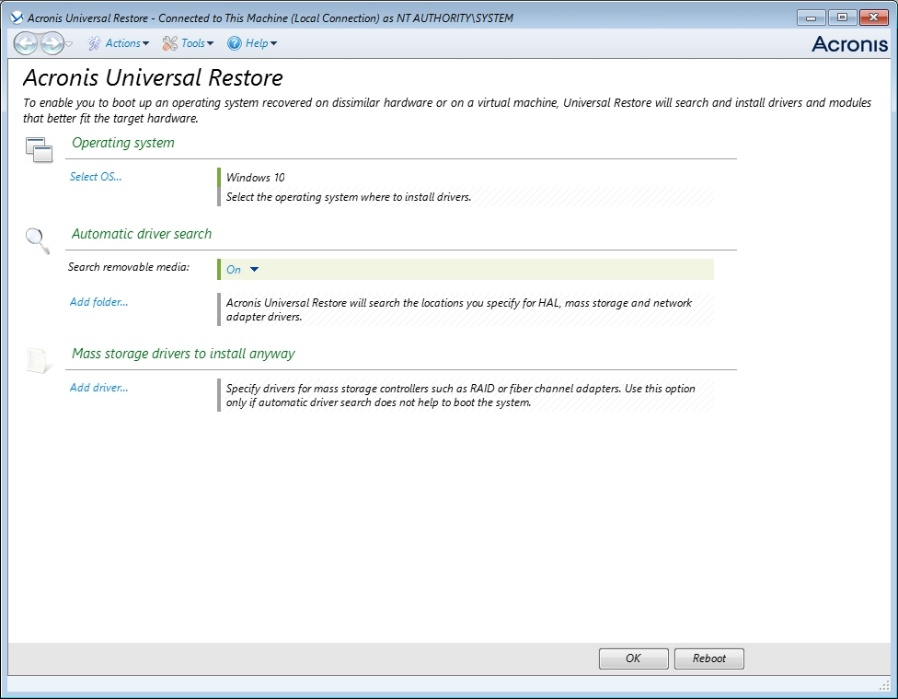
In our example, the Windows 10 operating system was automatically selected. If no operating system was specified, you can click “Select OS…” to navigate to the Windows system you need to repair.
The main job of Universal Restore is to add the necessary drivers to make the system bootable. It’s not intended to add all missing drivers to the system, however, but you can do that once booted into Windows. You will need to supply the controller drivers used by the new hardware (available on removeable media and in the inf/sys format), so it’s recommended you have those ready before you boot the Universal Restore media.
If you need help retrieving the needed drivers, there’s a good guide in the Acronis True Image users forum at https://forum.acronis.com/forum/100770 . You may also obtain the drivers from the manufacture’s support DVD and/or website.
Replacing a Hard Drive
The example below demonstrates how to solve a typical problem: Replacing a PC’s old HDD with new hardware – a Samsung 950 Pro PCI-based NVMe M.2 drive. In this instance, a full disk backup of the system was restored to the new NVMe drive, but Windows would not boot and showed an “Inaccessible Boot Device” error.
Universal Restore was used to inject the Samsung NVMe driver and make the other changes needed to make the system bootable. The “Add driver…” choice under the “Mass storage drivers to install anyway” heading was used to select the Samsung NVMe driver:
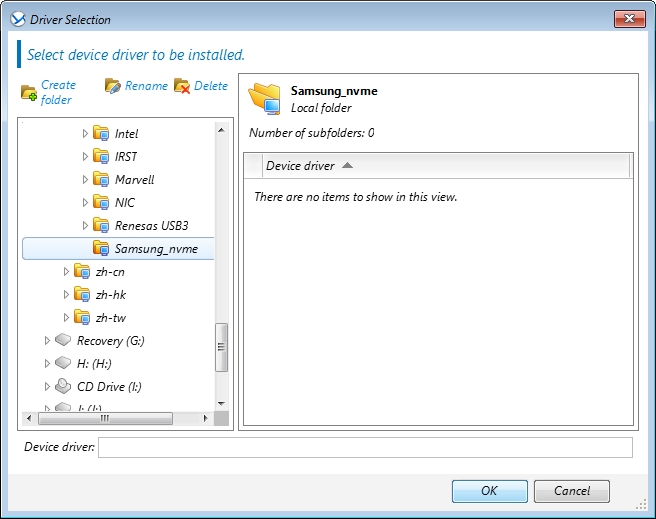
Once the “OK” button was clicked, a “There are activities that need user interaction” message was displayed because there was an unsupported controller on the motherboard.
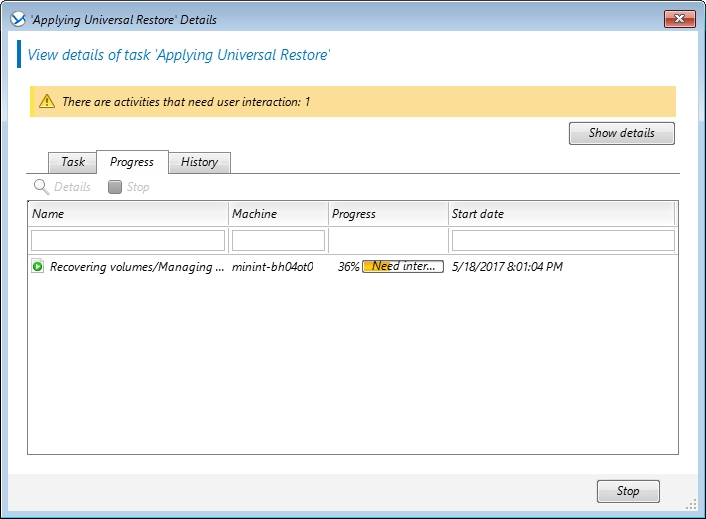
By clicking the “Show Details” button, the missing driver was discovered. In this case, there’s a controller that’s not needed to boot the new NVMe drive, so selecting the “Ignore” button skips that controller.
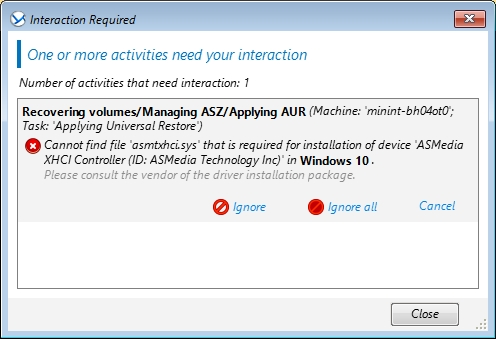
With that step, Universal Restore was successfully finished. Just close the dialog box and hit the “Reboot” button...
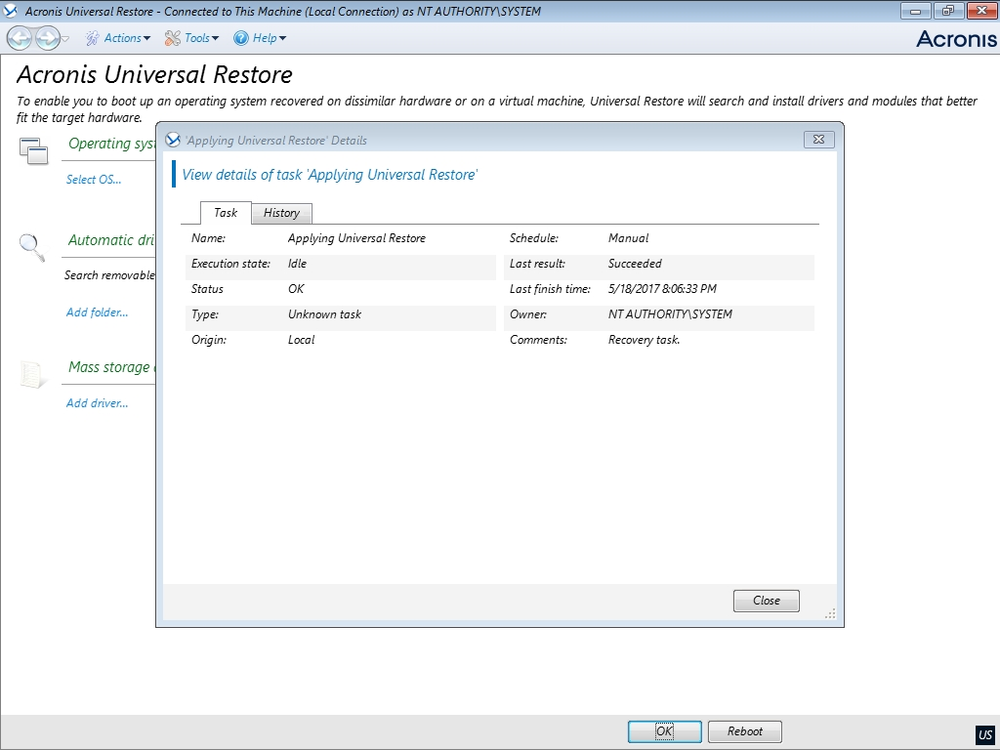
...and after the reboot, the computer’s BIOS was entered so the new NVMe drive could be selected as the first boot device. Once that’s done, there’s no problem booting the system.
About Acronis
A Swiss company founded in Singapore in 2003, Acronis has 15 offices worldwide and employees in 50+ countries. Acronis Cyber Protect Cloud is available in 26 languages in 150 countries and is used by over 20,000 service providers to protect over 750,000 businesses.


