Since 1995, MySQL has been the relational database management system of choice for millions of businesses around the globe.
The flexible Structured Query Language (SQL) architecture used in MySQL and its low-cost open-source licensing make it the ideal data repository for applications ranging from accounting and ERP software to Web server applications such as Joomla and WordPress. In fact, according to an iDatalabs report, about 25 percent of all medium-to-large-sized companies use MySQL in one capacity or another. Considering what MySQL offers for businesses, MySQL databases require sensible protection to ensure data availability and business continuity for organizations of various sizes.
This article will explore the different MySQL backup approaches to help you design a unique backup strategy and implement it effectively.
What is MySQL database backup?
MySQL database backup refers to the process of creating a copy (backup file) of a company's structured data utilized by a MySQL Server. SQL database backup can also refer to backing up an organization's structured data used by a Microsoft SQL server. The purpose of the database backup is to provide a readily available recovery option to reconstruct the original database following accidental deletion, human error, system crashes, natural disasters, or cyber-attacks.
There are various methods to create an SQL database backup - some are more common, while others are used in specific scenarios. Throughout the article, we will address both MySQL and SQL Server backup approaches to help you better understand SQL backups and implement your own backup strategy.
Let's start with the three primary backup types for MySQL database objects. Then, we will explore backup strategy creation, additional backup types, potential automation, and more, including the solutions required to streamline the entire backup process.
What are the primary types of backups in SQL?
MySQL backups can be divided into the following primary categories:
Logical
Logical backups output a specific database structure in a .sql file by generating the "CREATE" or "INSERT" SQL statements. You can then restore the backup via the mysqldump utility. This approach only backs up data without indexes, resulting in a small backup size. However, it provides a slower backup speed as it must execute all SQL statements one by one to enable restoration.
Physical (partial or full backup)
Physical backups copy database files in their original format as stored on the source disk. This approach is faster than logical backups but can be restored only to a MySQL server from the same database engine.
Consistent (Snapshot)
Consistent backups copy files at an exact point (moment) in time only after the server is locked or stops running.
Incremental backups
An incremental backup comprises data that has changed since the last backup (full or incremental). Incremental backups are suitable for extensive data sets to optimize storage space while retaining data availability. They take less time and storage space than full backups but can pose some risks for organizations, such as the following:
- Incremental backups can negatively affect the recovery time objective (RTO) as a complete data recovery would require you to restore the initial full backup followed by all incremental backups up to the desired recovery point.
- If an incremental backup is compromised, it can invalidate the entire incremental backup chain.
Binary log backups
Binary Log files (also "BinLogs") comprise records of every SQL query that made modifications to the system. Binary Log backups are a sub-type of incremental backups and are specifically designed to address the recovery point objective (RPO). Companies can use Mysqlbinlog to stream binary logs from a remote server and thus enable recovery up to the most recently backed-up binary log.
As for Microsoft SQL Server, it enables five backup types - full, differential, transaction log, copy-only, and tail log backup. However, the first three approaches are the most common, so we will explore them first below.
Full backup via SQL Server Management Studio
A full backup comprises your entire SQL Server database, backing up all tables, functions, procedures, views, indexes, etc., housed within it. You can create a full SQL Server database backup file using the following:
- SQL Server Management Studio
- Transact-SQL (T-SQL)
- PowerShell
- A dedicated third-party database backup solution
A full backup ensures you can restore the SQL Server database exactly as it existed when the backup was created. Moreover, full backups are the basis for all other backup types (e.g., differential backup requires at least one initially created full backup).
Differential backup
A differential backup contains only the changed data since the last completed full database backup. Differential backup typically takes less time than full backups because it only copies modified or new data instead of all database objects (regardless of their state).
Nonetheless, if you create multiple consecutive differential backup files, each new differential copy will duplicate modified data since it uses the initial full backup as a foundation.
For example, you can create a full backup on Sunday, followed by three differential backups on Tuesday, Thursday, and Saturday.
- The first differential backup will contain changed and new data from Sunday (when you created the full backup) to Tuesday.
- The second differential backup will comprise changed and new data from Sunday to Thursday. (hence, it will be bigger)
- The third differential backup will contain modified and new data from Sunday to Saturday. (making it even larger)
Subsequent differential backups can be the same size as the full backup, resulting in prolonged restore times since recovery requires both the full backup and the corresponding differential backup. To optimize recovery times and storage space usage, creating regular full backups and setting sensible retention rates for all existing backups is best. When you need to restore a database, you'd need to recover the last full backup and the differential backup most relevant to the point in time when the issue occurred. This allows a quicker and more up-to-date recovery than restoring only a full backup created long ago.
Transaction log backup
Transaction log (T-Log) backups are the most granular SQL Server database backup type. You can view them as incremental backups as they only comprise the modifications made to the specific SQL database since the last T-Log backup. You can initiate them in the shortest time frame (as often as every few minutes) to enable reliable point-in-time restores and minimize data loss.
Which type of backup strategy should you choose?
Backing up MySQL databases is critical for every business as the SQL server houses essential data for various apps and projects. However, defining the most optimal strategy for MySQL backup can be challenging. You must consider different factors - size, performance, availability, RTO, and RPO - to tailor the backup process to your needs and preferences. Below, we will explore the primary factors to consider when designing your SQL database backup strategy.
The backup type
As discussed, the primary types for MySQL database backups are logical, physical, and consistent; for SQL Server databases, the options are full, differential, and transaction log backups. All of them have advantages and disadvantages.
For example, full backups can copy the entire database and restore it to a specific point in time without additional processes. However, full backups take the most time and storage space. On the other hand, a differential backup file takes less time and less storage space, but subsequent differential backups can quickly pile up and pose storage space issues. Incremental backups are the quickest to create and can restore the database to any specific point in time as long as said point is within the backup interval. However, you may need to recover multiple incremental backups (and the initial full backup) to reach the desired point-in-time recovery, which can affect downtime.
To satisfy RTO and RPO, it's best to combine the three approaches. Such a strategy can also optimize storage space, reduce time spent on backup and restore processes, and ensure minimal downtime.
The backup frequency
Backup frequency depends primarily on two factors:
- How often do you modify or create data?
- How much data can you tolerate losing during a disaster event?
For example, suppose your datasets are relatively static, and you can afford a certain amount of data loss. In that case, you may go for monthly full backups, weekly differentials, and daily incremental backups. However, if you handle highly dynamic data loads and opt for minimal data loss, you may need to implement more frequent full and differential backups combined with incremental backups every few minutes or hours.
Moreover, you must consider the backup impact on your network bandwidth, storage space, and overall database performance.
The backup storage
The backup destination is another critical aspect of your database backup strategy. Generally, it's best to keep at least one operational backup copy on a remote server (e.g., in a physical data center, the cloud) to protect your databases against hardware failure, natural disasters, theft, etc.
You can employ various methods to store your backups - tape drives, local disks, NAS, cloud storage, etc. Each storage option has advantages and disadvantages regarding backup and restore speed, data security, reliability, and scalability. Every organization must take the time to consider all storage implications based on their availability, budget, and compliance requirements to ensure optimal recovery and business continuity.
Automation
If implemented adequately, automation is a game changer for SQL database backup. It can ensure that your backups are consistent, efficient, reliable, and readily available for recovery. You can use native options to help you automate database backups - SQL Server Management Studio, Azure Data Studio - to leverage T-SQL scripts and the Task Scheduler to automate SQL Server Express database backups.
You can also opt for third-party dedicated backup solutions to schedule SQL Server or MySQL backups, monitor their status, verify backup integrity, and manage retention rates to optimize storage space efficiently. Automating the database backup process can reduce human error, save time, and improve your recovery process.
Backup testing
Backup testing is the last fundamental element of a reliable database backup process. Backup testing is critical to verify all database backups' validity, completeness, and availability. Generally, you can restore backups to a different server (to an empty database) and check the current data quality, functionality, and consistency. You can also test different recovery option scenarios, such as partial, point-in-time, and tail-log backup recovery from the destination database.
Backup testing can help you identify and fix potential issues or security vulnerabilities within your database backup strategy to ensure a quick, efficient database recovery process in a disaster event.
Can SQL backups be automated?
Simply put, you can automate MySQL backups if your organization is concerned with disruptions to productivity or wants to improve recovery point objects (RPOs). Automating MySQL backups is one of the most impactful measures your organization can take against data loss without sacrificing organizational time, resources or revenue. With automated scheduling, businesses control when MySQL backups are performed to eliminate unanticipated downtime and interruptions to operations. Backup solutions that expand protection to MySQL environments are typically implemented in the following steps:
- Install your preferred solution and ensure protection is installed on the servers where your MySQL database is hosted. Alternatively, you can install protection on a network-connected computer that’s granted access to the MySQL server.
- You should have the necessary credentials on hand. Be prepared with the username and password essential to accessing and backing up the MySQL database.
- Create a backup protection plan for MySQL backup purposes.
- Designate MySQL database as the source of backup. For example, with Acronis Cyber Protect you may need to provide login credentials, server address and port details.
- Consider your backup options. Full backups let your organization backup the entire database, whereas incremental backups only apply to the changes made since your last backup. Additionally, you can pick a schedule that works for the business’ daily operations. The frequency of backups will depend on the criticalness of your MySQL database. Daily, weekly or custom intervals are widely known options.
- Carefully select where you want MySQL backups to be stored. This can include local disk, network storage or in a supported cloud storage service environment.
How can I automate SQL backups with Acronis Cyber Protect?
Automating MySQL backups with Acronis sets up Acronis to interact with your MySQL database to perform regular backups. Acronis is a comprehensive backup software which offers various features, including the ability to backup databases like MySQL. Here's a general guide on how to set up automated MySQL backups using Acronis:
Initial setup
- Install Acronis: Ensure you have Acronis Backup installed on the server where your MySQL database is hosted or on a network-connected computer that can access the MySQL server.
- MySQL credentials: Make sure you have the necessary credentials (username, password) and permissions for accessing and backing up the MySQL database.
Configuring Acronis for MySQL ackups
- Create a new backup plan: Open Acronis and navigate to the backup plan creation section. Choose to create a new backup plan.
- Select Backup Source: Choose the MySQL database as the source of the backup. You may need to provide the connection details, including the server address, port, username, and password.
- Backup options:
- Full or incremental: Decide whether you want full backups (entire database) or incremental backups (only changes since the last backup).
- Scheduling: Set up a schedule for the backups. This can be daily, weekly, or at any custom interval.
- Storage destination: Choose where the backups will be stored. This can be on a local disk, network storage, or a cloud storage service supported by Acronis.
- Backup validation: Enable automatic validation of backup files to ensure data integrity.
- Encryption and security: Configure encryption settings for securing your backup files, if necessary.
Why is it important to back up an SQL database?
The database is the most critical element of most applications, as it stores and manages critical app data. And, without a working database, most applications that rely on them are essentially useless. Therefore, if you have business or server applications reliant on MySQL, maintaining good backups of the database files is crucial. A good MySQL backup can save your team a lot of hard work, frustration, and lost revenue in the event of a disaster or if you need to migrate systems to new hardware.
Saving Data for Reinstalls and Migrations
In almost any business environment, software and hardware changes are inevitable. Software upgrades, adding new systems, or moving to new servers are a few reasons why fresh installations, reinstallations, and migrations are typical for most IT departments. If you are involved with any of these activities, you probably know that installing or reinstalling applications is the easy part; it is the migrating of old data that presents the most challenges.
When reinstalling software, the installation or setup routine usually generates a new database for the program. While some applications include tools that enable you to export, import, and migrate MySQL database files, just as many do not. Therefore, if you need to migrate data to a new machine or for a fresh install/reinstall, you will probably need to manually move the old MySQL database file. Hence, this is another reason to keep good backups of your MySQL databases.
Pre-Backup Procedures for Preventing MySQL Record Corruption
Before backing up your MySQL database, it is essential to take a few steps to ensure that your backup file will not become corrupted during the process. If you jump into backing up an active, running MySQL database, it is possible that the backup may be incomplete or that database consistency may be affected. The best way to avoid corrupted records in a MySQL database backup is to ensure the database is closed entirely and not running during the backup operation. This usually requires two separate steps:
- Close the application that accesses the MySQL database;
- Shut down the MySQL server application.
Once you are sure that MySQL is no longer active and being used, it should be safe to back up the database without fear of record or table corruption.
Backing Up Mission Critical Applications
While shutting down the MySQL database servers and the application that connects to it is the best way to prevent data corruption, there are times when doing so could have serious adverse side effects on business operations. For instance, if the MySQL database powers point of sale or other enterprise software or is the backend for a corporate website, shutting down the MySQL server could cause significant downtime and loss of revenue. Therefore, when backing up MySQL databases used for mission-critical applications, it is essential to limit database downtime as much as possible.
What are the different ways you can backup SQL Server data?
Companies can use several specific backup types to safeguard SQL Server data. Let's explore them below.
Copy-only backup
Copy-only SQL server backups aren't a part of the dedicated backup schedule companies use to protect their data. This approach doesn't impact your conventional backup sequence and can't be used as a replacement for regular, traditional backups. Instead, as the name suggests, this method copies specific backed-up data to use the copies for testing or development purposes.
Tail-log backup
A tail-log server backup comprises all transactions in the live transaction log that haven't been backed up yet. Typically, tail-log backups are performed before you initiate a transaction log backup to ensure the integrity of the transaction log chain.
File and filegroup backup
Files, when viewed by an SQL server, are physical elements within the database used to store data or objects. A filegroup comprises SQL files that are logically put together. This backup approach can copy specific SQL files to the backup database and is thus ideal to perform designated regular backups, optimize storage space, and minimize time spent on the backup process.
Partial backup
Partial SQL backups allow organizations to focus on a specific database section even further. This approach enables companies to back up database portions smaller than file or filegroup backups. They can back up file or filegroup subsections for a highly customized SQL server backup.
How to backup SQL Server databases via SQL Server Management Studio (SSMS)?
To backup and restore SQL Server databases via SSMS, you need a functioning SQL Server and SQL Server Management Studio.
Creating a test database
- Launch SSMS and connect to your SQL Server instance.
- Open a "New Query" window.
- Run the following T-SQL code to create the test database:
4. In "Object Explorer", refresh the "Databases" node to see the new database.
Taking a backup (SSMS)
- Launch SSMS and connect to your SQL server instance.
- In "Object Explorer", expand the "Databases" node.
- Right-click the database you want to back up, hover over "Tasks", and click "Back up..."
- Confirm the correct backup path under "Destination". If you need to update the path, click "Remove" (to remove the existing path) and then click "Add" to type in the new path. (you can use the ellipses to navigate)
- Click "OK" to create a database backup.
Taking a backup (T-SQL).
You can run the following T-SQL command to back up a specific database. The path may differ for your machine:
Restoring a backup (SSMS)
- Launch SSMS and connect to your SQL Server instance.
- In "Object Explorer", right-click the "Databases" node and choose "Restore Database..."
- Click "Device" and select the ellipses (...) to locate the database backup file.
- Choose "Add" and navigate to the location of the .bak file. Select the .bak file and then click "OK".
- Click "OK" to close the "Select backup devices" dialog box.
- Click "OK" to restore the backup database.
Restoring a backup (T-SQL)
You can also run the following T-SQL script to restore a database backup:
Which command is used to back up MySQL Server data?
The Mysqldump command line utility is a standard database backup and restore operations approach. It can also back up MariaDB in addition to MySQL. Below, we will explore several backup options made available to companies via the Mysqldump command.
Back up a single database
The most common use of the Mysqldump command line utility is backing up a single database. In the following example, we will outline how to create such a backup labeled "database_name" via the user "root" and save the backup to a file labeled "database_name.sql". When using the commands below, replace:
database_name with the actual name of the database (in both options)
root with the actual user name for the user account
To create an individual database backup, run the following command:
mysqldump -u root -p database_name > database_name.sql
You will be prompted to enter the root password to authenticate the process. Following authentication, the command line utility will initiate the dump file creation process. If you are logged in as the same user you're using to perform the backup (export), and if the user doesn't require a password, you can shorten the command to the following:
mysqldump database_name > database_name.sql
Back up multiple (or all) MySQL databases
Backing up multiple databases simultaneously requires using the "--database" option combined with the list of databases you wish to back up. Keep in mind, each database name must be separated via space.
mysqldump -u root -p --databases database_name_a database_name_b > databases_a_b.sql
If you need to back up all available MySQL databases, use the following command:
mysqldump -u root -p --all-databases > all_databases.sql
Both commands will create a single dump file comprising the specified (or all) databases.
MySQL database structure backup
To back up only the database table structure, use the "-no-data" option:
mysqldump -u root -p --no-data database_name > database_name_structure_only.sql
Back up only data from the MySQL database
To back up only data from the database, use the "-no-create-info" option:
mysqldump -u root -p database_name --no-create-info > database_name_data_only.sql
Specific table (or all tables) MySQL backup
To back up a specific table (or all tables), you must add the table name in the command. To back up multiple tables, you must add the table names separated by spaces after the database name:
mysqldump -u root -p database_name x y z > x_y_z_table.sql
Here, replace "x", "y", and "z" with the actual table names.
Create a compressed MySQL database backup file
If you need to backup a large database, it may be best to compress the output file via the "gzip" utility, redirecting it to a file as in the following example:
mysqldump database_name | gzip > database_name.sql.gz
Create a Timestamp Backup
If you plan on keeping multiple backups in the same backup location, adding the current date to the backup copy filename can ensure better backup navigation:
mysqldump database_name > database_name-$(date +%Y%m%d).sql
How to restore a MySQL database?
Generally, you'll need to create a new database to import the backup file into. If the target database already exists, you'll need to delete it first. Assuming you've satisfied these two requirements, you can restore the MySQL backup via the following SQL statements:
mysql -u root -p database_name < database_name.sql
It's highly likely that the "database_name" resides in a root directory on the host machine, so you may not need to add the specific path. However, you must specify the exact path for the dump file backup, including the server name (if required).
Restore a single database from a full MySQL dump file
If you've backed up all databases via the "--all-databases" option but you need to restore an individual database from the backup file, you can use the "--one-database" option as shown below:
mysql --one-database database_name < all_databases.sql
Export and import a single database via one MySQL command
Instead of creating a dump file from a single database and then importing the created backup into another MySQL database, you can opt for the following SQL statements:
mysqldump -u root -p database_name | mysql -h remote_host -u root -p remote_database_name
The command will transfer the output file to a MySQL server client on the remote server (remote host) and import it into a database labeled "remote_database_name". You must ensure that the database already resides on the remote server.
How to backup and restore MySQL databases via phpmyadmin?
In phpMyAdmin, the "export" function is used as a backup, while the "import" function is used to restore database backup files.
Create the backup SQL file
- Open phpMyAdmin. Click the database you want to back up on the directory tree (on the left).
- Click "Export" on the Export tab across the top of the display.
- Here, you can use the Quick "Export Method" to back up the entire database or the Custom "Export Method" to select a specific table or other special options.
- The format field should be set to SQL unless you need to change it.
- Click "Go". If you've selected the Quick option, your browser will download the database copy into your preferred downloads folder. You can then copy the backup to a secure location.
Clear out old data
Clearing out old data before restoring a backup is essential. As data isn't overwritten during a restore, the recovery process can duplicate tables or cause conflicts and errors.
- Open phpMyAdmin. Choose the database you wish to restore from the navigation pane (on the left).
- Select the "check all" box at the bottom. Then, select "Drop" from the drop-down menu labeled "With selected".
- You will be prompted to confirm your choices to process. Click "Yes".
- Approving the process will clear existing data to enable a clean restoration.
Restore the MySQL backup
- In the phpMyAdmin interface, click "Import" across the top of the page.
- The first section here is labeled "File to import". A couple of lines below it, you will find the line "Browse your computer", with a button labeled "Choose file" - click said button.
- Navigate to the backup location with the export file you want to restore via the dialog box. You can use the default setting for all recovery options unless you've used custom options when creating the backup.
- Click "Go".
How to backup MySQL database without phpМyАdmin?
There are numerous ways to backup MySQL databases without using phpMyAdmin - the Mysqldump command line utility, MySQL Workbench, third-party backup solutions, etc.
Depending on your needs, preferences, and budget, you can choose a suitable backup approach, combine multiple utilities to streamline different backup types, or employ third-party backup software, such as Acronis Cyber Protect, to ensure all of your backup and restore requirements are met regardless of the recovery scenario.
How to backup MySQL database via MySQL Workbench?
To back up a database via MySQL Workbench, follow the steps below:
- Click "Data Export" on the "Administration" panel. This will open the "Administration - Data Export" document.
- From the "Object Select > Tables to Export" tab, select the database_name schema.
- Select "Export to Dump Project Folder" under "Export Options" if you want to store database tables in separate .sql files, or select "Export to Self-Contained File" if you want to store the database backup in a single .sql file.
- To initiate the backup process, click "Start Export". You can track the process on the progress bar.
Keep in mind, MySQL Workbench doesn't enable backup automation or scheduling.
How to Backup a MySQL Database on a Linux Server?
Acronis Cyber Protect can streamline the entire Linux Server system backup with a few mouse clicks. If you run MySQL database-dependant applications on it, the backup process will require a couple more steps. However, the process is still relatively simple.
To back up MySQL databases on a Linux Server machine to a local or network drive, follow the steps below:
Part I – Install the Management Console
Step 1 – Create an Acronis account if you have not already done so. Make sure to activate your account using the link in the confirmation email you receive from Acronis. Step 2 - Log in to your Acronis account.
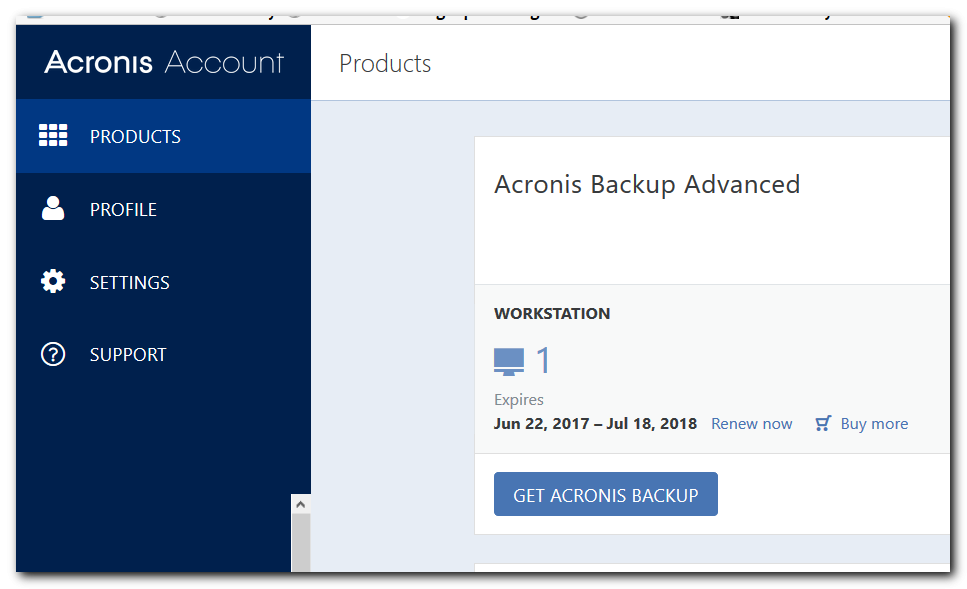
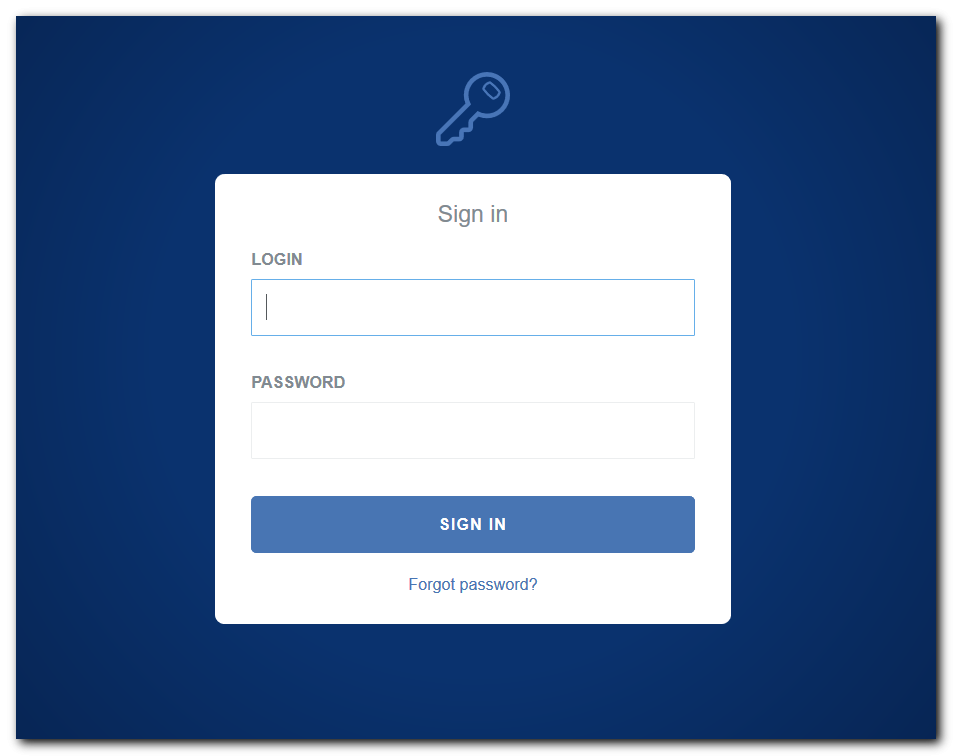
Step 3 – Download and install the applicable installer for the machine that will be running the management console application.
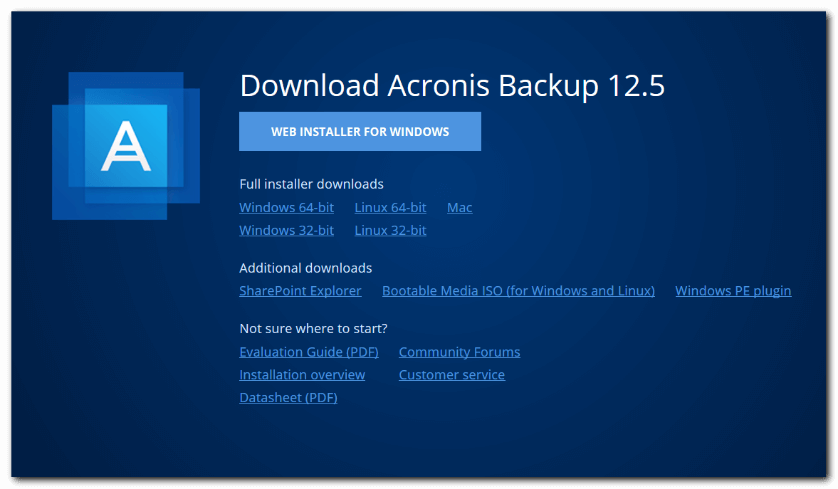
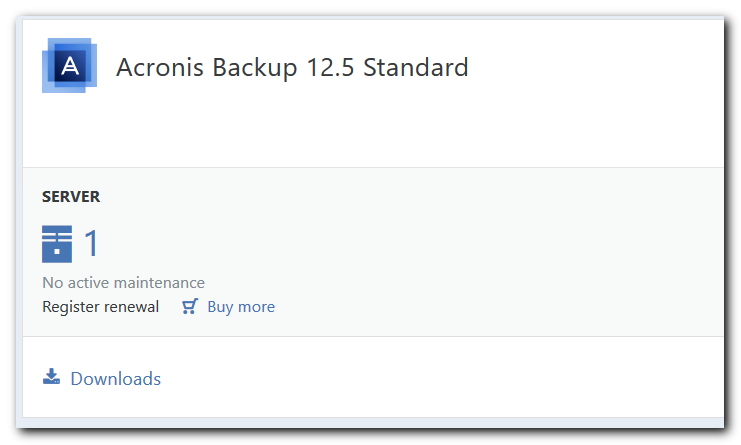
Step 4 – Launch the Acronis Cyber Protect setup file. Follow the prompts to download and install the application on the computer from which you plan to run the management console.
Step 5 – Log in to your new Acronis Backup server with your Administrator username and password. Add license keys as needed to your Acronis installation.
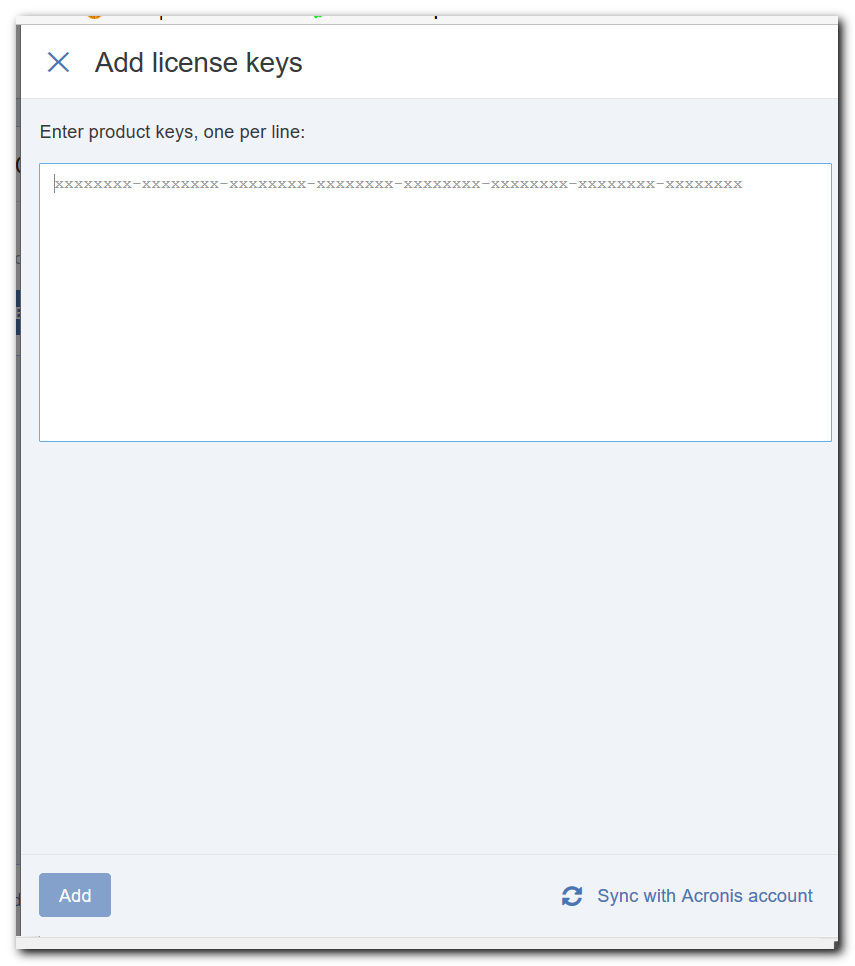
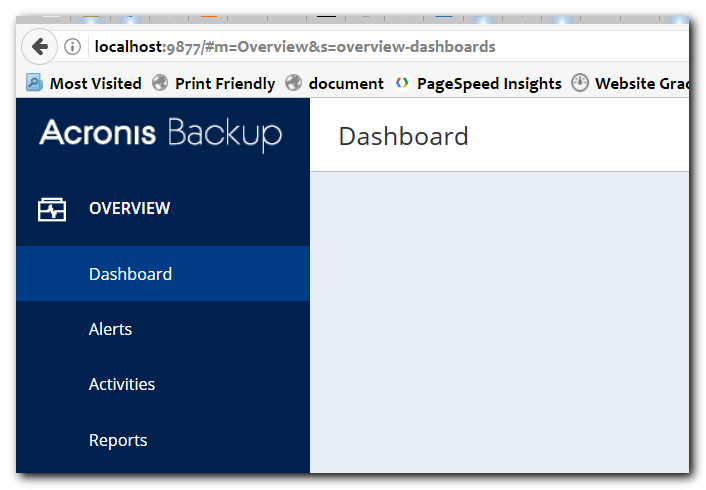
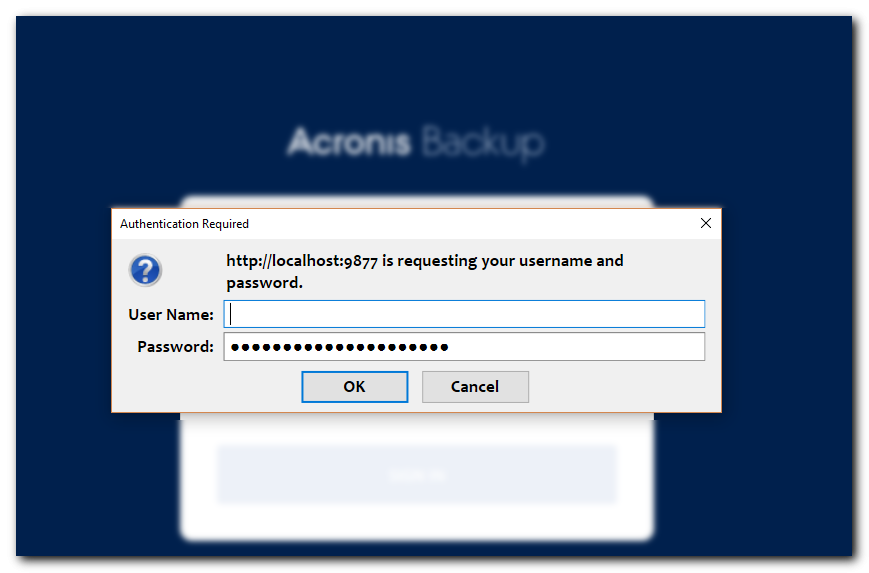
Part II – Install the Backup Agent on the Linux Server Machine
Step 1 – Download the Linux Backup Agent installation file from within the console management window.
Step 2 – Log in to your Linux server with your preferred terminal or FTP application. Create a new folder on the server named “AcronisBackup” or something similar.
Step 3 – Copy the Linux Backup agent installation file to the Linux server.
Step 4 – Go back to the Linux server and open your terminal application. Move to the folder that contains the Linux Backup Agent installation file. Run the installation file on the Linux Server to install the backup agent and connect to the machine with the Acronis console management application installed.
Step 5 – Go back to the system running the Acronis console management application. Open a new tab or window in your Web browser application, and then navigate to the Acronis Knowledge Base article 58136: Acronis Backup: Backing Up MySQL. Click the link titled “Download and unpack scripts.”
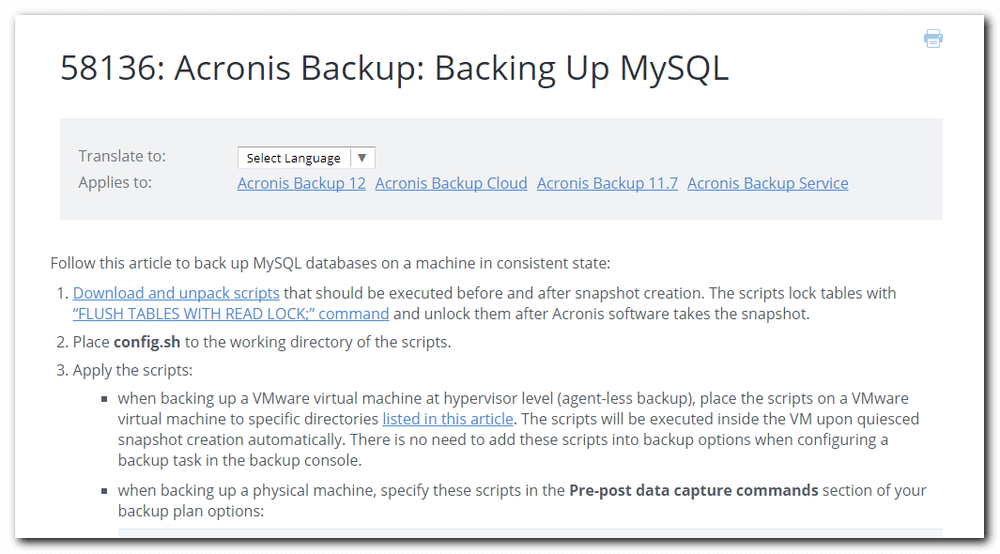
Step 6 – Use an FTP application to move the scripts file to the directory on the Linux server where the SQL database file is located. After moving the scripts, unzip the files in the selected folder on the Linux server machine.
Part III – Backing Up the MySQL Server
Step 1 – Go back to the system running the Acronis console management application.
Step 2 - Select “All Machines” in the sidebar menu. Click the “Enable Backup” button underneath the computer name for your Linux server machine.
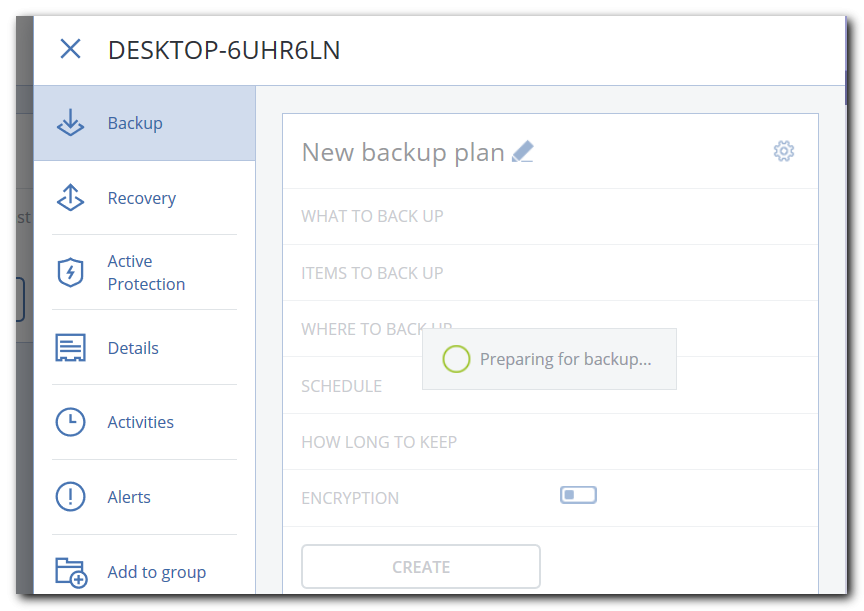
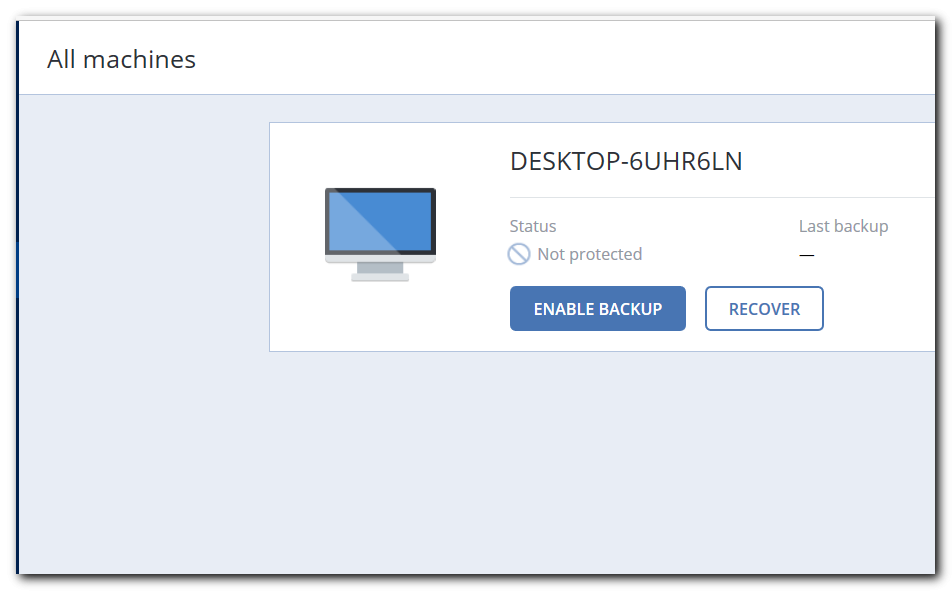

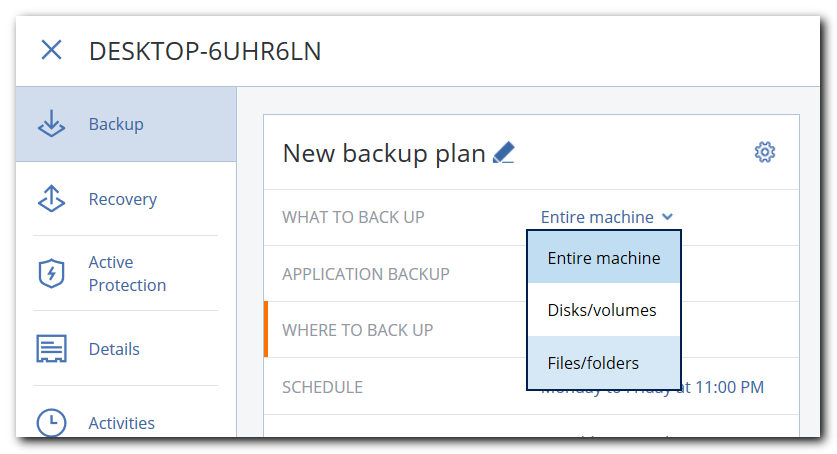
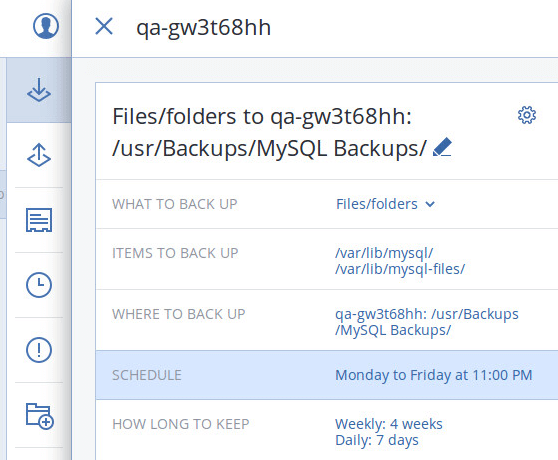
Step 3 – Click the drop-down list button to the right of “What to Back Up,” and then select “Files/folders.”
Step 4 – Click the “Specify” link to the right of “Items to Back Up.” In the next pane, click “Select files and folders.” Navigate to the folder that contains the MySQL database file you want to back up. Click the checkbox next to the folder name with the MySQL database file. Click the “Done” button.
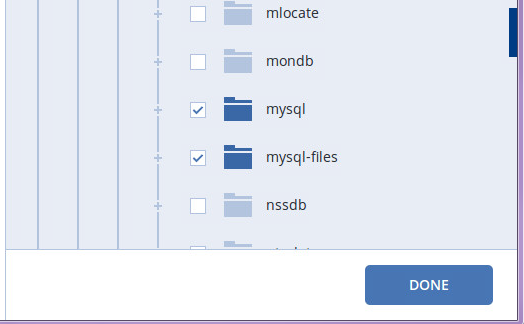
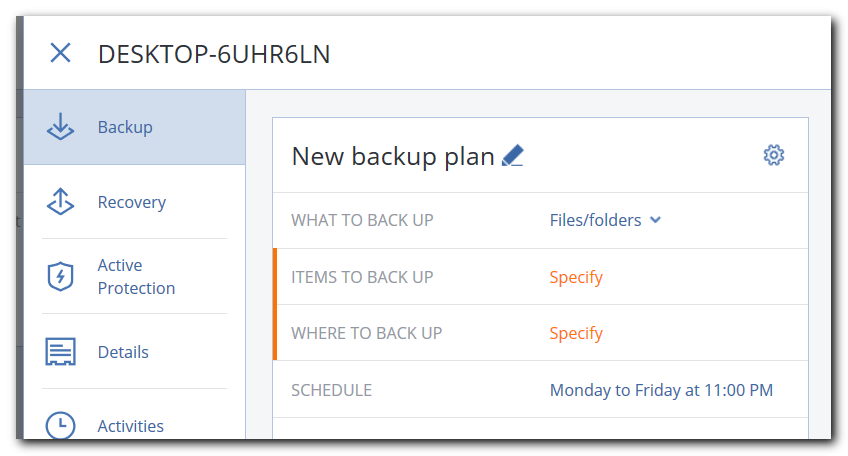
Step 5 – Click the “OK button.

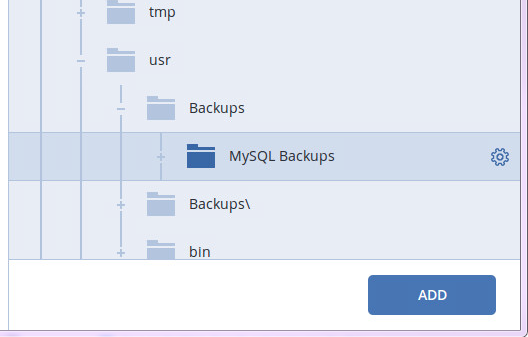
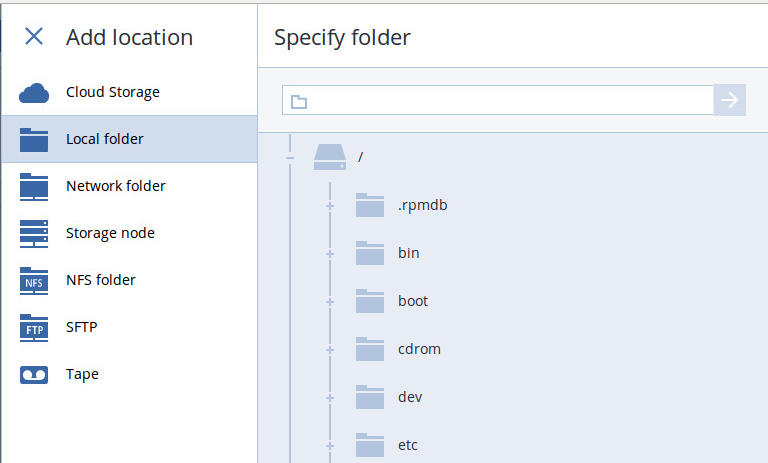
Step 6 – Click “Specify” to the right of “Where to Back Up.” In the “Where to back up” pane, click “Add Location.” Click “Local Folder” or “Network Folder.” Navigate to the local or network drive and folder where you want to save the MySQL backup file, and then click “Add.” In the “Where to back up” pane, click the path to the local or network backup folder you selected.
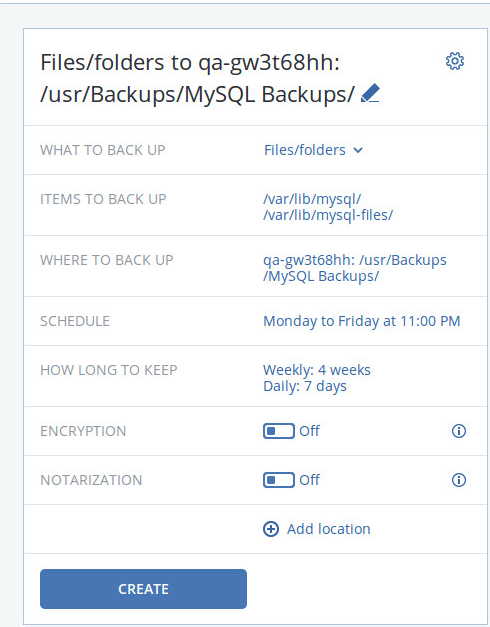

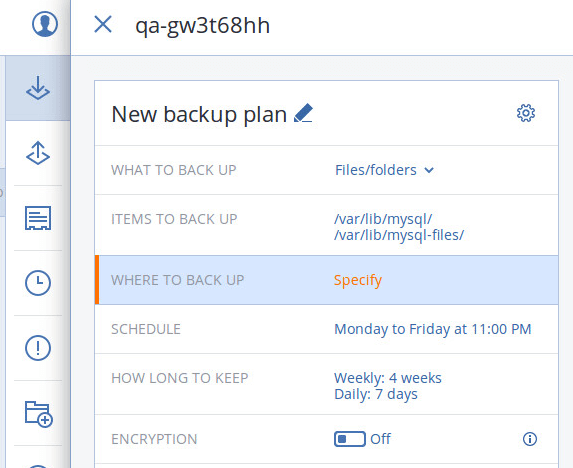
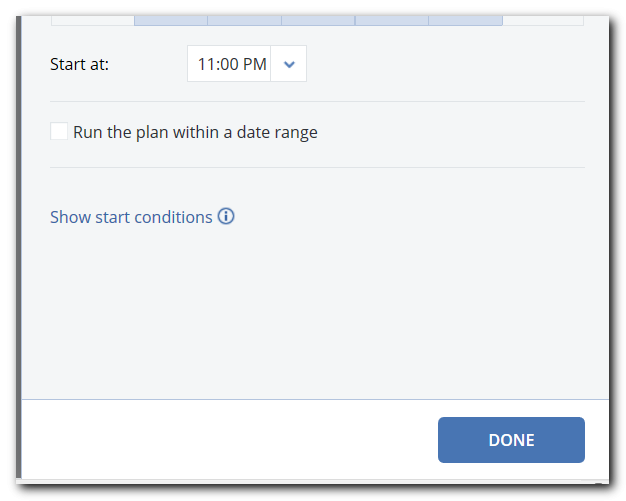
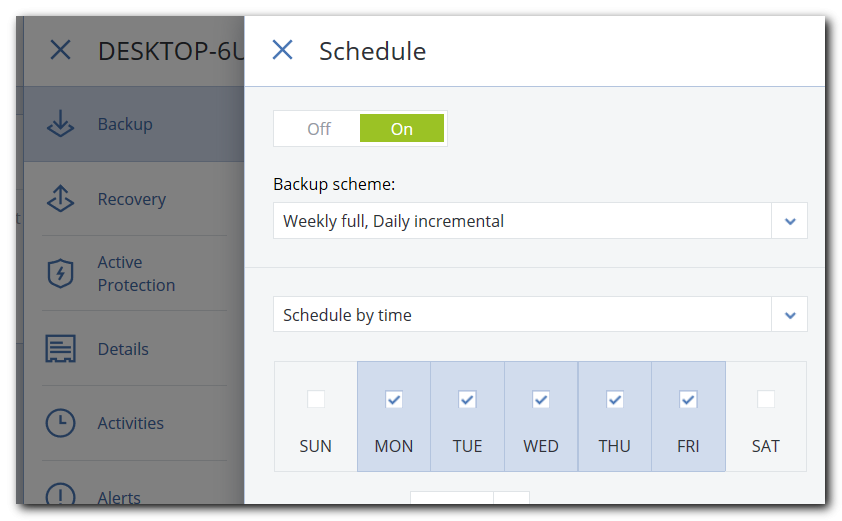
Step 7 – Configure schedule settings for the MySQL backup, and then click “Done.”
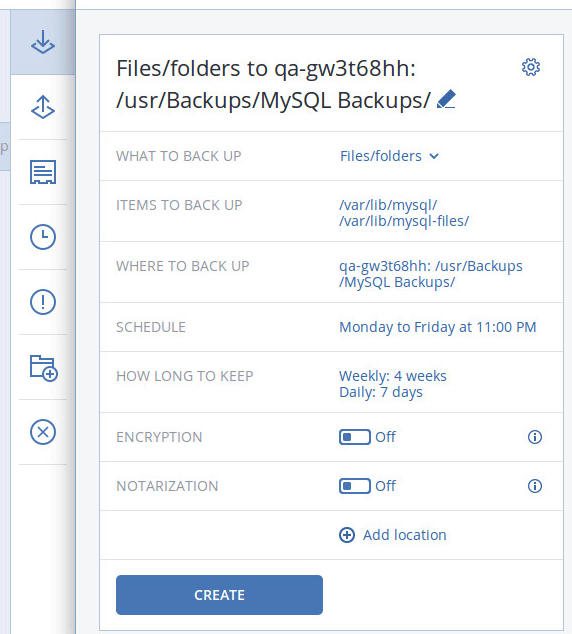
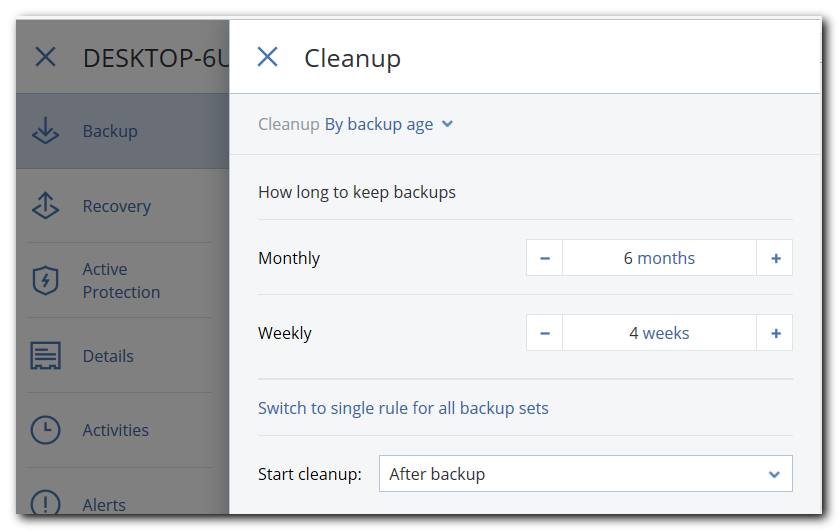
Step 8 – Determine how long you want to keep copies of the backup database. Configure the cleanup settings as needed, and then click the “Done” button.

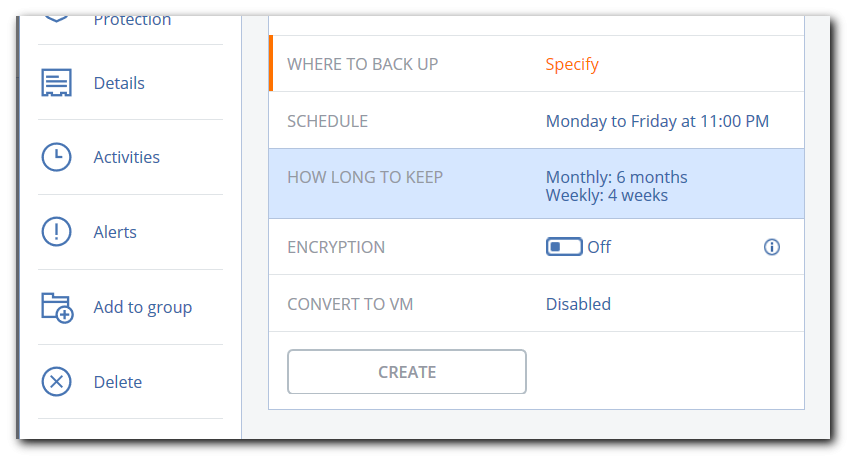
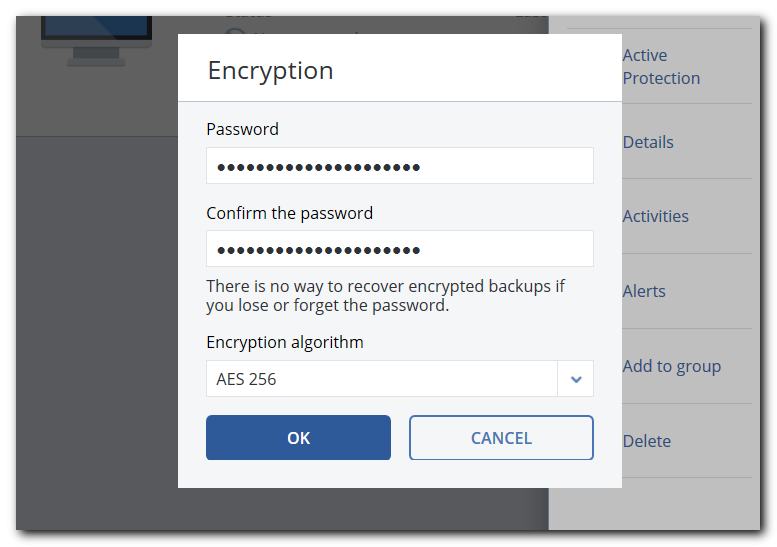
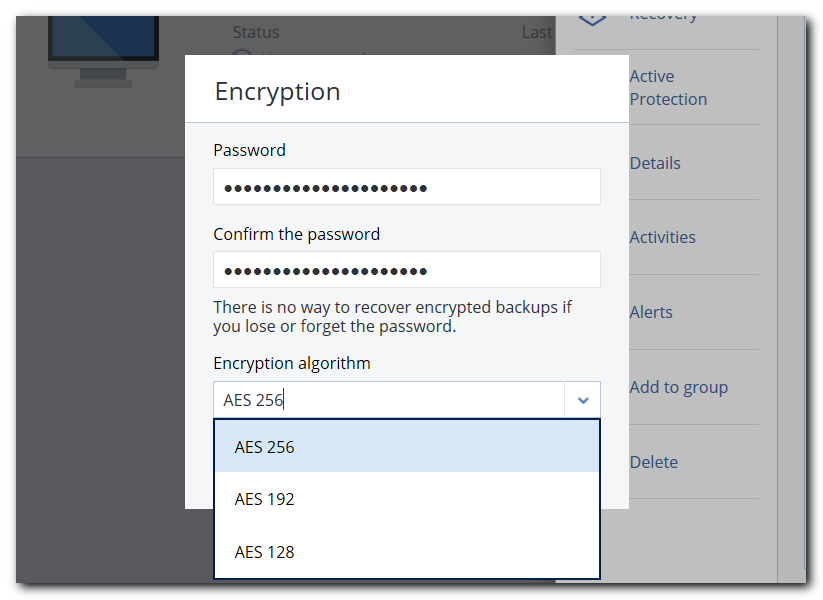
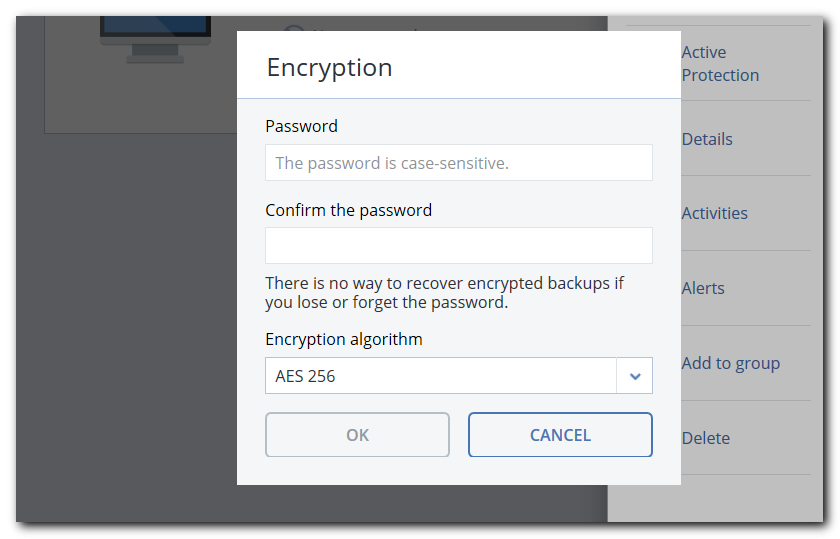
Step 9 – Click the “Encryption” toggle switch. Enter a strong password for the encryption. Re-enter the password to confirm it. Select an encryption algorithm, and then click “OK.”
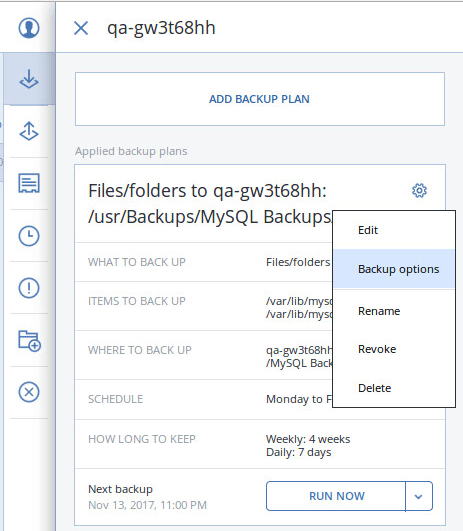
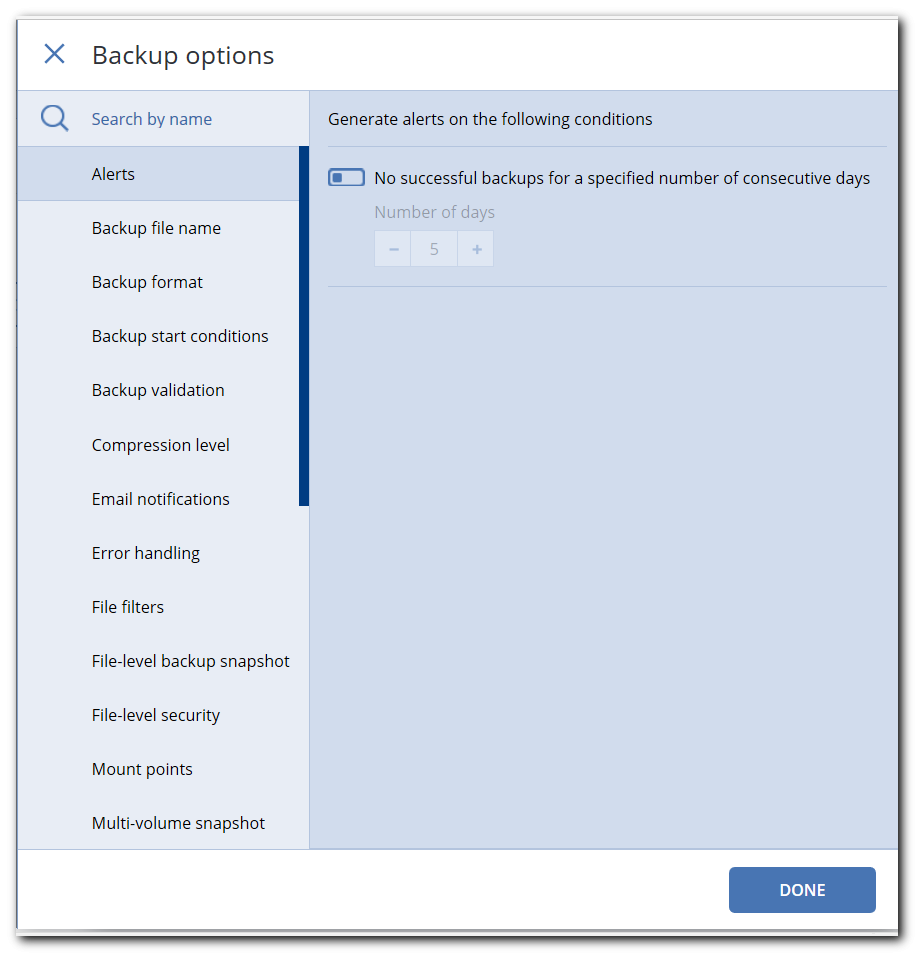
Step 10 – Click the “Gear” icon in the upper-right corner of the window. In the “Backup options” window, scroll down to and click “Pre-post data capture commands.”
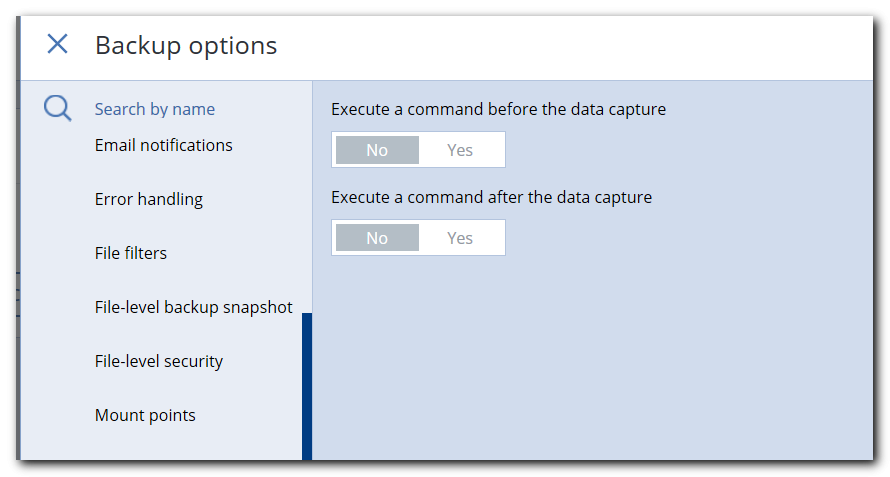

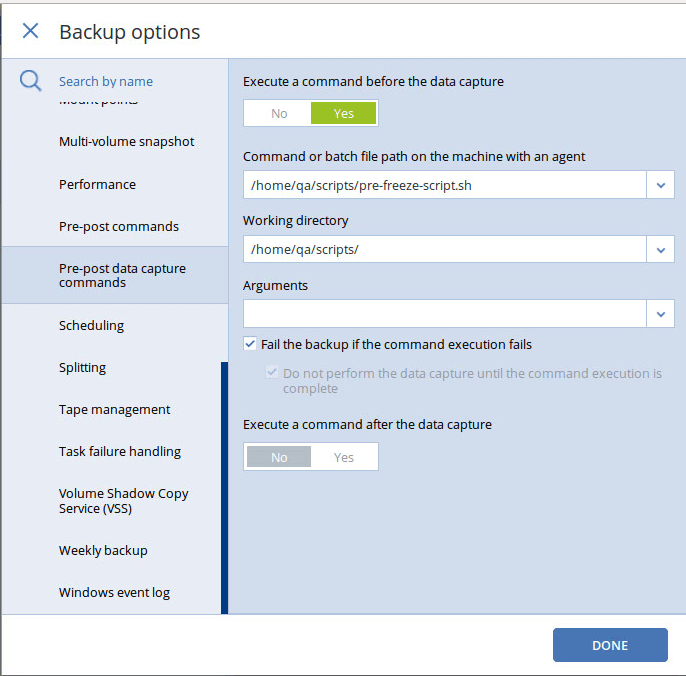
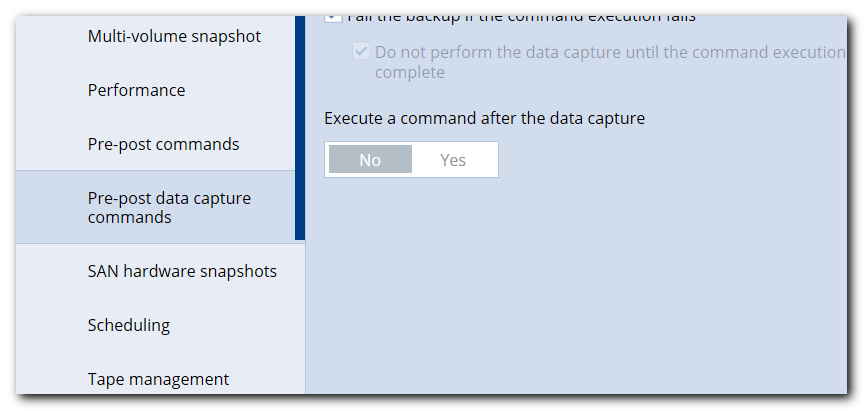
Step 17 – Click the “Yes” toggle button underneath “Execute a command before the data capture.” In the “Command or batch file path on the machine with an agent” field, enter the path to the “pre-freeze-script.sh” file. (Note that this is one of the files you downloaded earlier. In the “Working” directory” field, enter the path to the folder that contains the MySQL database file.
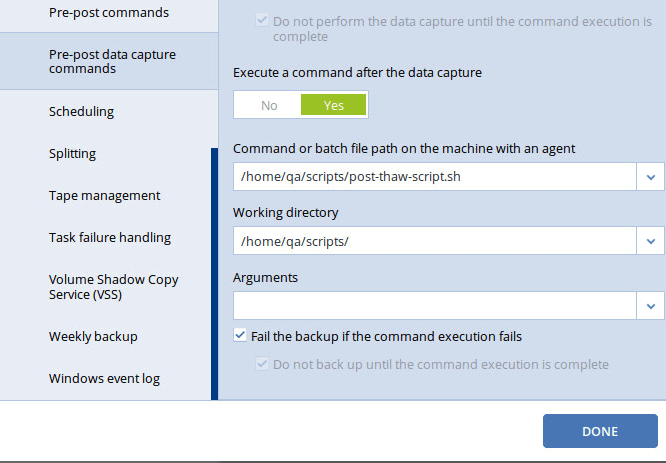
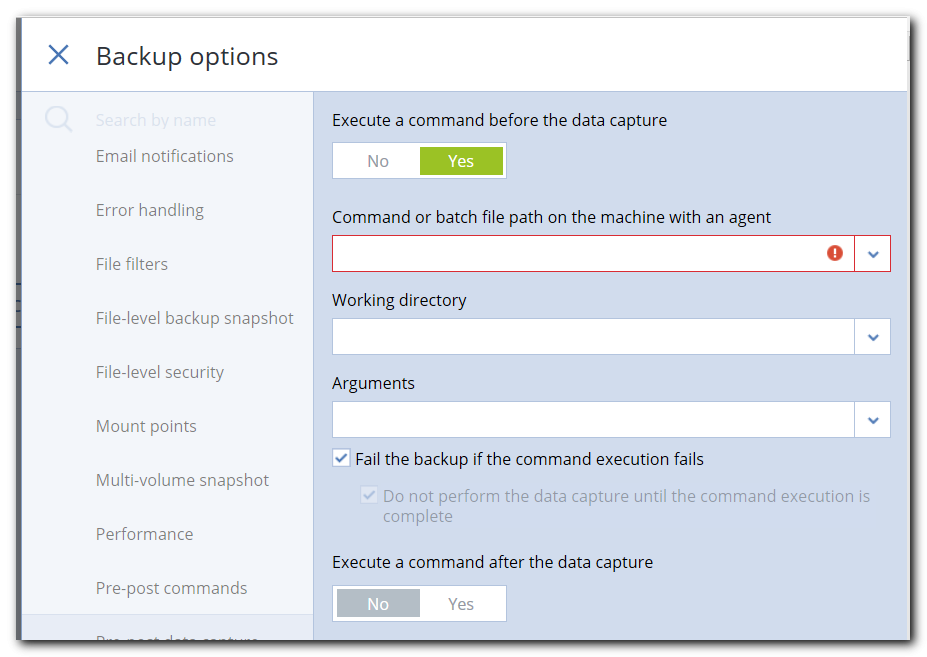

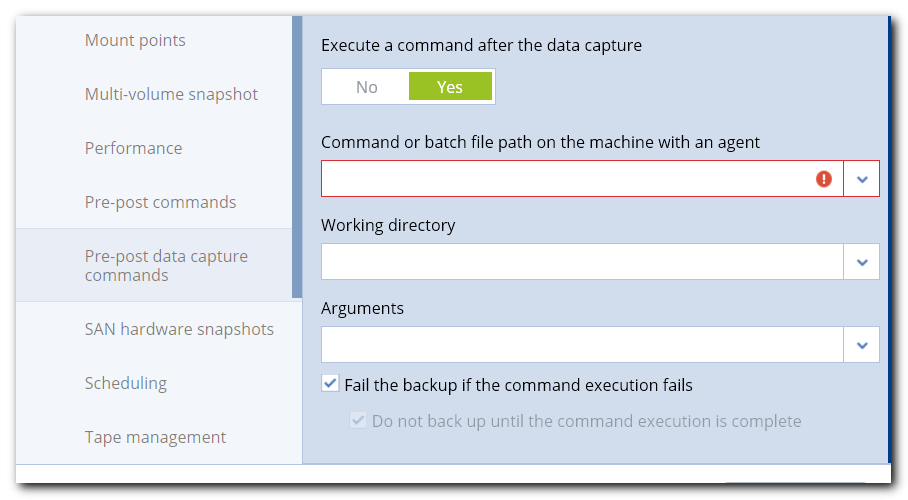
Step 18 – Click the “Yes” toggle button underneath “Execute a command after the data capture” In the “Command or batch file path on the machine with an agent” field, enter the path to the “post-thaw-script.sh” file. (Note that this also is one of the files you downloaded earlier. In the “Working” directory” field, enter the path to the folder that contains the MySQL database file. Click the “Done” button.
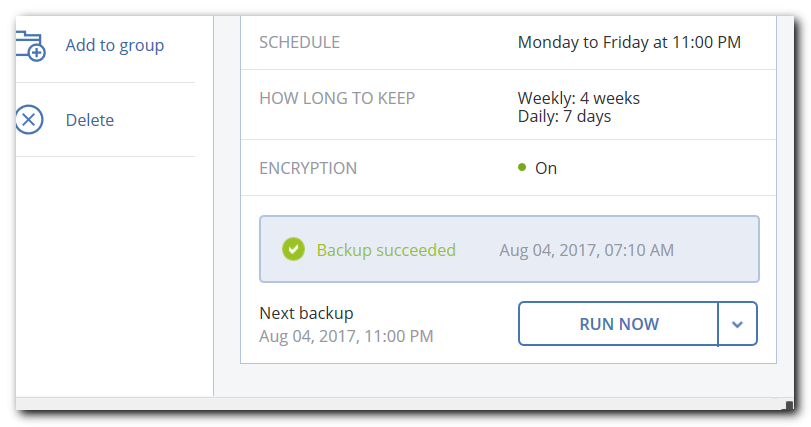
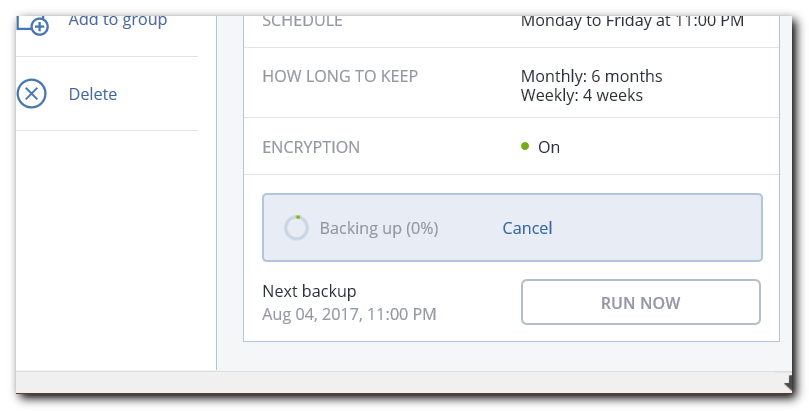
Step 19 – Click the “Create” button. After the window refreshes, click the “Run Now” button. Wait for the backup to run and refresh the console window.

Tip – You can also choose to backup your MySQL databases to the secure Acronis Cloud. To do so, just select your Acronis Cloud account in the “Where to Back Up” window.
Important Note – The above instructions are for use with MySQL databases where all files are contained on a single volume. If creating snapshots of databases spread across multiple volumes, the above process may not work correctly
How to recover a MySQL database with Acronis Cyber Protect?
Acronis Cyber Protect is a quick and straightforward MySQL database recovery option. To restore MySQL backups via Acronis, follow the steps below:
Step 1 – Shut down the MySQL server on the Linux server system.
Step 2 – Launch Acronis Cyber Protect console management application in a Web browser. Log in with your username and password if prompted to do so. Click “Devices” in the sidebar menu.
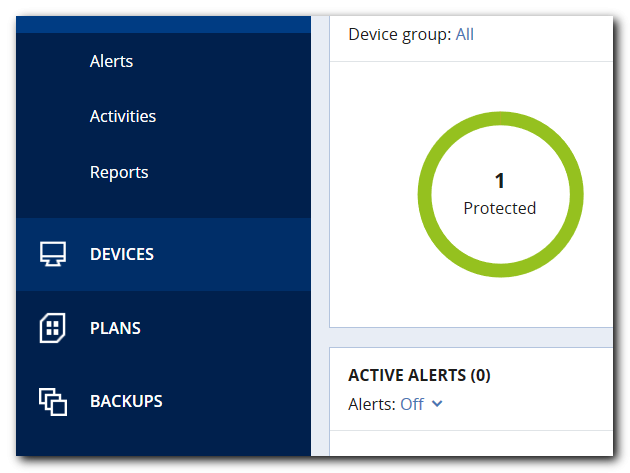
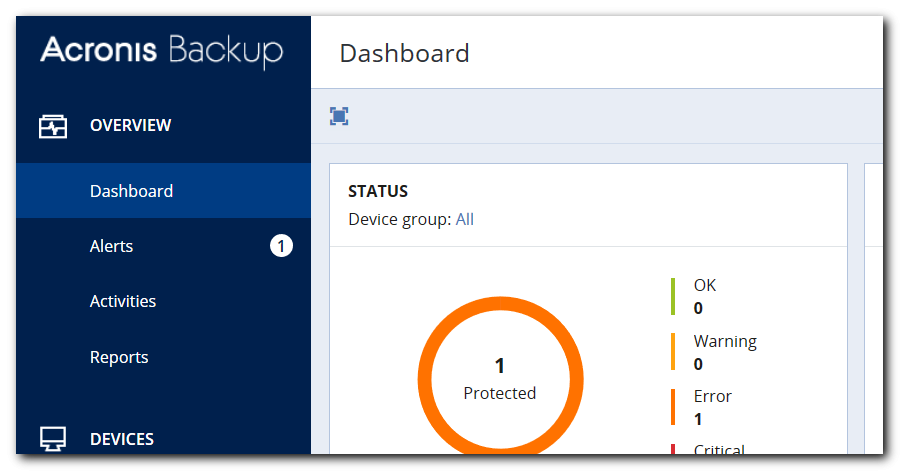
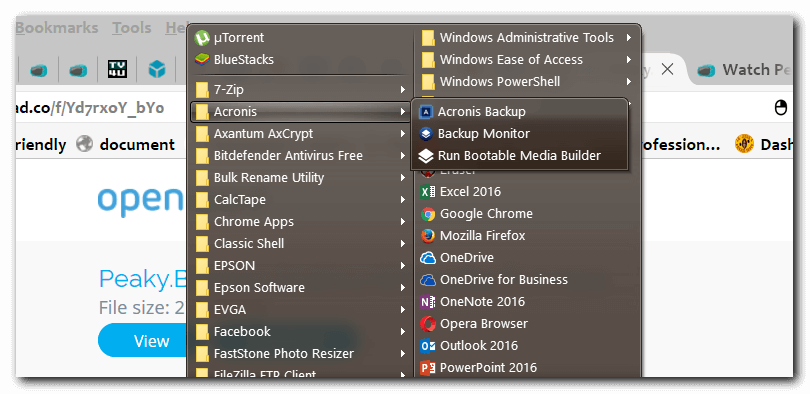
Step 3 – On the “All machines” page, click the “Recover” button underneath the machine on which you created the MySQL backup plan.
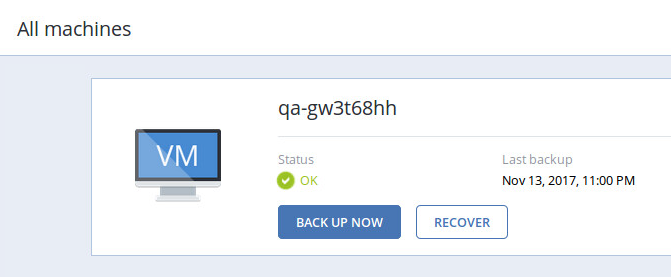
Step 4 – Click the “Recover Files/Folders” button.
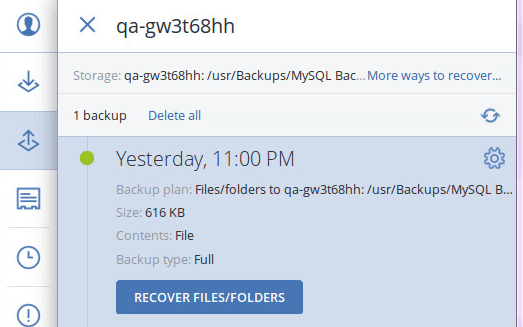
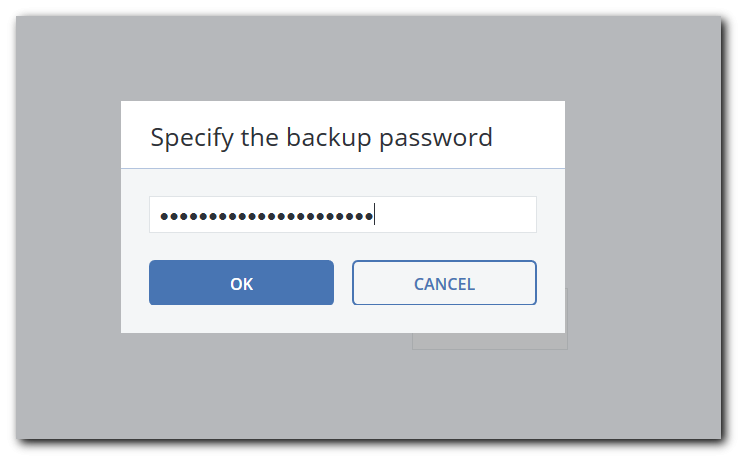
Step 5 – Enter the encryption password for the MySQL backup file, and then click “OK.”
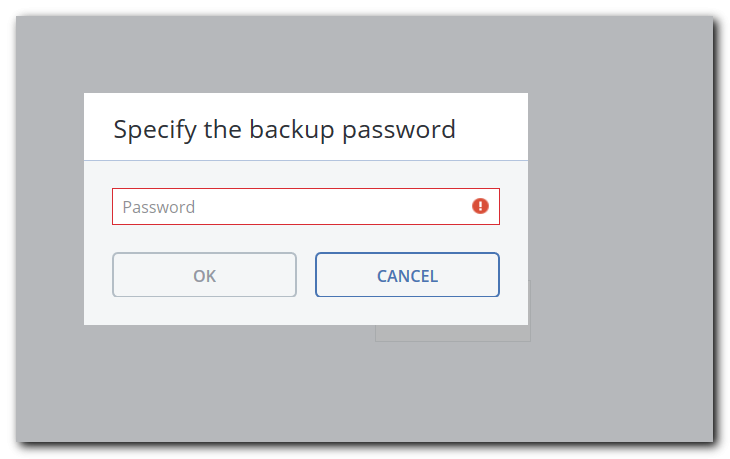
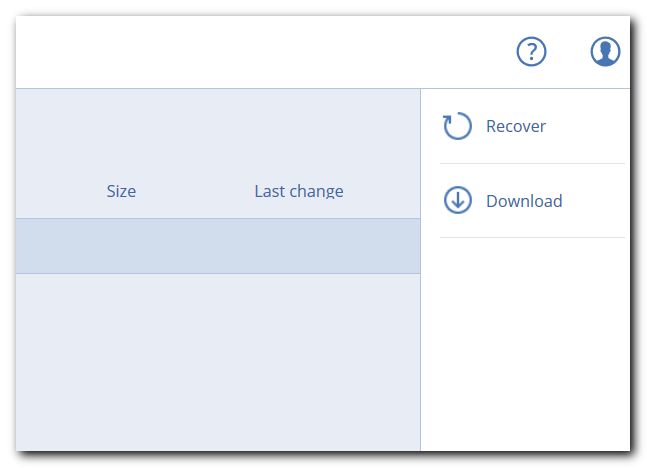
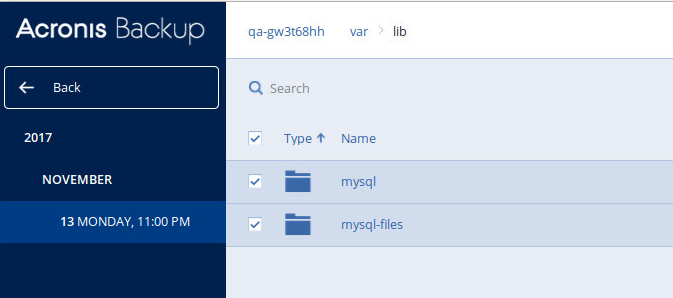
Step 6 – Navigate to the folder where you want to restore the MySQL database backup file. Click the checkbox next to the “Type” label near the top of the window, and then click “Recover” in the upper-right corner of the page.
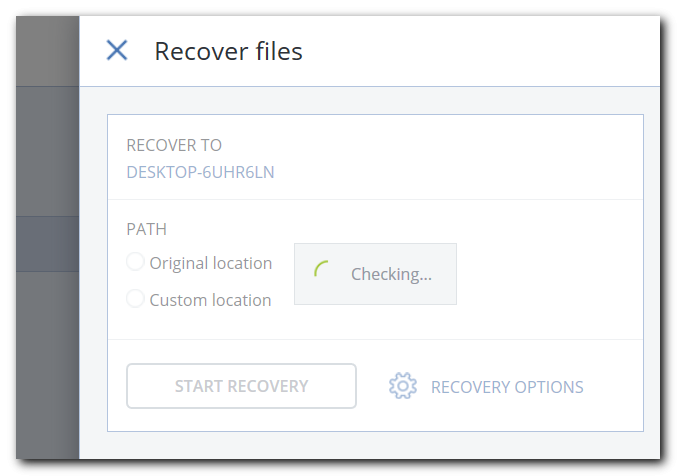

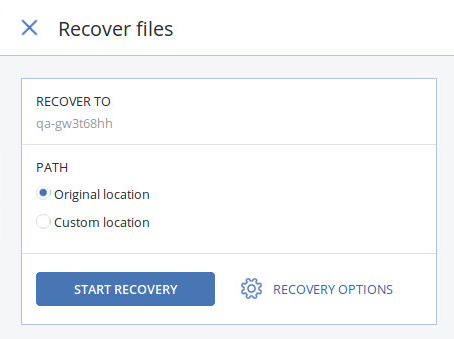
Step 7 – Select “Original Location” in the Recover Files pane, and then click “Start Recovery.” Alternatively, select “Custom Location” if you want to move the database installation to a new folder or machine.
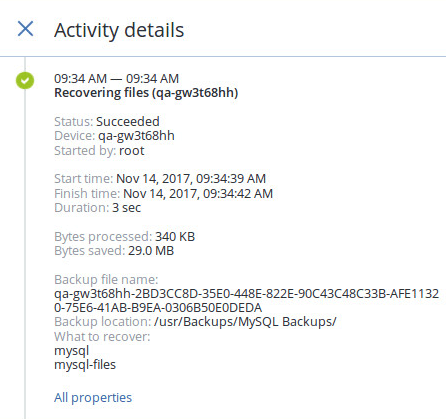
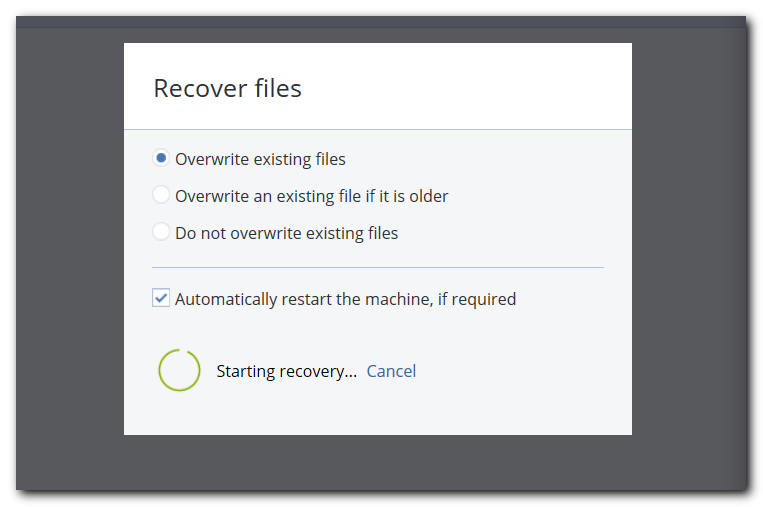
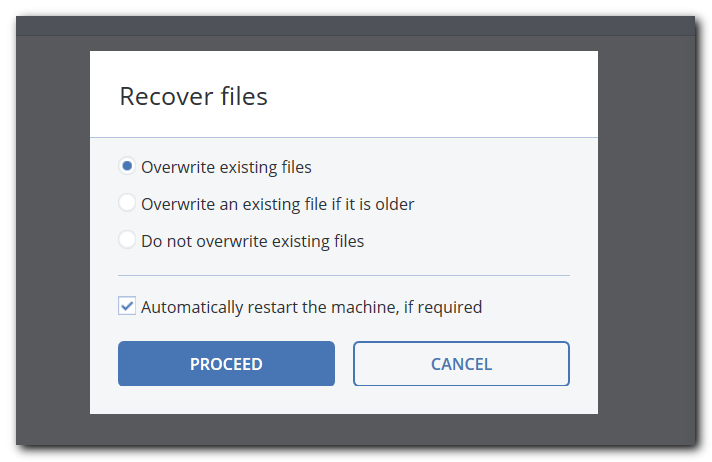
Step 8 – Select a file replacement option. You can choose from “Overwrite existing files,” “Overwrite an existing file if it is older,” or “Do not overwrite existing files.” Once you make your selection, click the “Proceed” button. Wait for Acronis Cyber Protect to run the recovery process and update the monitor window.
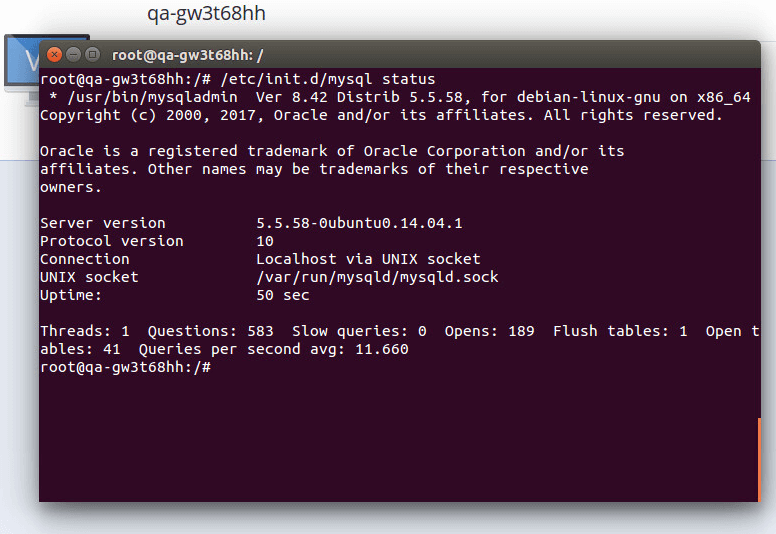
Step 9 – Restart MySQL on the Linux server.
Conclusion
MySQL and SQL Server databases are critical for businesses of all sizes globally. To protect your data from accidental deletion, hardware failure, cyberattacks, and natural disasters, you must ensure regular MySQL Server backups to secure storage, both onsite and in the cloud.
You can use numerous methods to back up MySQL databases, such as the Mysqldump command line, phpMyAdmin, dedicated backup solutions, and more. As for SQL Server databases, you can use SSMS, T-SQL scripts, and third-party solutions.
Whichever approach you choose, it's imperative to tailor it to your company's specific needs and requirements and stellar cybersecurity and data protection standards. As businesses manage bigger and bigger data volumes and cyber threats grow even more sophisticated, your MySQL backup strategy must empower scalability, data security, and backup availability to ensure a rapid recovery and business continuity regardless of the disaster scenario.
About Acronis
A Swiss company founded in Singapore in 2003, Acronis has 15 offices worldwide and employees in 50+ countries. Acronis Cyber Protect Cloud is available in 26 languages in 150 countries and is used by over 21,000 service providers to protect over 750,000 businesses.


