Introduction
So, what does that mean for you? Well, put simply, it means that if you have not experienced data loss due to a virus or hack yet, it may only be a matter of time. Although hackers, malware and ransomware should always be a concern, they are not the only threats to your data. While modern hard drives are certainly more reliable than they were in the past, countless thousands of drives die or fail daily. Therefore, to protect against losing your valuable data, you should prepare a data rescue plan to recover files ahead of time — before disaster strikes. The best plan for preparing yourself involves data recovery software, that you can use it immediately in case of emergency to recover data of your business and protect your organization from types of data loss scenarios; but this can be done only by reliable and tested tools capable of executing a data rescue process.
What is data rescue for Macs?
We live in times where cyberattacks, natural disaster, disruptive events or malware software are waiting just behind the corner, and stalking your business to hit in a moment of vulnerability. The only real and working solution in this kind of scenario is having the best data recovery software and ensuring full backup to in case of need. You must have a data rescue plan to action for recovering files, when unexpected event happens and you must be confident to ensure the capability to recover deleted files, or to restore your data in case of cyberattack in a simple, effective and fast way.
Thus, you give your business the chance to survive in extreme situations providing the right data recovery tools capable to complete data rescue process. Until you face that kind of unwanted scenario, you won't understand how important for mac users or any other operation system, having a file recovery software for data rescue when things get serious.
There are various reasons responsible for lost data caused by human factor, deleting files by mistake, cyberattack or any other disruptive event. If you have to deal with that kind of situation is very important to have options for data recovery. As an owner of a business, you must always have a plan A and a plan B to ensure your business’s continuity and recovery in case they’re needed. It is a must to have cloud-based backup options to execute a proper data rescue process; but sometimes this won't work without an internet connection, so you must have another option with external drives and storage devices.
Always having a plan gives you the opportunity of being one step ahead of the stalking threads out there and guarantees the functioning of your business, no matter what happens, because nobody is insured nowadays from vulnerabilities. This leads to the conclusion that it is up to you to get prepared for data rescue, whenever it is needed.
Is data rescue free?
Nowadays, there are enough options for data rescue and data recovery software apps, but of course they’re not free. Nevertheless, it is important to have a plan of action for data rescue and recovery apps in place despite the price, because it’ll be nothing compared to the cost in the event of lost files without a backup and recovery plan. So, having options for data recovery may be not free, but it is priceless in extreme situations. Another huge benefit is that you can preview files before recovery, which is a very useful tool. Also, these types of software are programmed to execute quick scans and, when needed, deep scans to protect all information before it is stored in the cloud and then recovered back to your computer or device in case of emergency.
According to a recent survey among 3,000 company owners, at least twice a year they have faced unexpected circumstances like deleted files, cyberattacks or harmful software, leading to the risk of losing their business data — which to them would mean losing their business.
If you love what you do, and want to keep your organization’s systems constantly operating and safe, you must be prepared for those critical moments. It is up to you to choose the best data recovery process and strategy for keeping your business secured. Don't hesitate about paying for that kind of software, because it is really lifesaving for your organization in case of unpredictable and disruptive events.
Do Macs have built-in data recovery software?
Yes, Macs have data recovery software built into their devices. You can use the apps in macOS Recovery to repair your internal storage device and boot drive; reinstall macOS; restore all file types of data from a Time Machine backup; and set security options. You will just need an internet connection to effectively execute data rescue and recovery processes for all kind of data and file formats.
Data rescue built in software versus third party data rescue software
Have you ever lost essential files while moving the from one location to another or accidentally deleted files during the process? Have you experienced losing files and data while formatting your external drives like USB drives, SD cards, or after malware corrupted your data? Don't freak out even if you don't have backup or data recovery software. With third-party data recovery apps and tools you can restore your data in just a few click away, previewing your recoverable files.
Best data recovery software — Acronis Cyber Protect Home Office
It is safe to say that Acronis Cyber Protect Home Office is the most reliable cyber protection and data recovery software on the market with the best data management. The complete cybersecurity services for a busy home an easy-to-use and reliable solution against data loss and for restoring your recoverable files. Acronis Cyber Protect Home Office combines and provides the most important principles like backup, disk cloning, scan, data recovery of any data file type and cybersecurity services, which makes it a complete software safeguarding your business data at the best possible way. The backup provides flexible local or cloud backup of a complete machine or previewed and selected files on a flexible schedule. While disc cloning creates a complete cloning of your data as a backup, or to migrate to a new device or computer. You also receive the best data recovery software with complete cyber protection, including antivirus and ransomware protection.
What should you look for in a Mac data recovery software?
Data recovery wizard for Mac is the world's most advanced and reliable mac data recovery software, which is designed to restore all files types of data loss in just a few steps. Another benefit is its user-friendly simplicity, which executes deep scan into storage devices that any other Mac data recovery software, ensuring you the best scan results and best data recovery. The original data rescue for mac keeps your files undamaged, and your personal info secured. Furthermore, it is the first and only data recovery software that resolves issues related to T2 chip data encryption, which should be considered as a major benefit. In conclusion we can say these are the main pros you should look for in a data rescue software for Mac and Mac OS X.
How to create a data rescue plan?
Creating regular backups of your data is the first step to implementing an effective data rescue strategy. However, simple backups to local or network drives (and even external hard drives) are no longer enough because of new ransomware threats that seek outs and encrypt backup files on both physical and virtual drives. And, in many cases, even cloud storage sites that use file synchronization (such as Dropbox) may not be safe from the ransomware plague, as your own sync/backup schedule could cause infection and encryption of backup files in the cloud. Therefore, in this article, we will discuss why implementing a data recovery is essential and how you can use Acronis' award-winning backup software to safeguard recover your data.
Why backups are no longer an “optional luxury”
Back in the day, backups and data recovery were generally considered necessary only for geeks and large businesses. After all, before USB hard drives and cloud storage sites were the norm, backups and data recovery were associated with clunky, hard-to-use tape drives that were neither convenient nor affordable for most home users, so a lot of them used external hard drives to keep their precious data separated from everything else — hoping this would ensure their protection. Hence, backups and data recovery of computers were considered more as a luxury than a necessity. Well, things have definitely changed.
Data loss is just around the corner
With so many threats to your data lurking around the corner these days, establishing a data rescue plan with regular backup and quick scan is not only smart, it is an absolute must. If the data on your PC is important to you, then you must also realize that creating a backup and recovery strategy, and then implementing it faithfully, are the only way to protect your files against loss due to hackers, malware, ransomware, hardware failure and other disasters. In short, not preparing yourself for eventual data loss is just plain reckless.
File storage sites are not really backups
Nowadays, there are many different file storage sites that enable you to store files and share them with others, and some of them are even free to use. However, while Google Drive, Microsoft OneDrive, Dropbox and other online storage sites are a convenient way of storing and sharing a few files, they are probably not the best backup solution for your data rescue plan if you need to safeguard a large amount of data or your entire system scan.
Limited space, limited convenience
In most cases, online storage sites offer only a limited amount of space for your files, which makes backing up your entire system difficult or, more likely, impossible. Not only is storage space an issue with these types of sites, the lack of automation and scheduling also makes regular file backups a time-consuming chore that still ultimately fails in securing all of your data.
So, what is the solution for this conundrum? Acronis True Image and Acronis Cyber Protect both enable you to store complete and up-to-date backups of your data in the cloud or on physical media with minimal effort, which ordinarily is a time-consuming process. That way, when you do need a stellar data recovery and rescue solution, Acronis will always have you covered with the latest version of cyber protection, guaranteeing to recover your files.
In the next section, we will take a look at just how easy it is to use the best data rescue software available — Acronis True Image — to implement a safe, effective and reliable backup strategy that will secure all of your data — unlike other apps on the market.
Securing a Windows PC with Acronis Cyber Protect Home Office.
Microsoft Windows is — by far — the most popular operating system in the world. However, the fact that so many people use Windows to run their PCs is also the same reason that machines running the OS are the biggest targets of hackers for phishing and malware attacks. When it comes to threats to your Windows data, it is not a question of if you will be targeted, but when. Consequently, you need to be ready before disaster strikes at your precious data, and having a plan for data recovery is a blessing. Fortunately, Acronis True Image makes the task of safeguarding and recovering your data extremely quick and easy.
Is Windows data recovery free?
There are, in fact, some applications providing free data recovery, and there are also paid applications with a temporary, free-trial version; however, they have restricted functions in the recovery process. For example, you won't be able to benefit from the best methods and updates the paid version of the different applications can ensure, such as complete recovery of your hard drive or cloud-stored data. On the other hand, it is a good idea to have a free-trial version, because you can try different applications and choose the software that fits best for you. But the best thing you can do is buy the paid version of the software — ensuring your complete cyber protection and file recovery.
How to back up your Windows PC with Acronis Cyber Protect Home Office
Acronis True Image is the world's fastest backup software and enables you to back up selected files and folders or an entire system with just a couple of clicks. That's why millions of Windows users across the globe turn to Acronis Cyber Security Home Office software to protect their valuable data and execute data recovery when needed. Just how easy is it to secure your Windows system with Acronis Cyber Security Home Office? Take a look at a quick, step-by-step walkthrough to see just how simple it is to back up a PC with Windows using Acronis Cyber Protect Home Office.
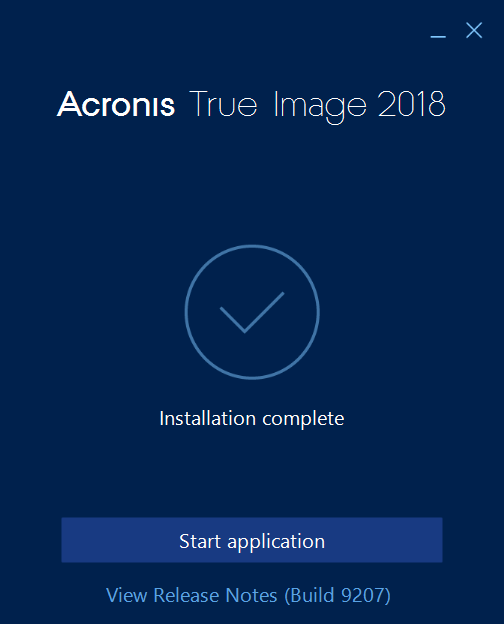
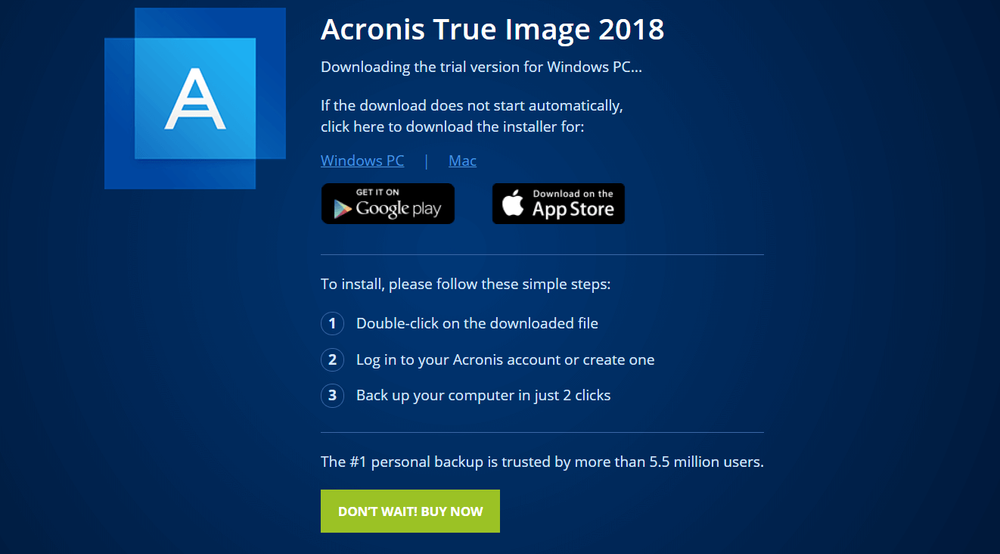
Step 1 — Purchase a subscription for Acronis True Image and download the software to your computer. Alternatively, download the trial version, which will allow you to access all the features of the software for a limited time. After you download Acronis True Image to your computer, run the setup file and install the application on your computer.
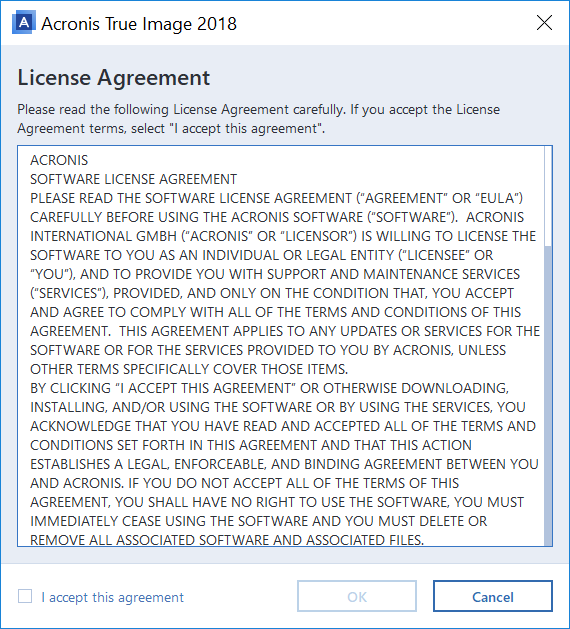
Step 2 — Launch Acronis Cyber Protect Home Office after the installation finishes. When prompted, accept the license agreement to finish loading the application.
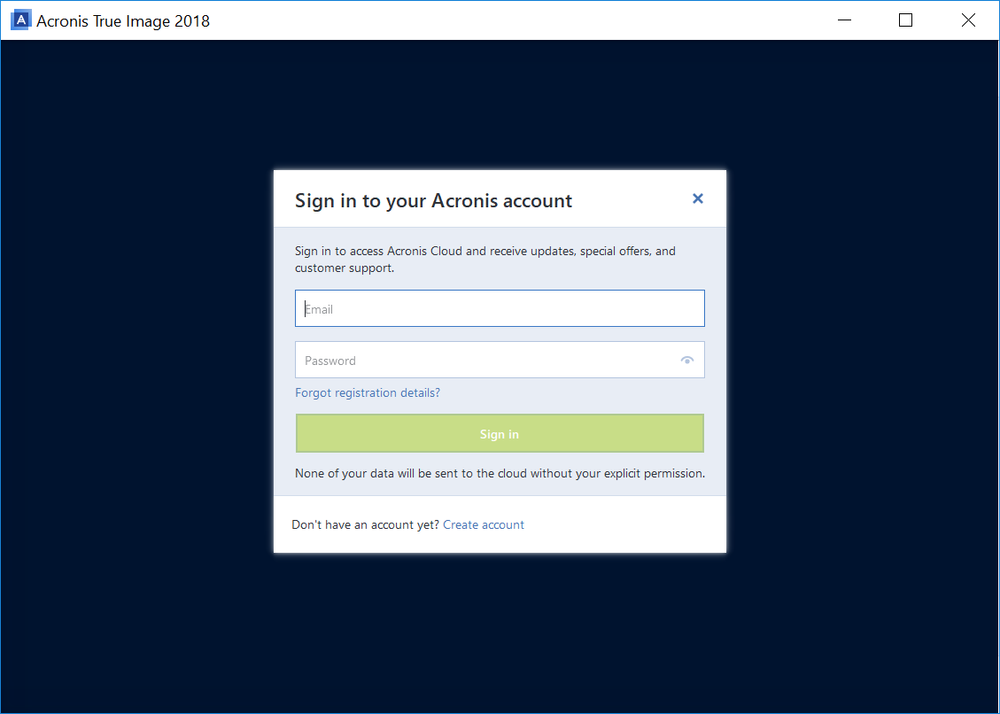
Step 3 — Fill in the form that appears to create a new Acronis account. After submitting the form, check your email for a confirmation message. Click the link in the confirmation email to activate your new Acronis account.
Step 4 — Log in to the application with your new Acronis account username and password.
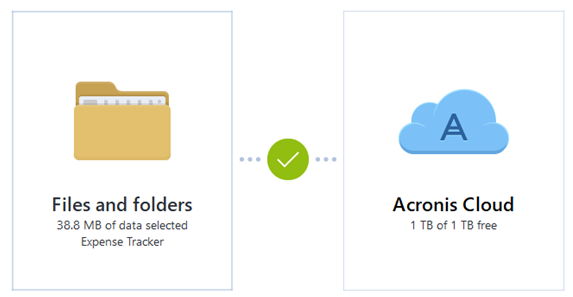
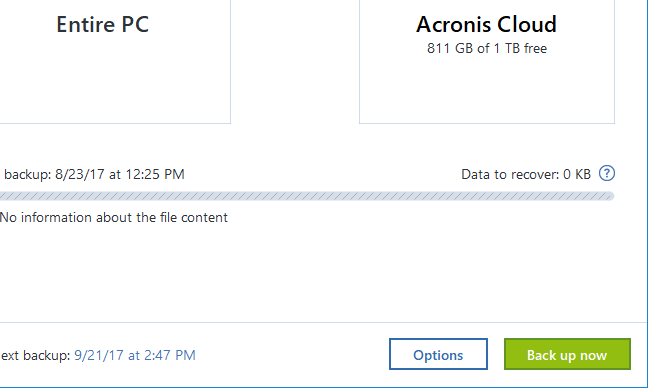
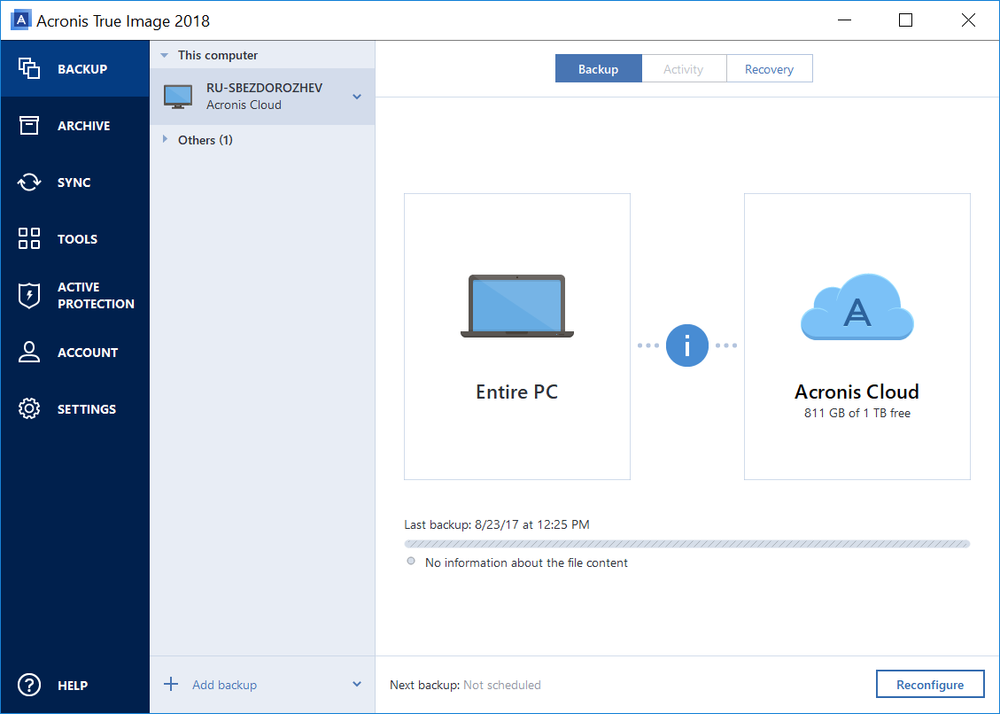
Step 5 — In the “Backup Source” list, select the “Entire PC” option. The graphic updates to display “Entire PC” in the main backup window.
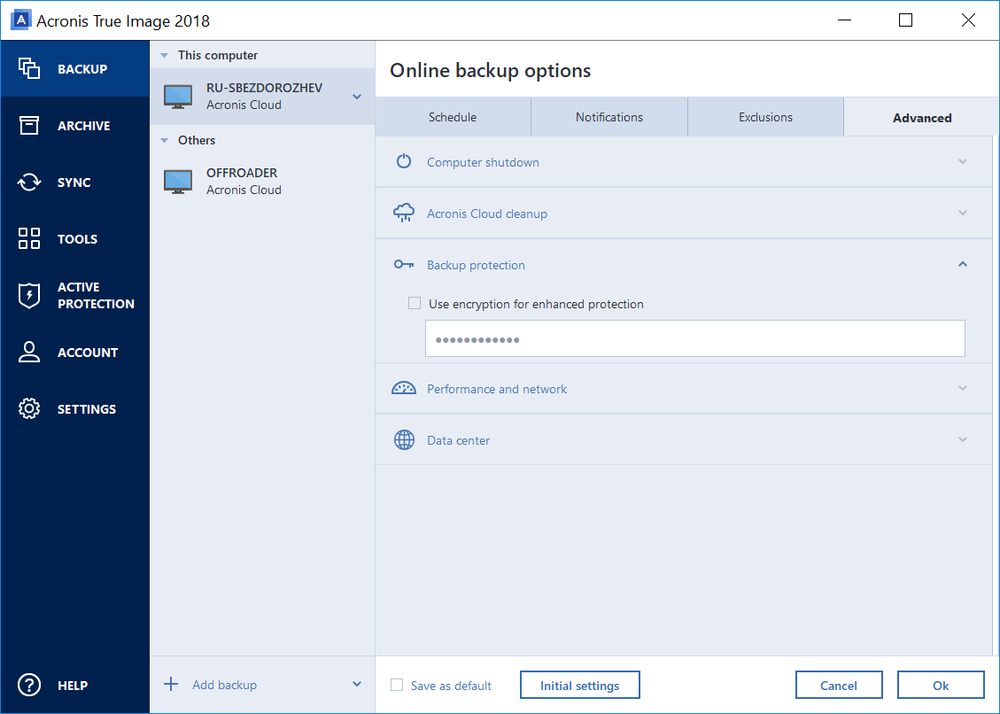
Step 6 — Click the “Change Destination” graphic in the main application window. Select “Acronis Cloud” in the “Backup Destination” list. The main backup window updates and displays “Acronis Cloud” as the backup destination. Pro tip — To encrypt your backup, go to “Options” → "Advanced" → "Backup protection". Enter a password for the backup file encryption. Be sure to enter a strong password that is difficult to guess but easy for you to remember. Use a password that is at least 12 characters in length and contains both upper and lowercase letters, numbers and symbols. Click the “OK” button to save the encryption password.
Step 7 — Click the “Back Up Now” button.
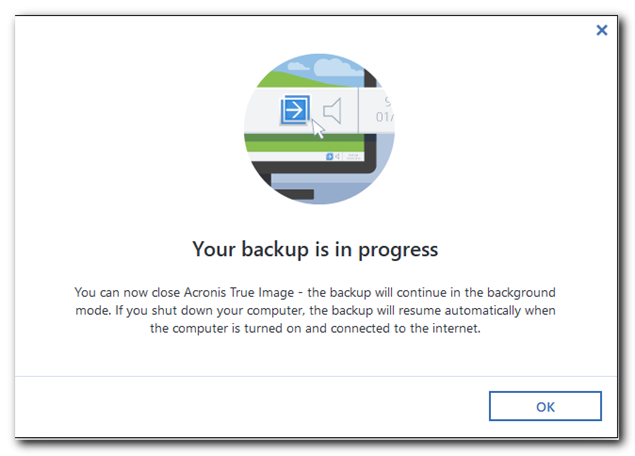
Step 8 — Wait for Acronis Cyber Protect Home Office to back up your system to the secure Acronis Cloud. Depending on the number of files on your system and the speed of your internet connection, the Windows computer data recovery could take a while to complete. A progress bar at the bottom of the main backup window shows you how the backup is progressing as well as an estimate of the time remaining before the backup finishes.
Step 9 — Click the “OK” button to close the notification window. You can use your computer normally while Acronis True Image completes the backup in the background. Once the backup is finished, the main backup window will display a green checkmark in the main application window.
Alternative – If you do not want or need to back up your entire Windows computer, you can opt to back up only selected files and folders. To back up only specified datasets, select the “Files and Folders” option in the “Backup Source” list. Pro Backup Tip — When implementing a data rescue strategy, it is always best to store backups in several locations (to ensure you always have access to at least one version — no matter what happens.) So, in addition to storing a backup set in the secure Acronis cloud, you should also consider backing up your Windows system to a local or network hard drive. To save a backup to a local or network drive, just select the appropriate drive location in the Backup Destination list.


Using Acronis True Image to safeguard your Mac computer data
Just as it does with a Windows PC, Acronis True Image makes it super simple to back up a Mac computer. And, with Acronis True Image, you can start backing up your system within seconds of downloading and installing the software. Better still, once you create a backup and data recovery plan with Acronis Cyber Protect Home Office, your backups will run regularly and automatically based on scheduling preferences that you can configure or change at any time.
Acronis data recovery options
Preparing and implementing an effective backup and recovery strategy is the most crucial part of any data rescue plan. However, when a data disaster does strike, or you have accidentally deleted files, creating and storing your backups is only half the battle. When your valuable data is lost or compromised, nothing is more important than being able to restore or recover all kinds of file formats from the recovery drive quickly and completely. Furthermore, you can preview found files and select which ones you want to recover and which you don’t. With Acronis True Image, recovering data is just as easy as backing it up; it takes only a few clicks. Check out the sections below to see just how easy is to retrieve your recovered files from a backup with Acronis Cyber Protect Home Office. Another important benefit is APFS support, because it shows the device path and its task is to fix crashes after database failures — a tool you don't want to miss for sure. In addition, Acronis Cyber Protect Home Office contains many other tools that will help you feel more secure about your complete data protection and recovery capabilities.
About Acronis
A Swiss company founded in Singapore in 2003, Acronis has 15 offices worldwide and employees in 50+ countries. Acronis Cyber Protect Cloud is available in 26 languages in 150 countries and is used by over 21,000 service providers to protect over 750,000 businesses.