Retaining control over your data means, among other things, knowing how to manage your system’s disk. When you know how to create, resize and format partitions, you unlock new, flexible capabilities. You decide where your data is stored and how the disk space is used.
That means you can maximize your storage space by merging partitions that are random and unused. You can expand a partition and dedicate its use as your music library. Want to create a dual-boot system on single disk? Resize Windows’ partition to save space and add the other operating system to its own partition. Then when you start the computer, you can pick the OS you want run. You are in control.

While Windows includes a native Disk Management tool for formatting and partitioning a hard drive, more advanced capabilities such as merging them requires outside help. For a total disk management solution to your partition needs, we’ll look at how to create a partition, how to merge partitions, and how to resize a partition using an easy-to-use and affordable app called Acronis Disk Director 12.
Create a partition/volume
In Acronis Disk Director, you need to select the partition/volume, disk or unallocated space you want to work on before the operations become available. Make your selection at the bottom of the screen, and that will launch a user-friendly management wizard. To create a new partition:
- Run the Create Volume Wizard by right-clicking any unallocated space, and then selecting Create Volume.
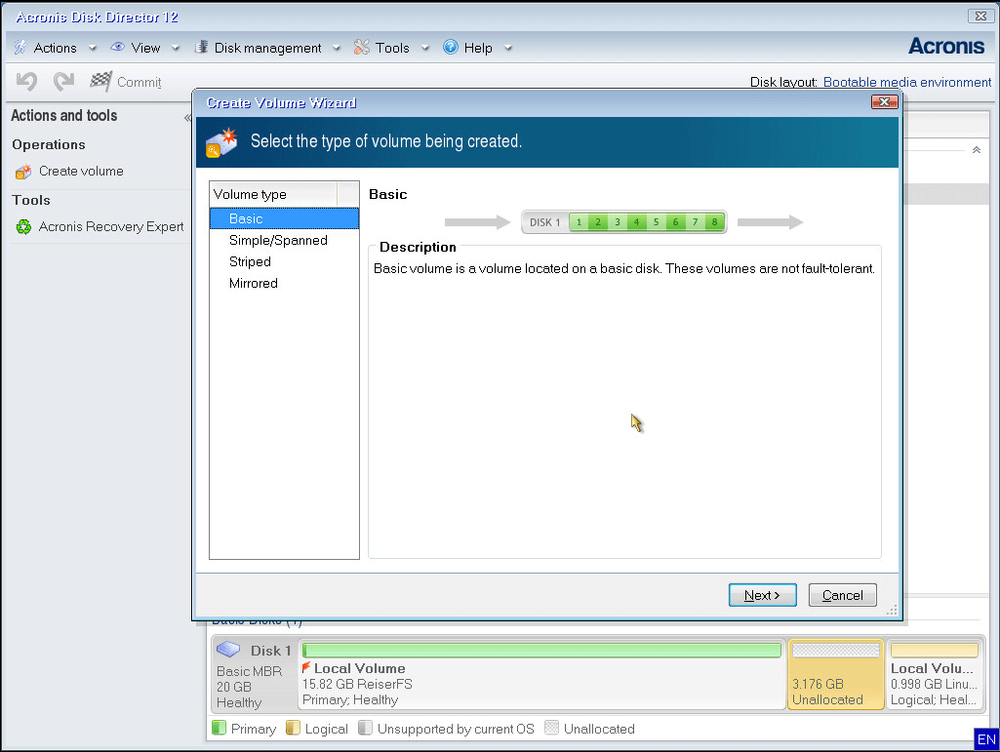
- You’ll then need to specify the volume type. You’ll see a list of types that are supported by your operating system, as well as a brief description to let you better understand the advantages and limitations of those volume type.
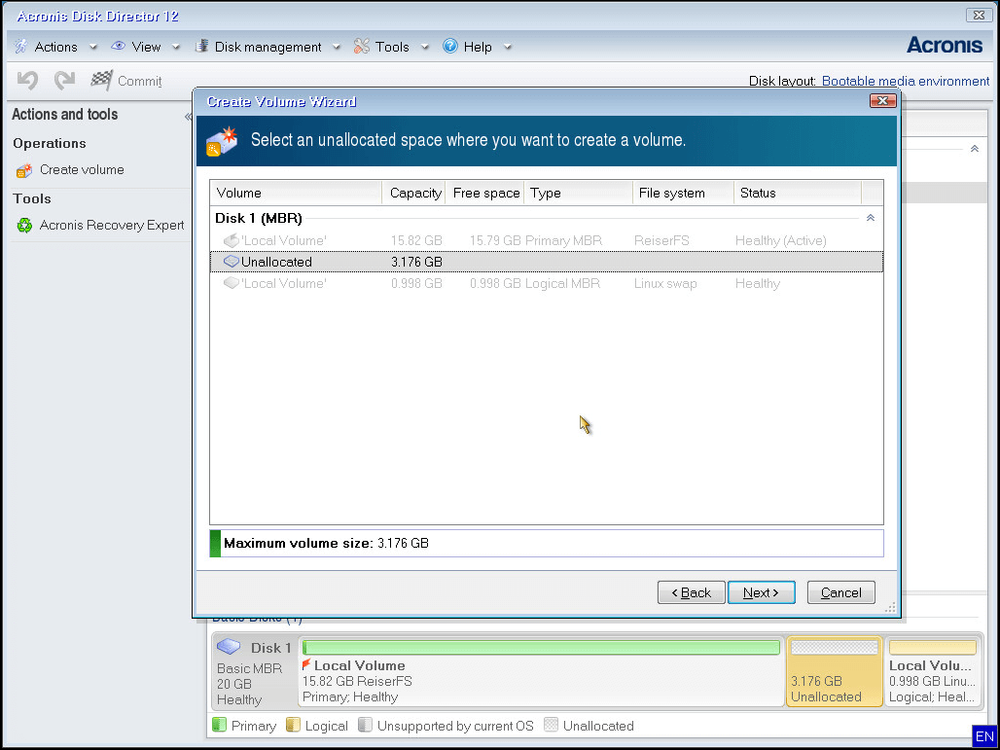
Depending on the type of volume being created, you’ll need to select the disk where it will be placed. A basic volume, for example, requires you to select a basic disk and specify the unallocated space you’ll be using.
- You’ll then be asked to define the size of the new partition. The default is set to “maximum,” but you might want a smaller partition. Simply move the slider or enter the size you want into the Volume size field.
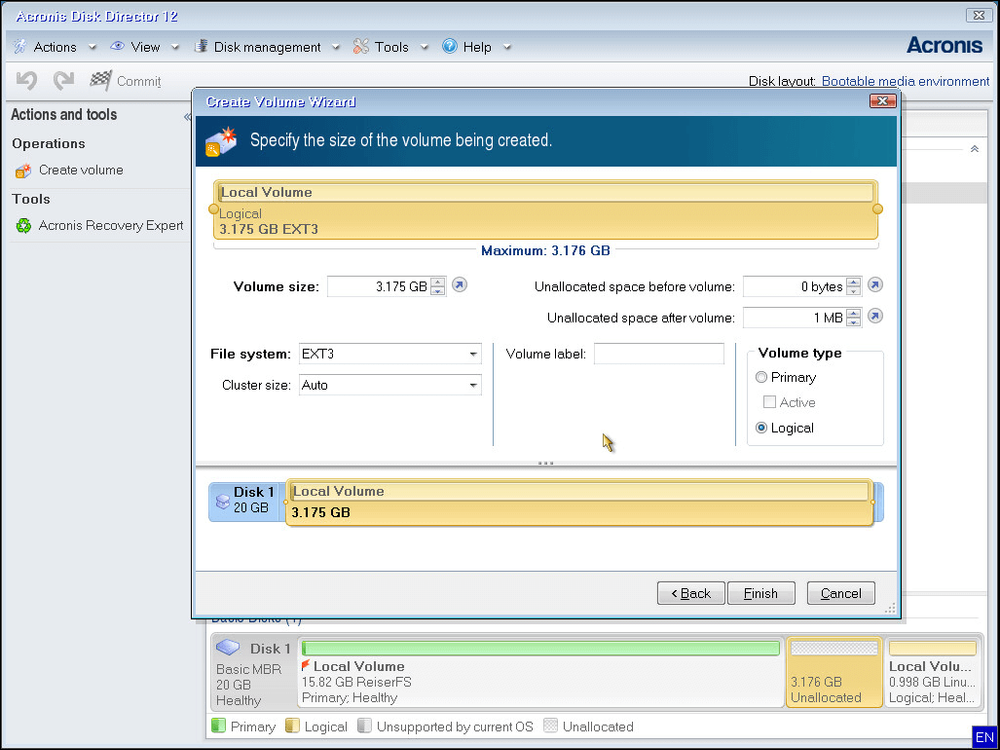
- Then you have a few decisions to make.
- The type of file system. The default setting is NTFS, but you’ll be able to select from supported file systems.
- The minimum cluster size. This is the smallest amount of disk space that can be allocated to store a file. It’s advisable to leave the default size, which optimized based on the volume size and file system type you’ve selected.
- The name of the partition. While the default is “none,” you can assign a short name to better differentiate it from other partitions.
- The drive’s letter. While the next available letter in the alphabet will be selected by default, you can dictate the drive letter if you wish.
Finally, if the new partition is a basic volume, specify whether it will be:
- Primary, if you plan to install an operating system on it. If you want the machine to start from this volume, mark it as Active.
- Logical, if it is intended for data storage.
- Then click Finish.
The creation of the partition/volume will appear as a “pending action” that you’ll need to execute. If you exit the wizard without approving the actions you’ve taken, the new partition will not be created.
Resize a partition/volume
Whether you want to expand the storage of a partition or reduce its size to free up space on the disk, the ability to resize a partition is a tremendous utility. Want to resize the partition from which the machine or an operating system starts? You can, just remember you can only resize the system volume, boot volume, or the active volume if it is a basic volume.
Did You Know?
When resizing a partition, you have a choice of how your disk space is used. Since a basic volume occupies a single region on a single basic disk, when you resize a basic volume you can only use the unallocated space that is adjacent to the volume – although you can move available space to be “adjacent” if needed. You can also choose to Convert the disk to dynamic and use unallocated space from all dynamic disks on your machine. In that case, the volume will become a simple or spanned volume.
To resize a partition:
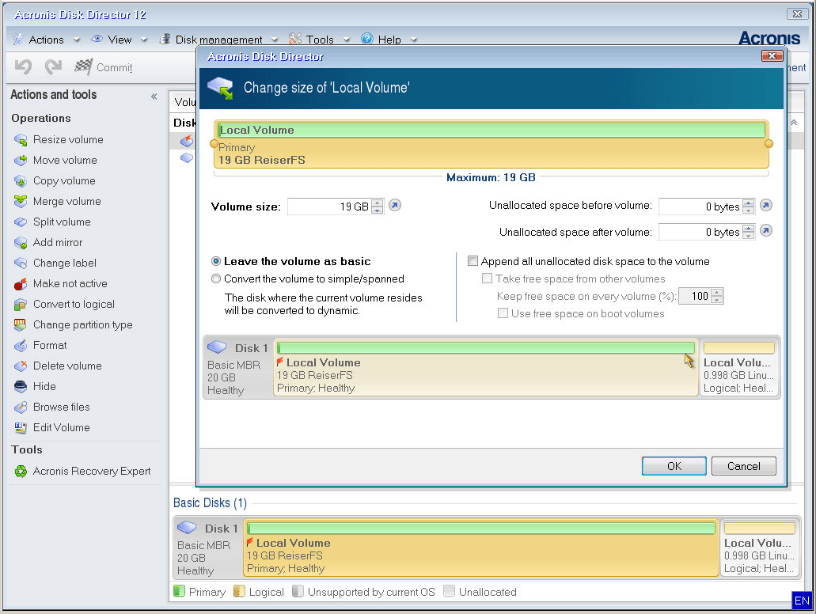
- Select the volume that you want to resize, and then click Resize volume.
- Specify the new size of the volume by typing the desired size or by moving the slider.
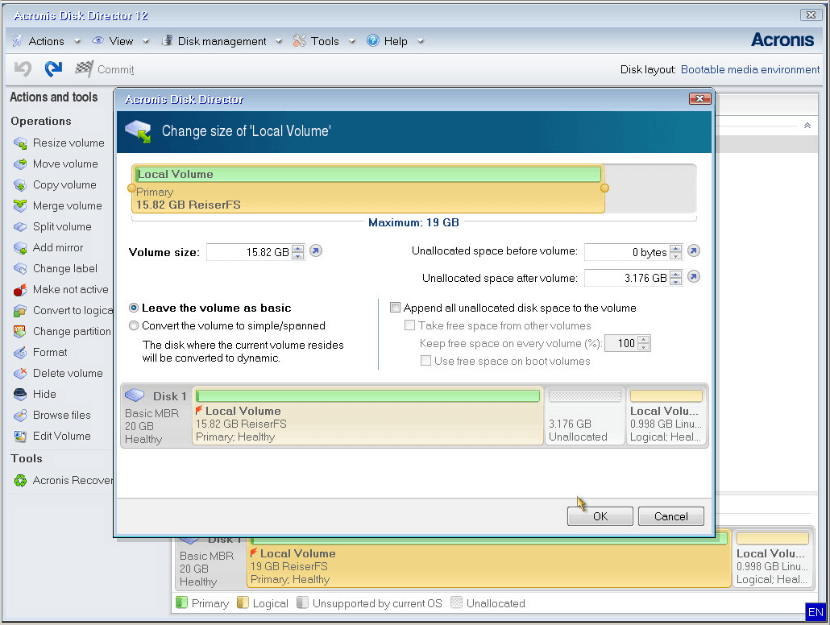
- You then have to choose the volume type:
- Click Leave the volume as basic if you’re only going to use unallocated space that is adjacent to the volume.
- Click Convert the volume to simple/spanned to use unallocated space from all dynamic disks on the machine, which will also convert the corresponding disk to dynamic. This option is not available when resizing the active volume, or boot or system volumes.
If you choose to Leave the volume as basic, you have the option to select Append all unallocated disk space to the volume, which will make all that extra space available for the partition you are resizing. When this check box is selected, you also have the option to Take free space from other volumes. This reduces all other volumes on the disk so you can reassign the unused space to the partition you are resizing. Finally, you can also take free space from boot volumes, but that is not a default option. You will need to mark the check box labeled Use free space on boot volumes.
- Use the preview area at the bottom of the window to see where the resized volume will be located on the disk.
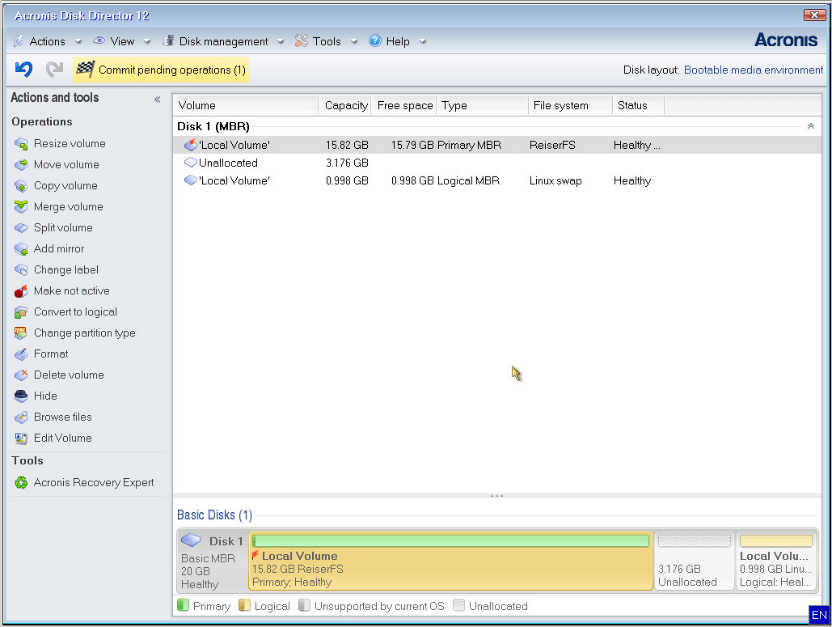
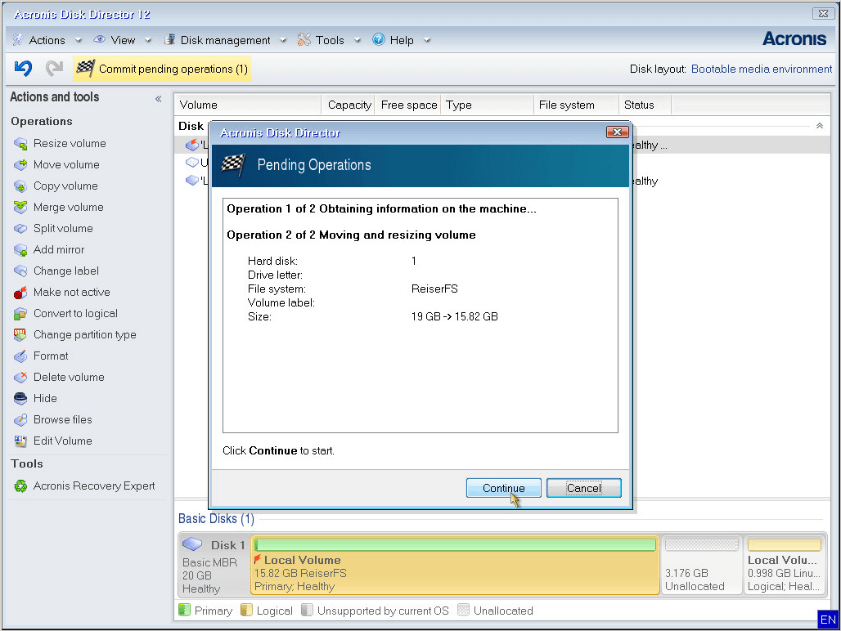
- Click OK. Resizing the partition will appear as a “pending action” that you’ll need to execute before exiting the wizard.
Merging partitions
If you’ve got two adjacent basic volumes, even if their file systems are different, it is possible to merge them while keeping all of the included data intact. The only volumes that cannot be merged are ones that contain encrypted files. In order to merge two volumes:
- Right-click one of the volumes you want to merge, and then click Merge volume.
- Select the second volume.
- In Main volumes, specify which volume will be considered the main. Data from the other volume will then be added to a separate folder in the main volume.
- Click OK.
Again, the merger will be listed as a “pending operation” that you’ll need to execute before leaving the wizard. Otherwise, the change will not be applied. Once merged, the remaining volume will have the same label, letter and file system as the main volume you selected in step 2.
Not sure which volume to assign as the main? There are two things you should keep in mind: size and security. Size, because to merge two volumes, your main must meet the free space requirement. That means it must have at least 5 percent of the second volume’s total size available. Security, because you don’t want to lose security settings like access permissions. To keep those settings when merging volumes with two separate file systems, select the one whose file type supports security options. Otherwise, if you merge a secure volume into a non-secure volume, those security settings will be lost.
Formatting a partition
Formatting prepares a partition to store the files and folders you’ll place there by establishing a file system. And while you can format it when you’re creating the volume, you can also use the format operation to quickly wipe the data or to change the file system. Keep in mind, the process destroys any data on that volume regardless of why you are formatting the partition. Make sure you have a backup of any files you want to keep. If you’re confident that you want to proceed, here’s how you format a partition.
- Right-click the volume that you want to format, and then click Format.
- Select the File system that you want to create on the volume. For Windows, the NTFS file system is usually recommended.
- Select the Cluster size, or allocation unit size, for the file system. For most users, leaving the default size is recommended.
- If you want to assign a Volume label, you can create one now.
- Click OK to add the pending volume formatting operation.
About Acronis
A Swiss company founded in Singapore in 2003, Acronis has 15 offices worldwide and employees in 50+ countries. Acronis Cyber Protect Cloud is available in 26 languages in 150 countries and is used by over 21,000 service providers to protect over 750,000 businesses.


