You accidentally deleted a file and already emptied the recycle bin when you realize you need that file back. Here’s an even worse scenario: your hard drive just crashed and you lost everything you need to run your personal finances as well as your small business.
Do you Really Need it? Most people think all you need to do is run hard drive recovery software. Easy, peasy they say. Abracadabra — all your files are back. Or are they?
What is hard drive recovery software and how does it work?
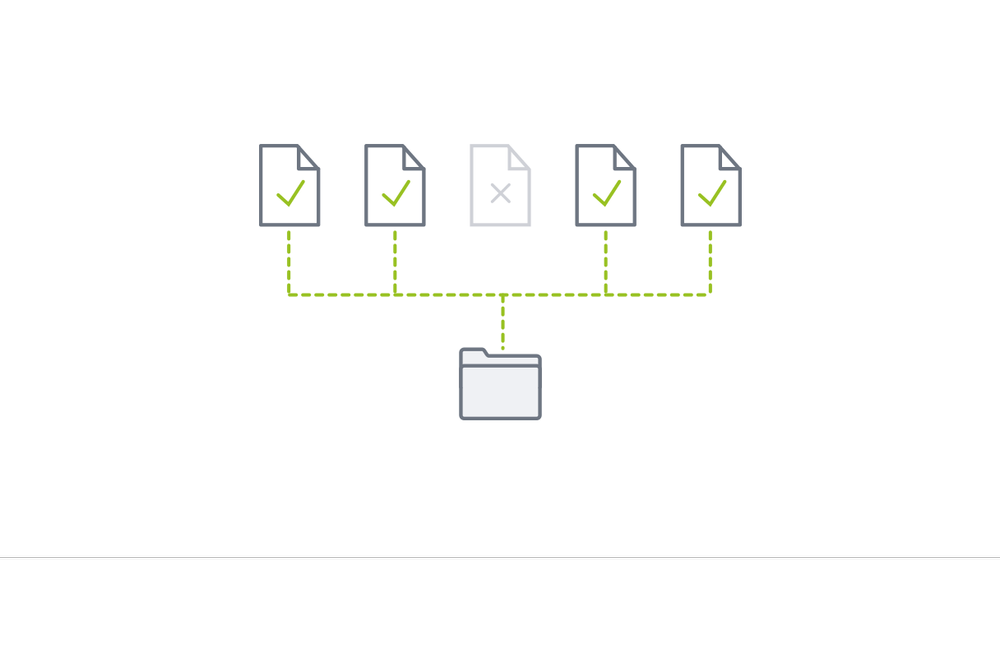
If you accidently delete a file or lose all of your files because of a system crash or virus, hard disk recovery software may be able to recover the file(s) from your hard drive by “scouring the drive, locating recoverable data, piecing it back together, and providing it in a salvageable format.” When you delete a file on your computer, it goes to the recycle bin. If you empty the recycle bin, the file is still not totally removed. Instead, the file remains “hidden” on your computer, the path to the file is removed, and the space is designated as available for other files. If the operating system does not use that available space by overwriting another file, the deleted file can stay on your hard drive for years.
The problems with hard disk recovery software
So many solutions, not enough time
There are many data recovery tools and software available, each with different features and capabilities. Multiple vendors all claim to be the “#1 Data Recovery Software” and that they can salvage data from any drive. There are even free software. There’s a lot to choose from and deciding which is best is complicated. Usually, if you are considering data recovery software, you have already lost your precious data and are under pressure. Your search for the right tool or software is reactive. You are in an emergency situation, need to get your file(s) back fast, and do not have time to research, test, and wait — yes, many of these tools can take hours to retrieve (or not retrieve) your file(s) and other alternatives require expensive consultants and/or ask you to ship the disk drive directly to a vendor.
Free is Not Free
Software vendors are in the business to make money, so anything that is offered “free” is not really free. For example, a TalkTechtoMe review of supposedly free software received the comment that “none of these programs are FULLY functional as is ... Not one of them will get your files back in their entirety without asking you to upgrade or pay for a registration key. Some limit the amount of data or number of files you can get … Looking through all these bogus tools has been a total waste.”
No 100% data recovery guarantee
Hard drive recovery software can be inconsistent. Recently, TopTenReviews ranked The Best Data Recovery Software and noted that even the best has problems:
· Not all “found files” are recoverable — many can be empty or unusable fragments, headers without content, pictures only half complete, etc.
· Inconsistent results — consecutive scans reported different results, not exactly providing confidence about what data is recoverable.
Here’s the Kicker: Not Everything is Recoverable
If your files are overwritten or if your disk has failed, no hard disk recovery software can recover your files. Think there might not be any harm in trying? Think again. Even experienced users trying to recover data from a failed or failing disk by themselves can easily result in further or even permanent data loss. Only a data recovery expert can possibly retrieve files from an overwritten or failed drive. But this is often expensive and can take a lot of time; you often need to ship your system out and be without it for a few days to weeks.
What are the common causes of data Loss?
We have all experienced data loss scenarios at some point in our lives, and it is definitely not something we want to happen again. It is an unpleasant experience, but sometimes it happens and brings us a lot of headaches and lost data. If something like that happens and you are provided with software capable to recover files and completing the data recovery process, it is a real life-saving option.
There are different reasons leading to data loss, and we will explore them one by one right now to get to know the devastating effects and how we can respond to such unpleasant experiences. Let's get started!
Human error
Deleted files by mistake: This is the most frequent reason leading to lost data. Often, it happens by mistake while you clean your hard drive or your duplicated information. At some point, you see that you have accidentally deleted files that shouldn't be deleted. Files deleted accidentally can be irrecoverable if there is no data recovery option for lost files.
Spillage of liquids: Everyone of us had drinks or lunches in front of the computer because of the rush to complete as much work as possible, or in case we watched movies or played video games. Sometimes we are not concentrated enough, and it happens to spill water, coffee, or something else over our PC's and storage devices. This, of course, leads to malfunctions and data loss. In this case, if there is no option for file recovery, our information will be lost due to the malfunction of the device or hard disk drive.
Hardware failure
Hardware devices that store every single file in our system tend to fail, and this will lead to irretrievable data loss. The reasons for hardware failure can be internal or external. Hard drives are prone to stopping working due to physical or mechanical failures like overheating, water and fire, power failure, or human mishandling.
On the other hand, they may fail due to hardware malfunctions like firmware corruption, read/write head failure, and corruption of bad sectors. In these cases, the only thing that can save you is having a data recovery tool in order to perform data recovery process.
Firmware corruption
Firmware on your HDD is software designed to manage many primary functions of the hard drive (accessing data, reading, and writing to the drive, for example).
If the firmware gets corrupted, there's not much to be done to salvage all the files and data on the HDD. Even if you somehow avoid data loss at first, damaged firmware leads to low functionality of the hard drive, which can result in only partial data access. Seagate and Western Digital are two examples of notoriously faulty HDDs regarding firmware issues.
Even if firmware corruption can be repaired, the constant failure of read/write heads can damage the drive's service irreparably.
Computer viruses and malware attacks
Another aspect that can lead to lost data is facing a malware attack or virus, unfortunately. As per recent research made by MTA University, 73% of the hard drives fail and stop working when facing a virus or malware attack. That leads to the conclusion that in such a case, the consequences can be devastating for any hard drive or storage device.
Computer viruses have the ability to invade and cause harm to the data files stored on both drives and the network systems of companies. These viruses can steal, corrupt, encrypt, or even delete important data. Additionally, they can infiltrate an organization's network system and disrupt the proper functioning of computer hardware.
One common type of computer virus is known as ransomware, which incorporates malware. Ransomware poses a threat by blocking access to data or publicly exposing it unless a ransom is paid. Another method that these viruses employ is through email attacks, like phishing, which can result in data theft and damage, leading to the loss of information and functionality. To effectively defend against computer viruses, it is recommended to utilize antivirus software that is regularly updated.
If you face some of the scenarios mentioned and are unable to recover lost files, it can really have a huge impact on your business or on you, because we all know how precious our data can be, either for us as individuals or as business owners. Losing data is really a painful experience, no matter if it is photos, videos, sensitive information, documents, or client details. It always brings headaches.
The bad news is that in most scenarios, when you face data loss or permanently deleted files, if you don't have a hard drive recovery tool to recover lost partition functionality, you will lose this information for life. On the other hand, if you are provided with data recovery software, then you will be able to bring things back to normal. In conclusion, we can say that having the option to recover data when facing unexpected scenarios is really a blessing for every individual and business organization.
The Basics of Hard Drive Recovery
Hard drive recovery is the process of recovering data and restoring a hard drive to its last known good configuration and condition after a system or hard drive crashes, is corrupted, or is damaged. It provides the ability for a hard drive to recover from a failure, restore it to a normal working condition, and recover deleted files or lost and inaccessible data.
Typically, when we need to recover lost data from a drive, we have a couple of options. One way is to use drive data recovery software designed for hard drive recovery. This software can help us fix errors like accidental file deletions and data corruption. It's quite effective in retrieving all the data, except in cases where it has been overwritten in the disk sector.
Another option is to perform drive recovery by connecting the affected hard drive to another computer using interfaces like SATA, ATA, or USB. This allows us to access and retrieve lost data by ourselves. Additionally, in some cases of hard drive recovery, we might have to deal with drives and physical damage that needs repair before we can access and copy the recovered data successfully.
On the other hand, we also have the option to recover a hard drive's recently deleted files by using DIY data recovery software. The software will be the answer you are looking for, and you can recover your information by yourself using this type of software.
If the case is difficult and you see that you won't handle it by yourself, there are professional data recovery services that can help with this process. These professionals can be wonders in the hard drive data recovery mission, but the downside is that it can be an expensive option. As we know, sometimes it's not about the money, but the data we want to restore and keep.
Can a damaged hard drive be recovered?
The short answer here is — it depends. But as we want to understand the issue to fix it properly, let's explore the long version below.
Firstly, we need to know how HDDs operate. A hard disk consists of clusters of storage space called "sectors." If a sector on the hard drive is damaged, defective, or somehow corrupted, we can refer to it as a "bad sector."
As hard drives use sectors to write and read data on them, a bad sector will typically not respond adequately to read or write requests. Here, it's good to know that even SSDs can get a bad sector, although the scenario is slightly different.
The two types of bad sectors are hard (physical) bad sectors and soft (logical) bad ones.
Hard bad sectors are created due to physical damage or natural wear and can't be repaired.
Soft bad sectors are typically caused by software errors and can be repaired.
The easiest way to determine if your hard drive (or SSD) suffers from bad sectors is upon attempting to access data on it. In most cases, you'd stumble upon an error-correcting code (ECC) stating it's unable to match the contents of the sector. If that happens, it's most likely you have a bad sector on your hands.
Such a sector can be referred to as "bad," but the decision is not final. Your operating system will mark any sector as "bad" if it can't access its contents. However, you can determine if the bad sector is hard or soft. If the cause of the error is software-related, you can try numerous tricks of the trade to repair it.
Keep in mind though that it's best to back up or clone your hard drive before attempting to fix bad sectors.
If the cause for bad sectors is physical, you won't be able to copy the data on them and add it to the backup. Nonetheless, you can ensure that data on good sectors isn't compromised during the repair process.
You can also create a backup while skipping bad sectors altogether, but we'll discuss that in the article's following sections.
Back to fixing soft bad sectors, there are several ways to resolve the issue on your own. However, if your HDD has too many soft bad sectors, repairing it may be impossible. A way to determine the relative number of bad sectors is by following your computer's behavior.
If you experience slowdowns, glitches or screen freezes, it's critical to back up all unaffected data before the bad sectors swallow it. If you don't experience severe machine issues but still can't access specific files, this can mean you have only a few bad sectors to deal with.
Here's how to try fixing them properly.
Hard Drive Recovery For Windows users
Check for System errors on the HDD
First, you can scan the hard disk to see if any system errors are showing. To do that:
- Press the Windows Key + E
- Right-click on the drive you wish to inspect -> choose "Properties"
- Select “Tools” → “Error checking” → “Check”
- You'll see a pop-up window appear; when it does, click on "Select drive"
Windows will now check for system errors in the specified drive. If it detects a software issue, it will most likely be able to repair it.
Run the "CHKDSK" command and format the HDD
If the first method didn't help, chances are the software issue on your hard drive is more serious. Worry not; we have plenty of tactics left to try fixing it.
If we suspect multiple bad sectors on an HDD, we can run the CHKDSK command and then format the hard drive to repair it.
Here's how to do it:
- Press the Windows key on your keyboard
- Type "cmd"
- Right-click on the Command Prompt → choose "Run as administrator"
- Now, type in "chkdsk X: /f /r /x" and press Enter ("X:" corresponds to the letter of the potentially compromised drive)
After the check is done, you'll need to format the HDD. Here's how to proceed:
- Open the "File Explorer" in Windows
- Locate the potentially compromised hard drive and right-click it
- Choose "Format"
- Set the file system to "NTFS"
- Check the "Quick Format" option → click "Start"
Here, you'd use the backup you created earlier to recover all data to the formatted drive. Following clean formatting and proper data restoration, the drive should be usable.
Defragment the HDD
If you use a mechanical hard disk on Windows 10 or 11, you can defragment it to see if the issue persists. However, this step doesn't help SSD much and can also shorten their lifespan, so it's best only to use it on HDDs.
Here's how to try this step:
- Press the Windows key to locate the "Defragment" option
- Open the "Defragment and Optimize drivers" tab
- Select the specific drive and hit "Optimize"
- Windows will now defragment the drive
- Once it's complete, you can restart your computer
After the OS reboots successfully, disk errors on the HDD should be fixed
Use Windows PowerShell
Windows PowerShell can also assist in fixing the issue. Here's how to use it:
- Press the Windows key
- Type "powershell"
- Choose to run PowerShell as administrator (typically, the option is on the right)
- A new window will appear → copy-paste the following command in it:
- Repair-Volume X –OfflineScanAndFix (replace X with the letter of the inspected drive)
- Hit "Enter" after pasting the command
- Then, run the following command:
- Repair-Volume X –Scan (replace X with the letter of the inspected drive)
When PowerShell is finished with the repair process, restart your PC and check for persisting disk issues.
Try Recovery troubleshooting
Sometimes, it's easier to detect bad sectors on a hard disk. If you see the following messages during Windows boot — "Repairing disk errors" or "Windows detected a hard disk problem" — you can go straight for a Recovery troubleshoot.
To do so:
- Shut down your computer
- Turn it back on and press F2, F8, F12 or other combination used by your PC's make and model to bring up the Startup recovery screen
- Once you hit the proper button (or a combo) and the screen pops up, click "Advanced options"
- Select "Troubleshoot" → open "Command Prompt"
- In the "Command Prompt," type and execute several commands as follows
bootrec /fixmbr
bootrec /fixboot
bootrec /rebuildbcd
After executing all the commands, restart your PC to see if the issue persists.
Boot Windows in Safe Mode
If you can still detect bad sector performance, you can go for all the above steps again. However, this time, you'd do it in Safe Mode.
Once you enter Safe Mode on your PC, go for each of the methods below:
- Check the hard disk for system errors
- Run CHKDSK (and format the drive after)
- Defragment the HDD
- Run Windows PowerShell to try detecting and repairing disk errors
Once you're done with all attempts, restart your PC. Following the reboot, check if there are any persistent errors.
Reinstall Windows
If all else fails to deliver, you can go for a Windows reinstall.
To do so without losing any data, follow the steps below:
- Open "Settings"
- Select "Systems"
- On the right menu pane, choose "Recovery"
- Go for "Recovery options → select the "Keep my files" option → press "Reset PC" to start the Windows reinstall
- Choose the "Cloud download" option or the "Local reinstall" option (the first one downloads fresh files to install Windows, while the second relies on local files to reinstall the operating system)
- Click on Next and Reset
After the reinstall, you'll have a fresh Windows 10 (or 11) install; you will have all of your old files on the PC but not the settings and apps you customized before the reinstall.
Hard Drive Recovery For Mac users
Now that we've covered Windows users, let's go over to Mac.
Try Disk Utility to check the HDD's status via SMART
Disk Utility is a feature reliant on Self-Monitoring, Analysis, and Reporting Technology ("SMART," for short); its purpose is to check startup disk status.
The data given by SMART is, by no means, in-depth, but it can often show you how your HDD's doing.
If you're using external storage devices connected to the Mac, you may need additional software to inspect those.
Go for the First Aid option in Disk Utility
If you somehow detect hard bad sectors on your HDD, there's nothing you can do to repair them. Remember, we can only fix soft bad sectors via commands. Nonetheless, you can deny the storage space used by bad sectors so that macOS wouldn't use it anymore for writing new data.
You'd lose some storage space, but you'll ensure that your Mac operates properly after successful deallocation. To deallocate storage space:
- Start your Mac → press and hold the "Command" + "R" keys until the Apple logo shows up
- Go for macOS Utilities -> select “Disk Utility” → click “Continue”
- Specify which drive needs repairing and select the "First Aid" tab
- Select "Run" to repair the HDD
If the repair is unsuccessful, you can erase the corrupted drive and reinstall your OS (if you have an operational backup ready for recovery).
Go for the Restore Option in Disk Utility
Lastly, you can try cloning your failing HDD on Mac; to do so:
- Connect an external storage drive to the Mac (the drive should be at least the same (or larger) size than the HDD you wish to clone
- Select “Application” → “Utilities” -> “Disk Utility” → launch “Disk Utility”
- Choose the specific hard drive from the sidebar → open the "Restore" tab
- Browse through the "Restore from" drop-down menu to choose the source drive → Select "Restore"
Once the cloning process is complete, click "Done."
Preventing Data Loss in the Future
As we discussed above, losing important files can be really catastrophic for individuals and businesses, but there are a few simple rules to follow in order to prevent future data loss. We already mentioned the importance of having some data protection and recovery software and tools to restore valuable files in unexpected situations. Another priceless help would be to use backup services, where you will feel comfortable knowing that you have a reserve copy of your important data if you face any disruptive event.
Processing regular backups can be your life-saving option when needed, and you will be one click away to restore your data base in minutes. For instance, if you become a victim of a ransomware attack and cybercriminals lock your data, asking for a ransom to be paid, you will have the ability to save this amount of money and not pay them because you have the option to restore your data with an existing copy from the latest backups.
If you want to have even greater success in keeping your data and in a healthy condition, you must provide yourself with reliable antivirus software. Thus, you will know that constant scans will be done every day, and viruses or malware attacks will be blocked by the antivirus system with the real-time protection it provides. As per one of the latest researches from MTA University, businesses and individuals equipped with a robust antivirus program and a backup option can recover from 90% of the cyberattacks and viruses they face.
This will guarantee a healthy environment for your business or PC under any conditions and circumstances. On the other hand, those who are not equipped with antivirus or backup options will face a huge risk of losing all of their data or experiencing a malfunction of their systems and computers. It is a matter of choice, whether you want to be on the winning or losing side of this battle.
Recover everything with the #1 personal HDD and SSD recovery software
Acronis True Image protects everything with full image backup of Windows and Mac: the operating system, programs, settings, files, and boot information, with simple words all your data stored. You can back up to external drives, NAS devices, network shares, and the cloud with just two clicks. You can also protect smartphones and tablets: back up iPhones, iPads, and Android devices, and Facebook social media feeds. You can remotely back up for others anywhere in the world and manage everything from a touch-friendly online dashboard. And, you can easily recover photos, or just one file or your entire system, or retrieve data when files are lost.
With Acronis True Image, you can also recover many file formats from multiple family devices that are backed up to the cloud, including Windows and macOS computers, smartphones, and tablets. When you back up to the cloud, you can access your files from a web browser and resume working on data immediately, even if you need to use a different computer. In addition to ensuring you can recover 100 percent of your data — regardless of the event that caused data loss — Acronis True Image is less expensive than most hard disk recovery software.
Why pay up to $99 for data recovery software that won't recover 100 percent of data when you can pay less, up to half, for a backup solution that recovers 100 percent of your data, anytime, anywhere? Plus, it's so easy there's no reason not to use it.

Hard Drive Recovery Software
Hard disk recovery software does not recover 100 percent of your data, is time consuming to buy and try, and is typically more expensive than Acronis. To properly protect your data and files, be proactive, back up your entire computer with Acronis True Image.
Enjoy peace of mind knowing that no matter what happens to your computer, your disk drive, or your data, you can always recover everything, it's capable to complete a full Windows file recovery! What's more, you can also protect multiple family computers and mobile devices as well. Want to see for yourself? Try Acronis True Image by clicking here.
Reclaim Your Lost Data Now! Get Our Powerful Data Recovery Software
About Acronis
A Swiss company founded in Singapore in 2003, Acronis has 15 offices worldwide and employees in 60+ countries. Acronis Cyber Platform is available in 26 languages in 150 countries and is used by over 21,000 service providers to protect over 750,000 businesses.