
Power User Insights are guest blogs written by advanced users who share their tips, tactics and techniques so you can get the most out of Acronis products.
Bob Huffman has used Acronis True Image for a number years and has served as a Forum MVP for the past 3+ years helping users. He brings over 30 years of experience as an enthusiast and custom computer builder with a passion for data handling and storage.
If you need to recover your system, wouldn’t it be easier to use your wireless mouse and keyboard like you always do? Of course, but that means ensuring the proper drivers for those devices are included in the recovery media you’ll use to restore your system.
The release of Acronis True Image 2018 features a move to a WinPE/RE-based environment for recovery media, which lets you add drivers for those instances when required drivers are not found in the default Windows Driver Store.
Here’s a quick step-by-step “how to” article on driver injection using the Advanced option of the Acronis Media Builder tool. We will explore how to add drivers from your currently installed Windows OS directly into the WinPE/RE media so that access and use of your devices will function just like they do in Windows.
When would you need to add another driver?
There are a few instances, but a common example is the use of a hard disk RAID array. That’s because several manufacturers now preconfigure their computers with the hard disk controller set in RAID mode, even when the machine doesn’t include a physical disk array (more than one disk). Why are they doing it? Because Intel now designs its Storage Controller drivers to use RAID mode even when having standard SATA disks installed since those drivers contain the AHCI option settings for advanced disk control, including SMART functions. The result is the best of all possibilities.
Let’s get started.
Gather the required information about your drivers
Determining which drivers your system uses requires a few steps. We’ll use Windows Device Manager for this purpose.
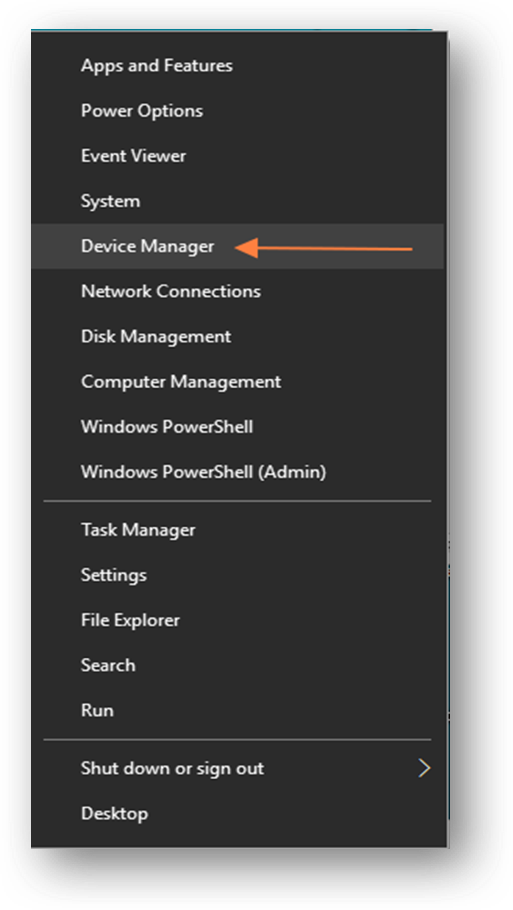
For Windows 8 or Windows 10, right-click the Windows Start button. Find and select Device Manager, as illustrated below.
Once the Device Manager is open, find and select the carat (>) that precedes Storage Controllers to expand the listing of all Storage Controller devices in the computer as illustrated below.
NOTE: If exclamation marks are shown in the Device Manager, it means a problem exists with that device. In all likelihood, it is a driver issue that you should be able to correct by installing updated drivers or rolling back to previous drivers. You’ll need to correct the issue before continuing.
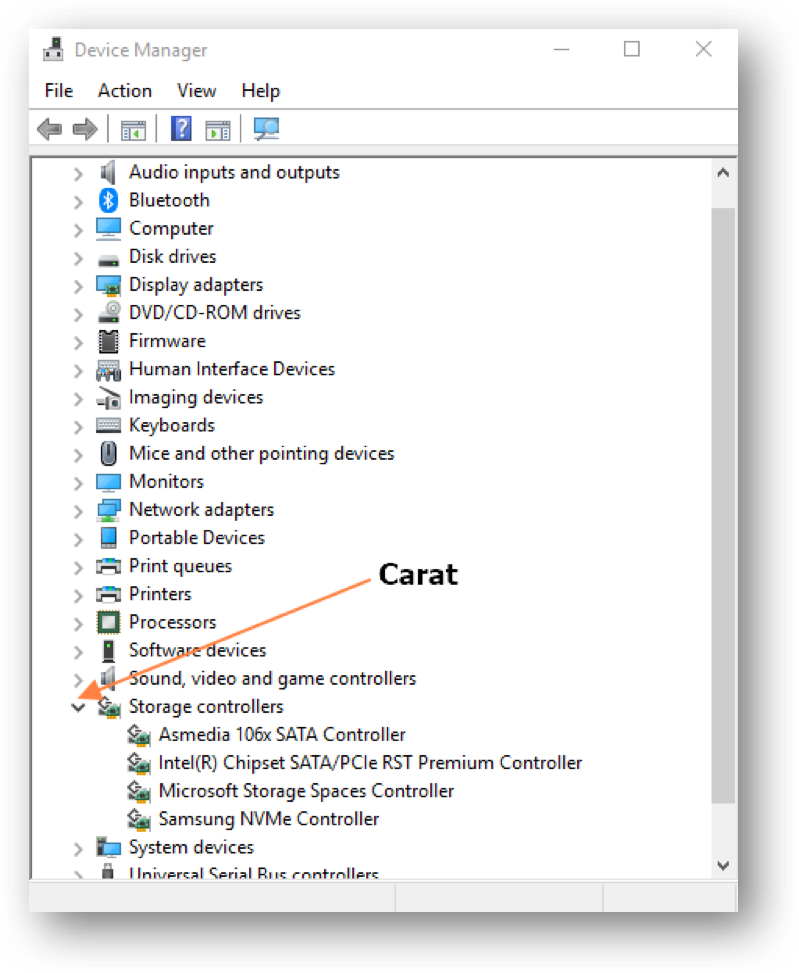
As you can see in the graphic above, there are four Storage Controllers on this computer. In this example, our interest is in the Intel Chipset SATA/PCIe RST Premium Controller, as this is used for the RAID array on this machine.
To determine which driver is used, double-click on the desired Storage Controller entry. This will display the Properties window. You’ll then select the Driver tab, as illustrated below.
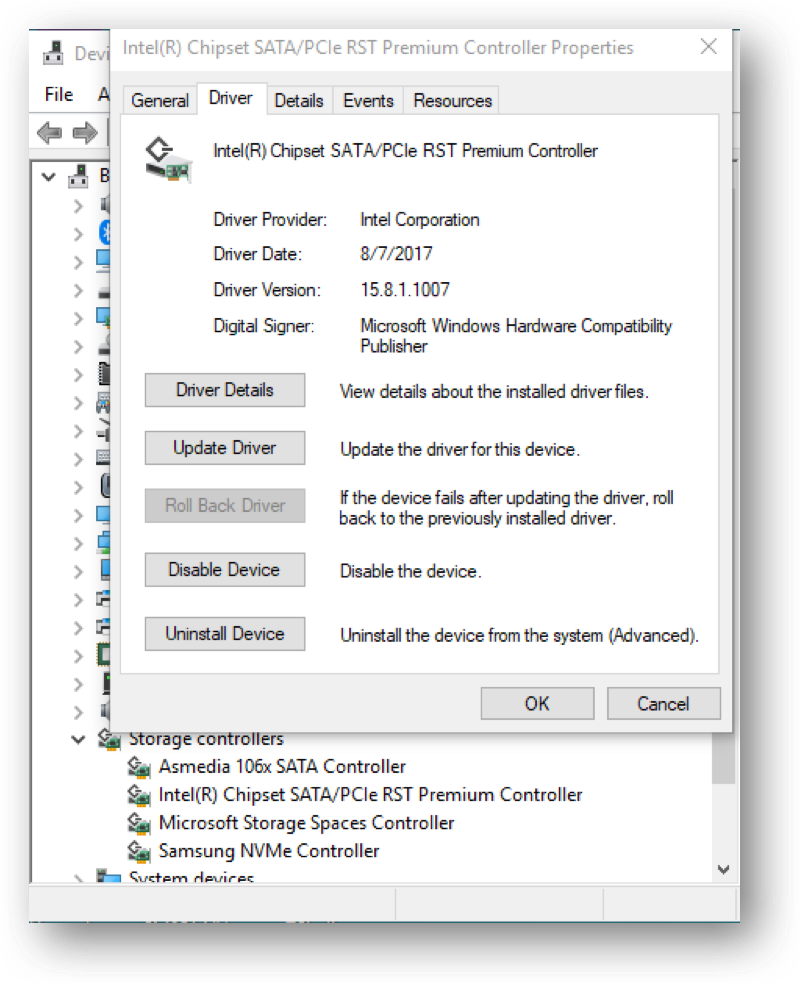
Write down the Driver Date and the Driver Version found here for future reference. In our example, we find:
Driver Date: 8/7/2017 Driver Version 15.8.1.1007
Click on the Details tab of the Properties window and select Inf name from the drop-down menu under Property.
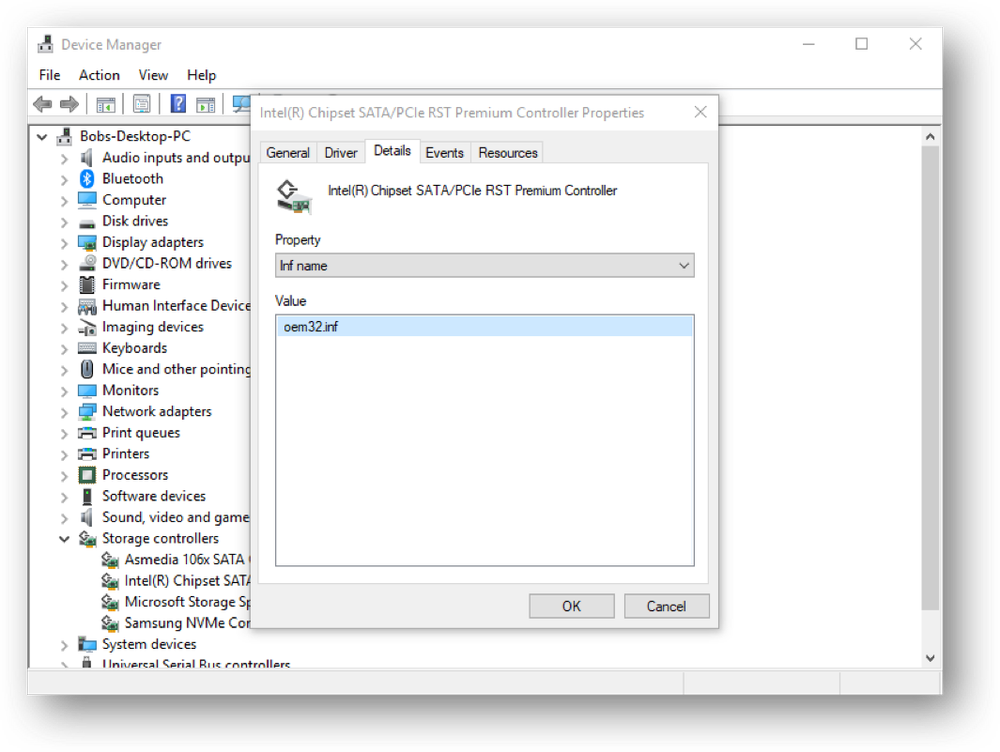
We now know that our driver for the Intel Storage Controller is:
OEM 32.inf Dated 8/7/2017 Version 15.8.1.1007
How do we find where this driver is in our installed Windows OS? We’ll use some built-in Windows tools using an Admin Command Prompt. The easiest way to open an Admin Command Prompt is using the Search feature of Windows:
- Type Command into the Search box on the Task bar
- Find Command Prompt in the next menu
- Hover your cursor over the entry
- Right-click and select Run as administrator
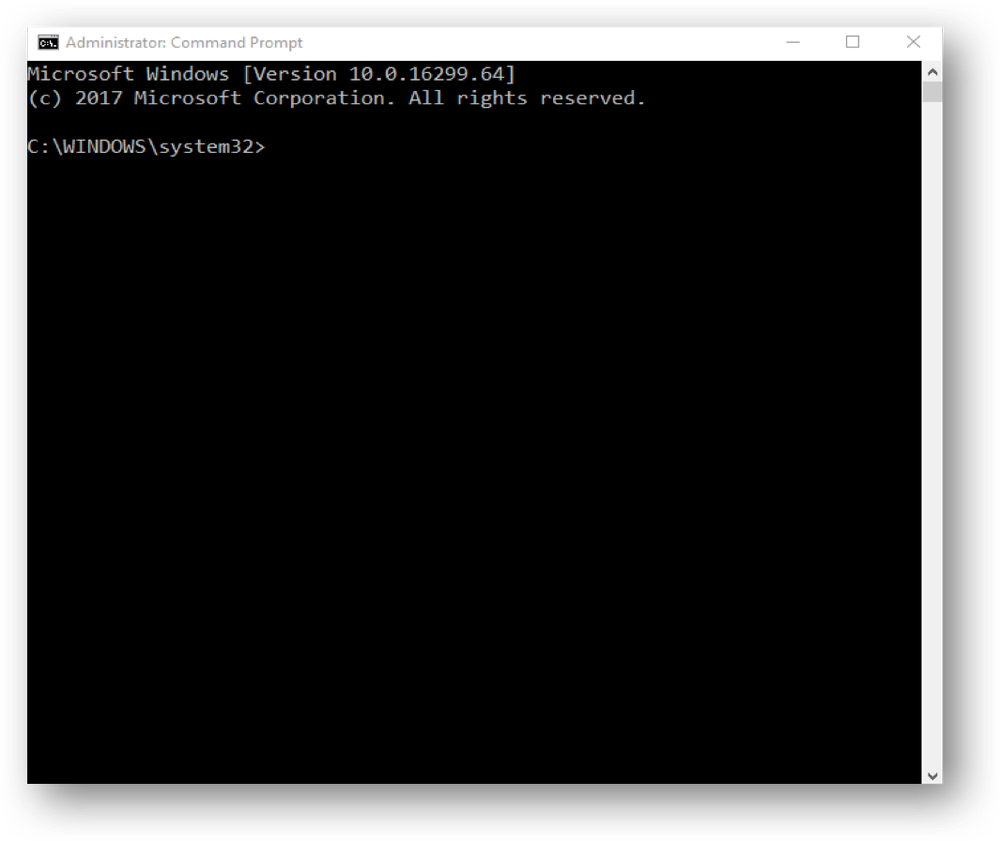
When the Command Prompt opens it will appear as illustrated below.
NOTE: The path C:\Windows\system32> indicates the prompt is open as an Administrator. If you see something else on your screen, then you do not have an Admin Command Prompt open. You will need to find out how to do so on your computer.
To find our Storage Controller driver, we will first use the Windows utility known as Pnputil. This utility can be used to manage device drivers in a Windows installation and help determine where our driver file is located.
At the flashing prompt in the Command Prompt window, type pnputil /enum-drivers. Note the space between “pnputil” and the “/” character. Press the Enter key and the utility will produce a list of all device drivers on your computer, as illustrated below.
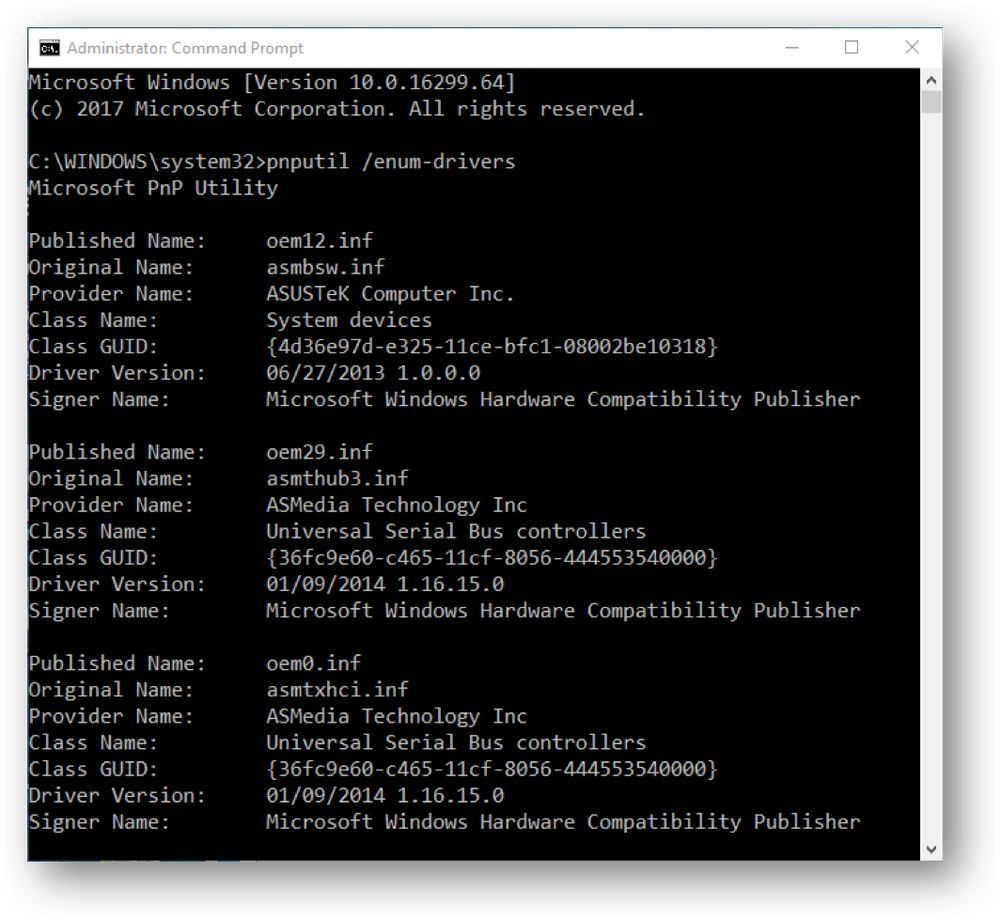
You’ll notice that the resulting list includes both the Published name and the Original name of the installed driver. From our look in the Device Manager, we know that we need to 1) find the OEM32.inf Published name for our driver and 2) verify date and the driver version so we can write down the Original name of the driver, which will help us discover the driver location. Scroll down the list until you find the Published name of your driver, then record the Original name of the driver file as illustrated below.

In our example, we find that the Original name of our Storage Controller driver is iastorac.inf. We will use this name and the Command prompt to locate the driver.
To locate the Storage Controller driver, use the Dir command at the command prompt. To start a clean work space, you can clear the command prompt window by typing cls and pressing the Enter key.
At the flashing prompt, type dir infname /s. In our example, we would type dir iastorac.inf /s and then press Enter. You should see a result similar to the one below.
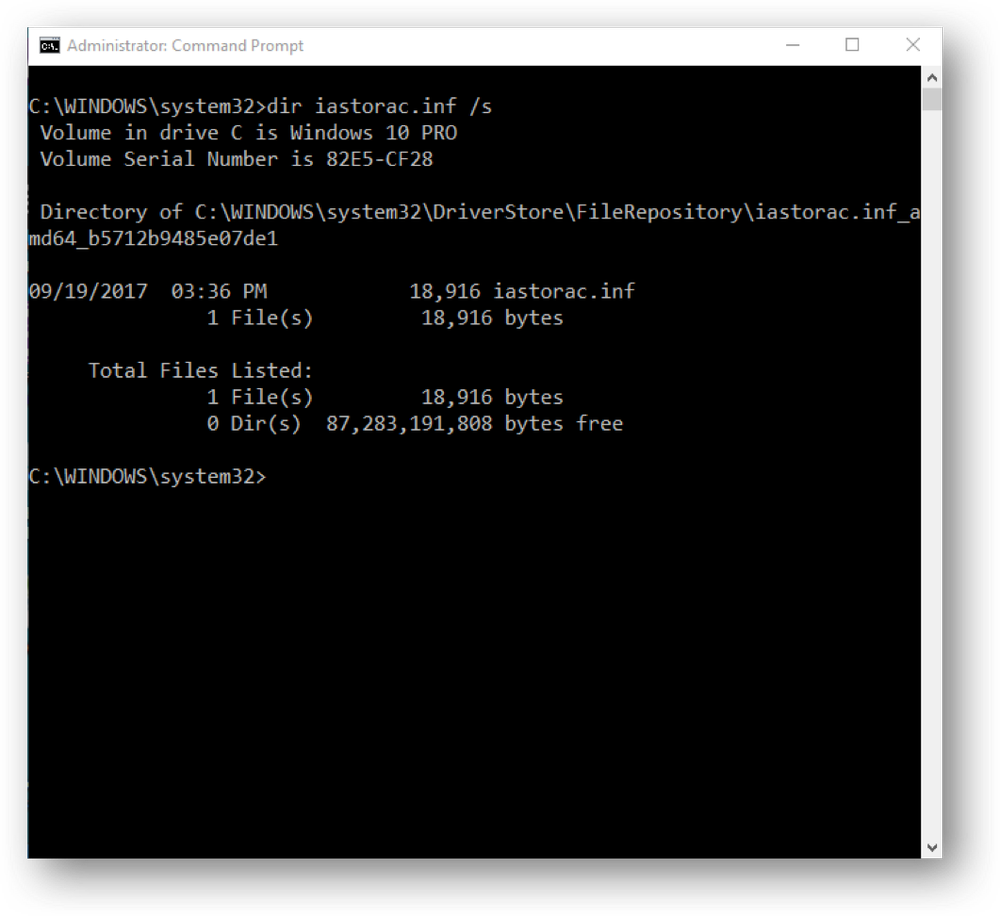
As you can see, our command shows the path to the driver file location in the Windows Driver Store File Repository. You need to have this exact file path to add it to the Acronis Media Builder Advanced WinPE/RE creation tool in order to add that driver to your WinPE/RE-based Recovery Media.
To ensure you have the precise file path, open Windows Notepad and use the copy/paste function.
- To copy: Position your cursor at the start of the driver path, hold down the left mouse button and highlight the entire path. Then click the left mouse button to copy the path.
- To paste: Position your cursor inside the Notepad window, click the left mouse button and select Paste. The path will appear in the Notepad.
- Save this Notepad to an easily remembered location so it can be retrieved when creating the Recovery Media.
The Command Prompt’s default window size may be a problem when attempting to view the command output. To see more of the Command Prompt window than what is illustrated above, right-click the Command Prompt title bar and select Properties. Select the Layout tab and set the Screen Buffer Size Height option to 9000.
For some, text size can be an issue. You can adjust text size by right-clicking the Title Bar, selecting Properties, followed by the Font tab, and choosing an appropriate font size.
NOTE: For Windows 7 users, the copy and paste functions are a bit different. To enable copy in the Command Prompt, you first must enable Quick Edit Mode. To do that, right-click the Title Bar, select Properties, select the Options tab, check the Quick Edit Mode under Edit Options, and then click OK.
For a complete rundown of copy and paste from/to the Command Prompt visit this link:
http://www.isumsoft.com/it/how-to-copy-and-paste-in-command-prompt-on-windows-7-10/
Next, we will create the WinPE-based recovery media and add our driver during the build process.
Adding drivers to WinPE Recovery Media
Open Acronis True Image on your computer and then select the Tools option from the left column. Then locate the Media Builder Tool icon and click to select the tool. Your screen should match the screenshot below.
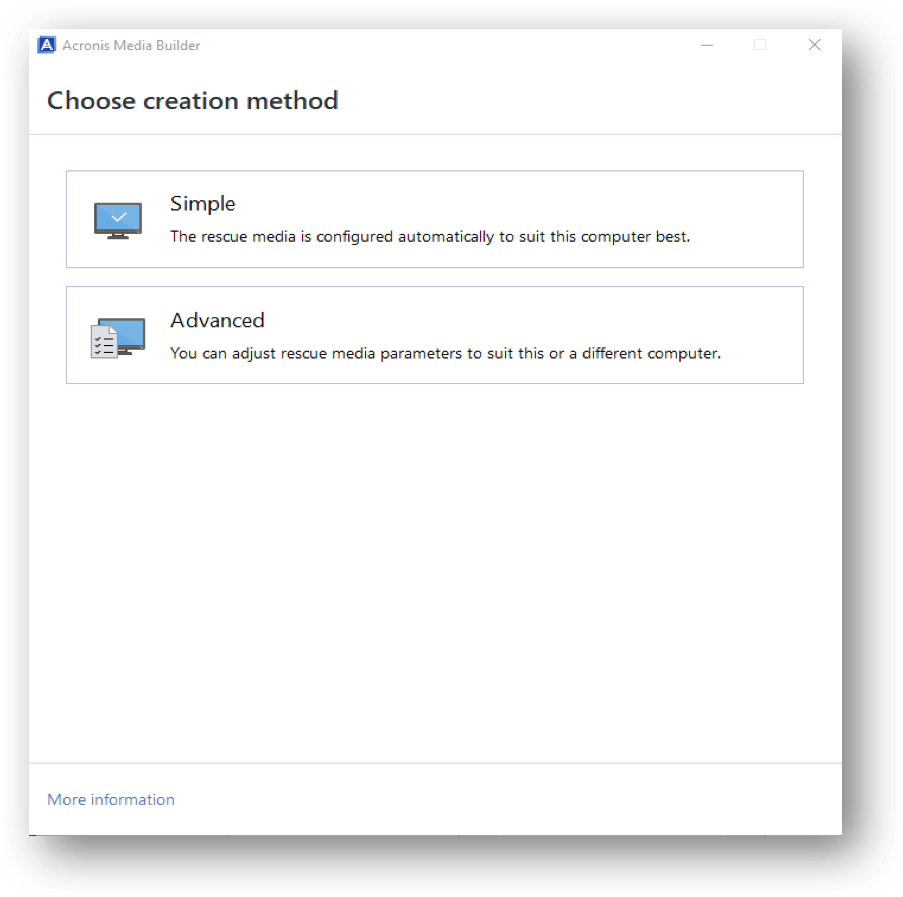
On this screen you will need to select the Advanced option to create a WinPE/RE-based media.
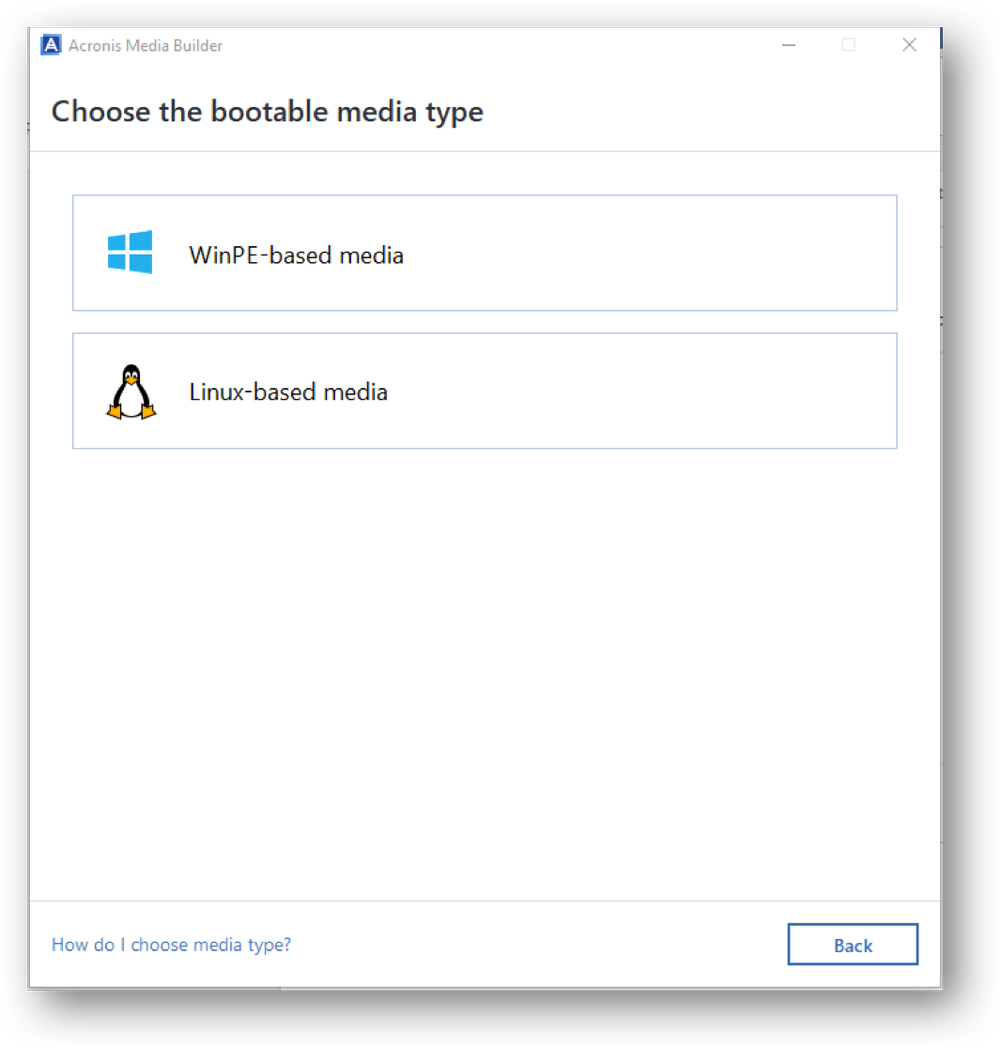
On this screen select the WinPE-based media.
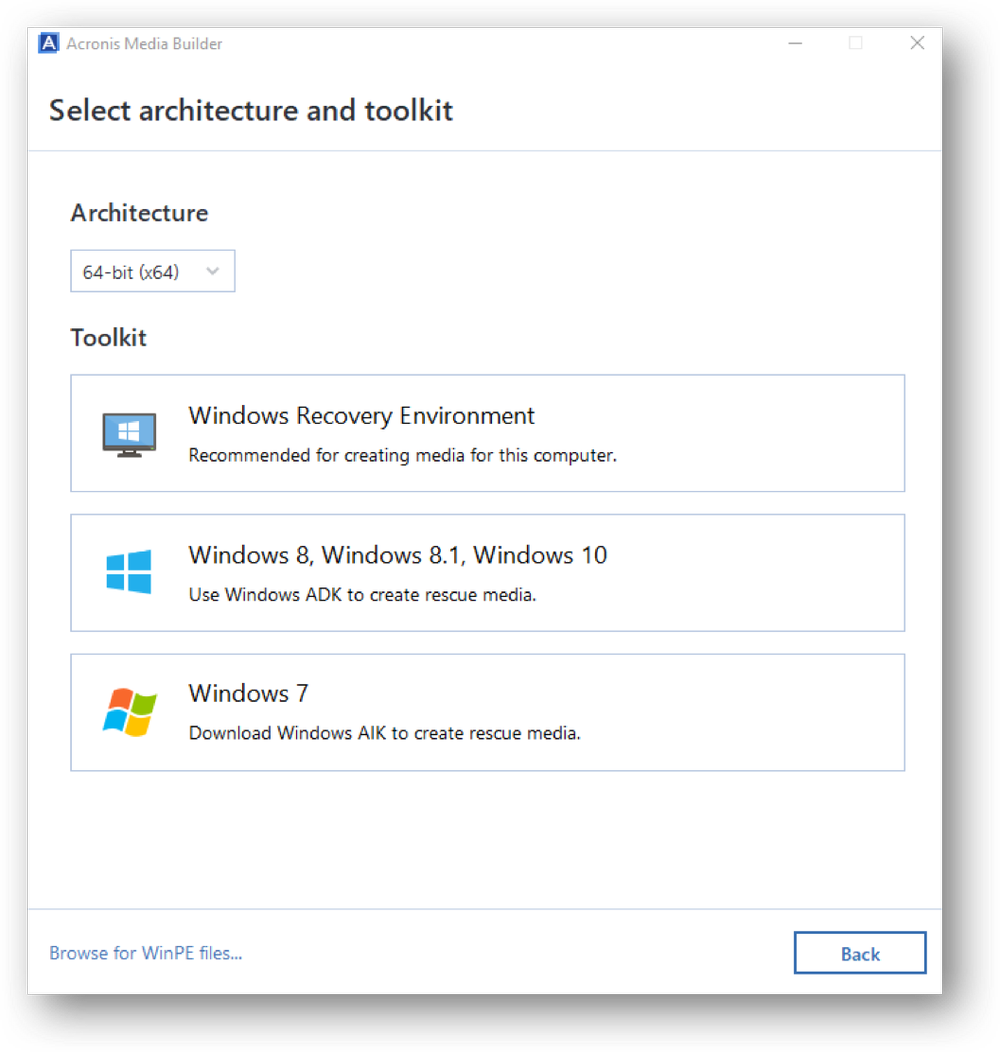
On this screen you will find options for creating WinPE media using a Windows PE ADK installer kit. Choose your appropriate version of Windows. If you do not already have the Windows PE ADK installed on your computer, you will be prompted to download and install the appropriate software onto your computer. Note that you can create a Windows Recovery Environment (WinRE) here that will allow the addition of drivers, which does not require downloading and installing the WinPE ADK.
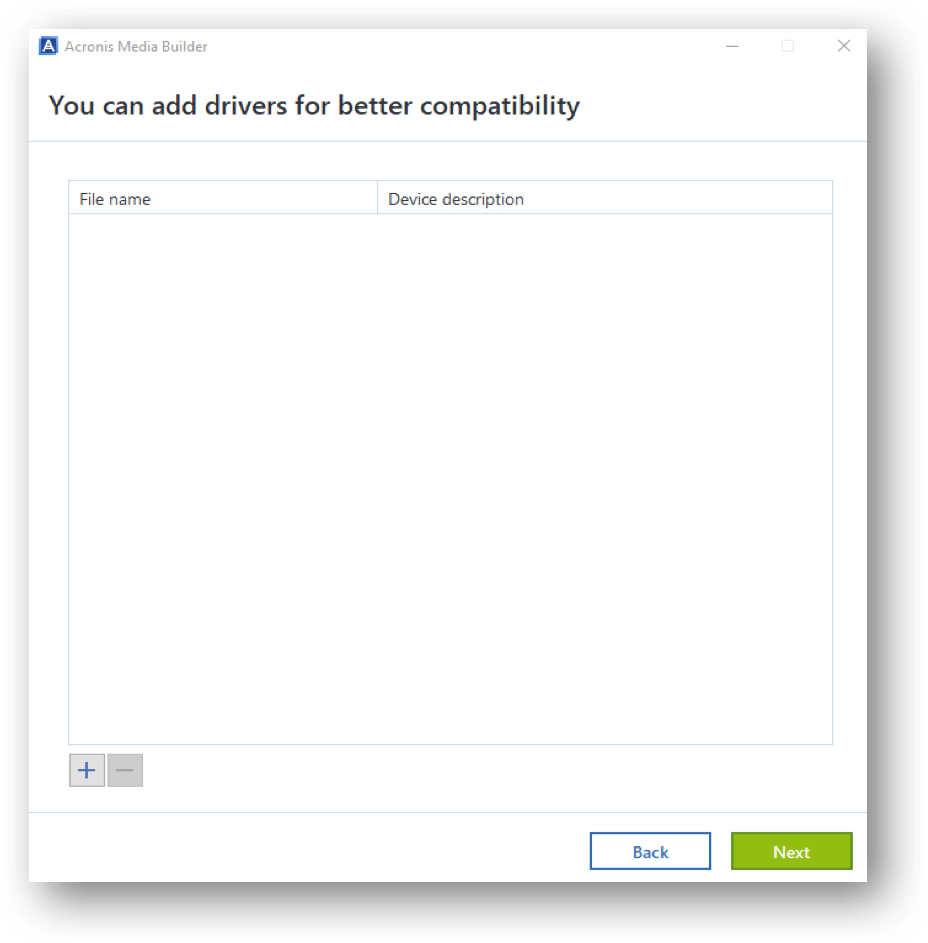
This screen is what you will see when the WinPE ADK is installed on your computer. To add drivers, click the <+> button in the bottom left screen corner of the screen. An Explorer window will open where you can select a driver path, as illustrated below.
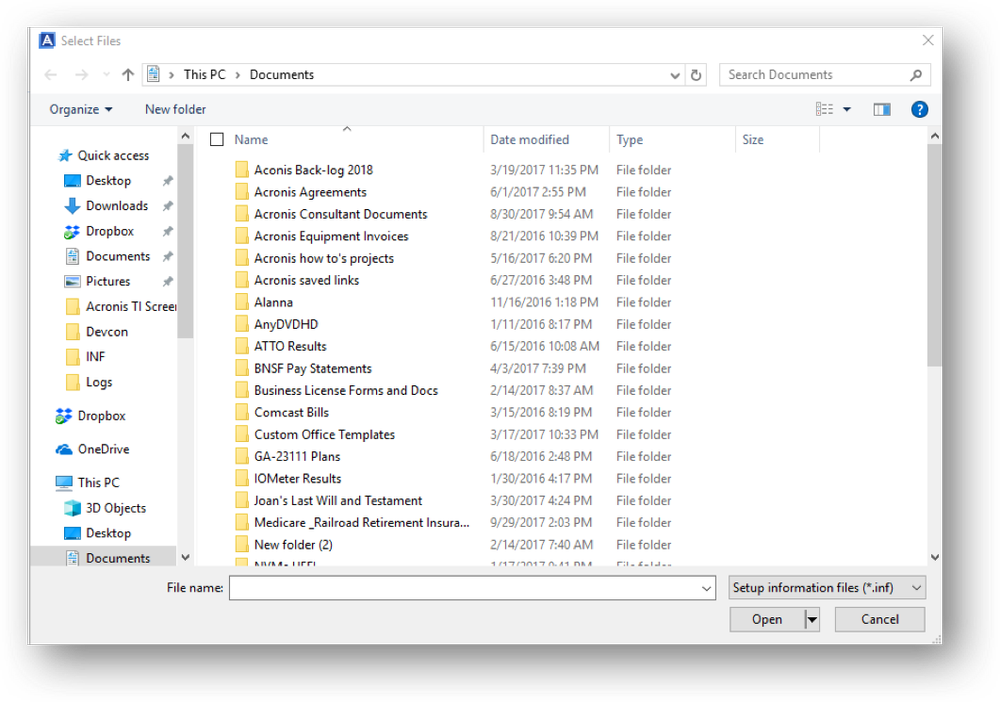
This screen is where we will use the file path found with the Dir command and saved in Notepad to locate our needed Inf file. Simply open the Notepad and copy/paste the driver file’s complete path into the File name field at the bottom of the window.
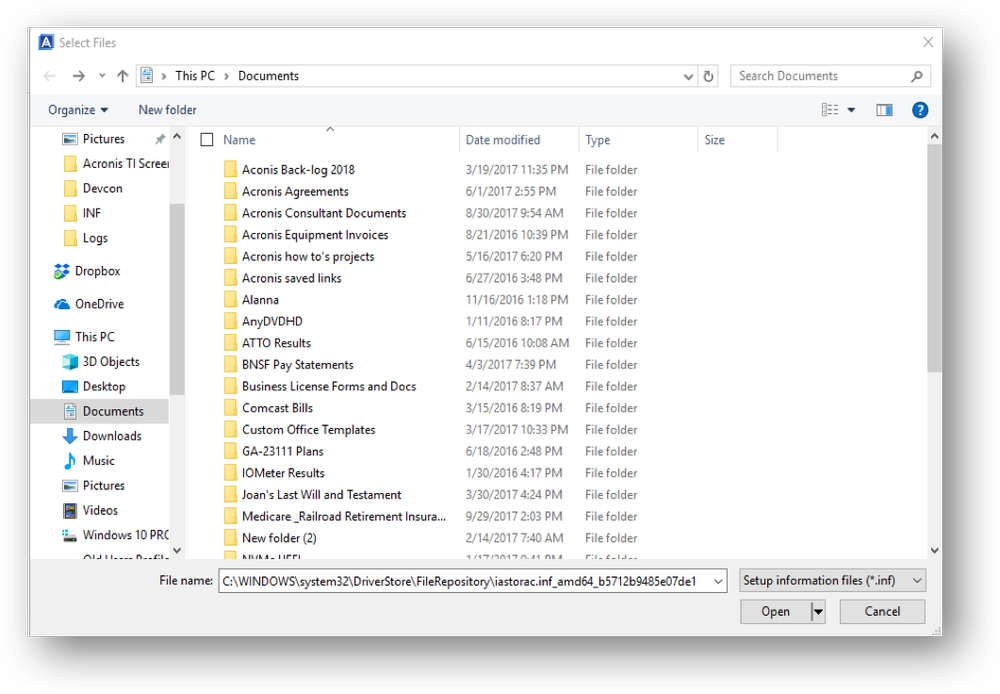
Once you have pasted the path into the File name field, click the Open button and Explorer will navigate to the path location, revealing the needed Inf file for selection, as illustrated below.
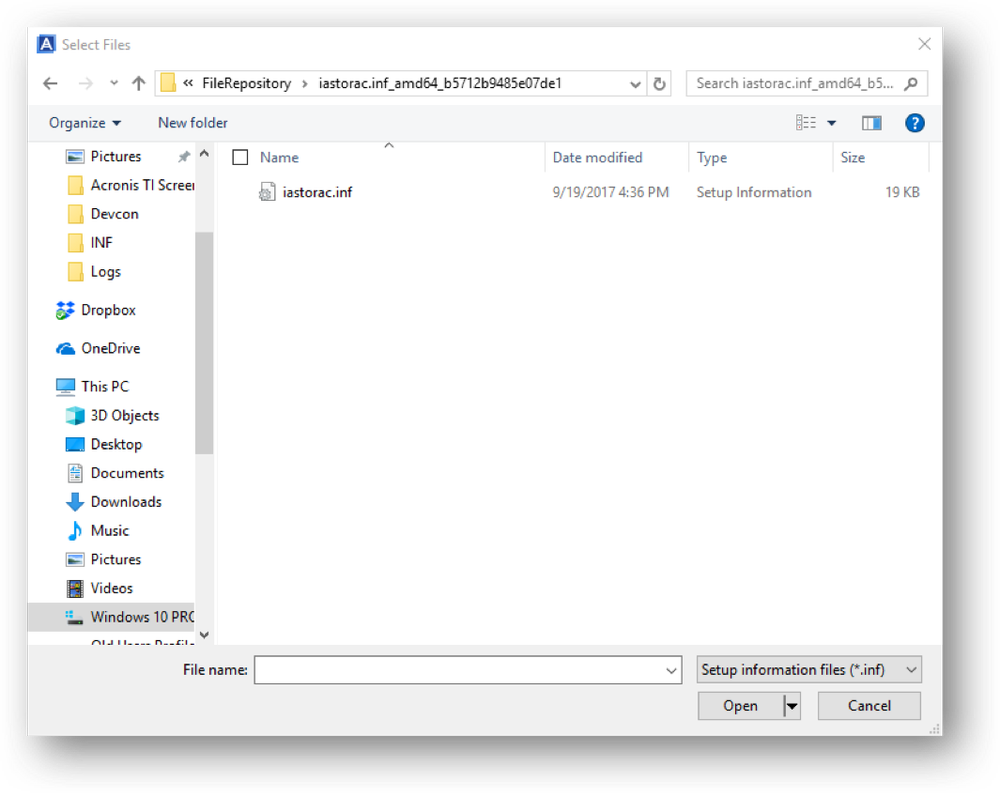
Select the Inf file and then click Open. This will place the file in the “add drivers” window in the Acronis Media Builder, illustrated below.
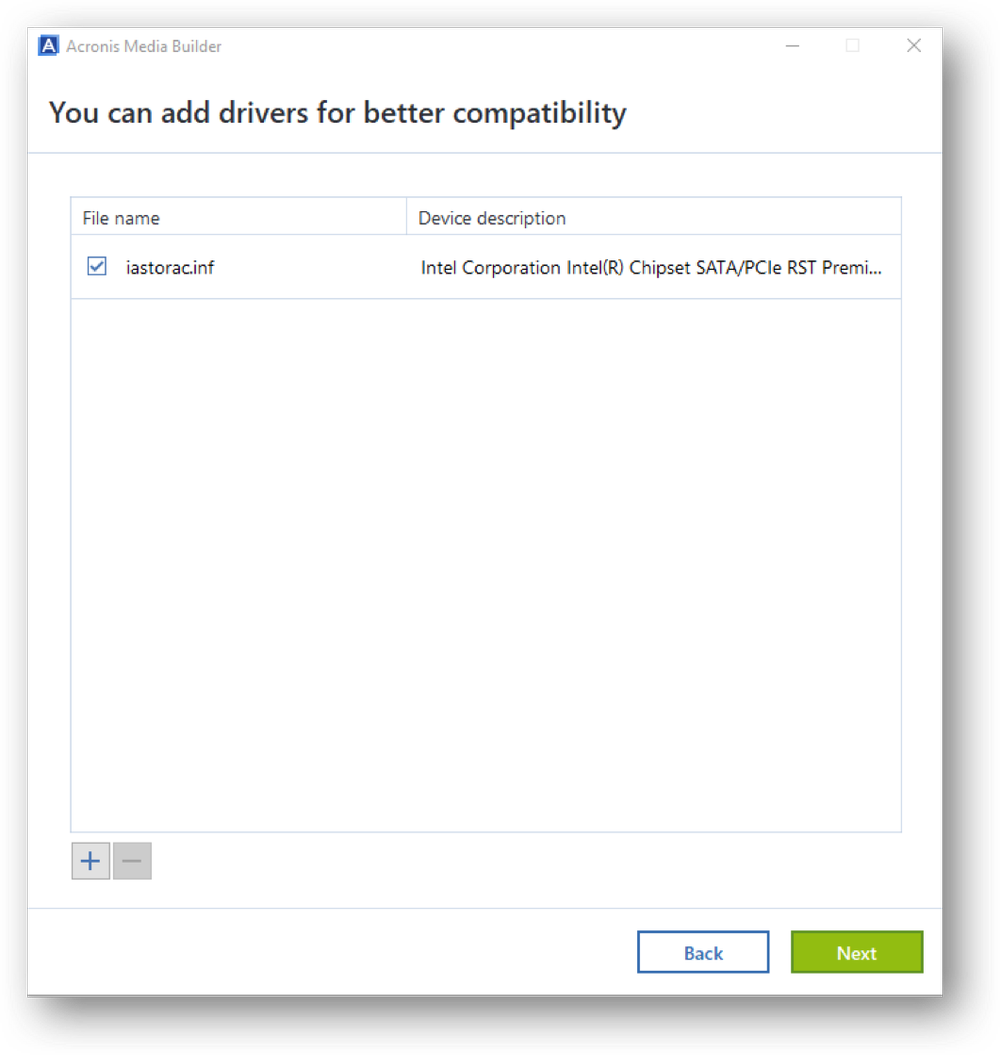
As you can see, the needed driver file has been successfully added in to the tool for injection into the created media. Repeat this process for any additional drivers you wish to add, including Bluetooth devices, additional Storage Controller drivers, network adapter drivers, etc. Once you’ve added your additional drivers, select the green Next button to continue the media-building process.
Creating WinPE Recovery Media
You’ll land on the following screen, which allows you to choose the type of media you wish to create. For this tutorial (and ease of use), we will select the USB option to create our recovery media on a USB thumb drive.
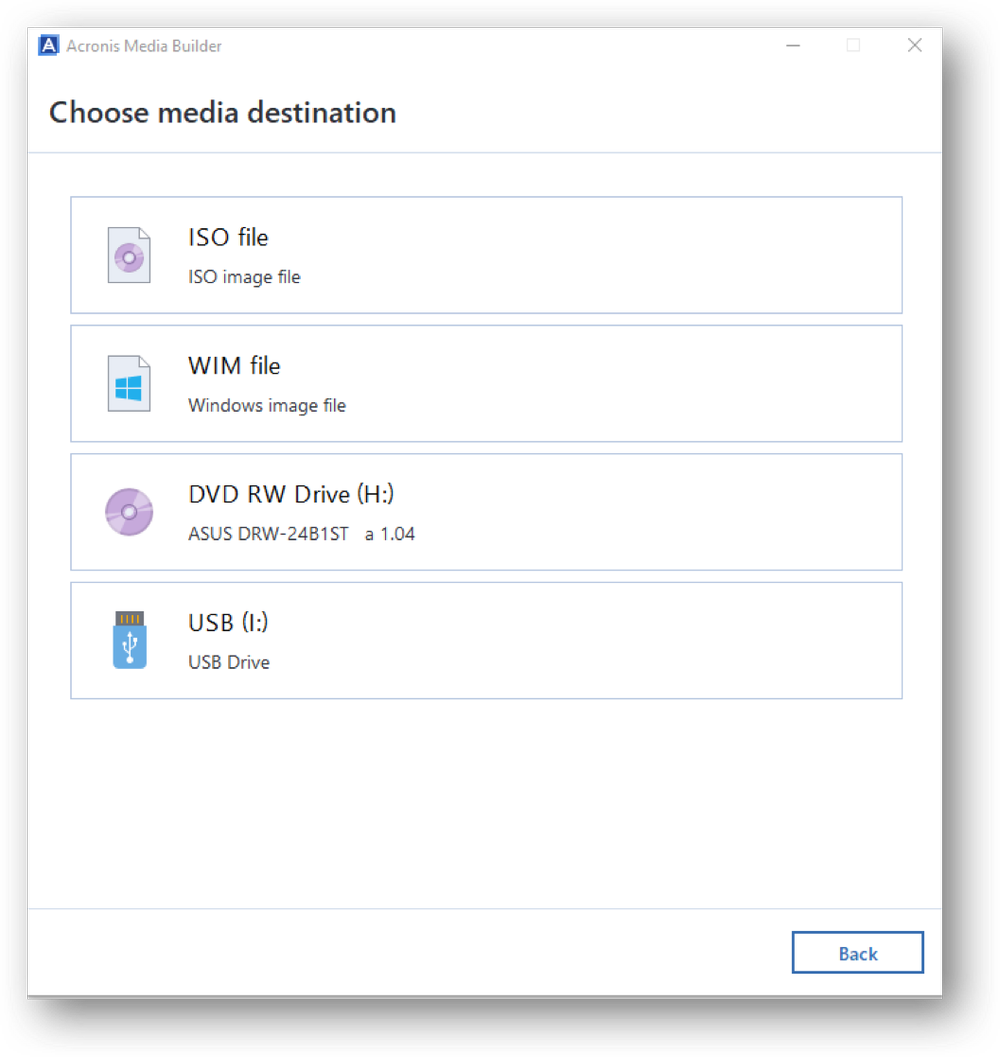
NOTE: When creating USB recover media, you must start with a blank FAT32 formatted thumb drive. If the drive previously contained data and/or it was formatted previously with a third-party tool, your attempt to create recovery media on it is prone to fail. It is strongly suggested that you use a new blank drive.
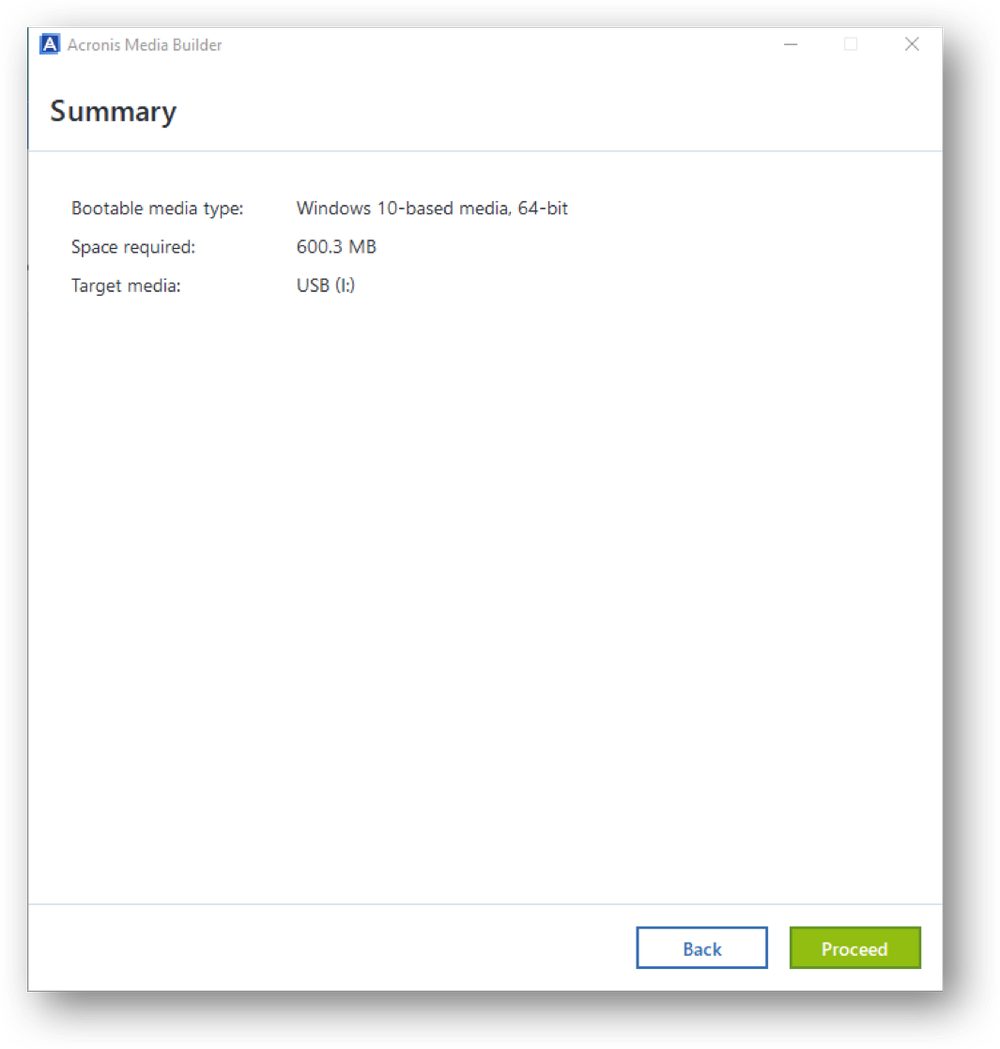
The next screen, pictured above, shows the media type being created, the space required, and the target to which the media will be created. Click the green Proceed button to create the media.
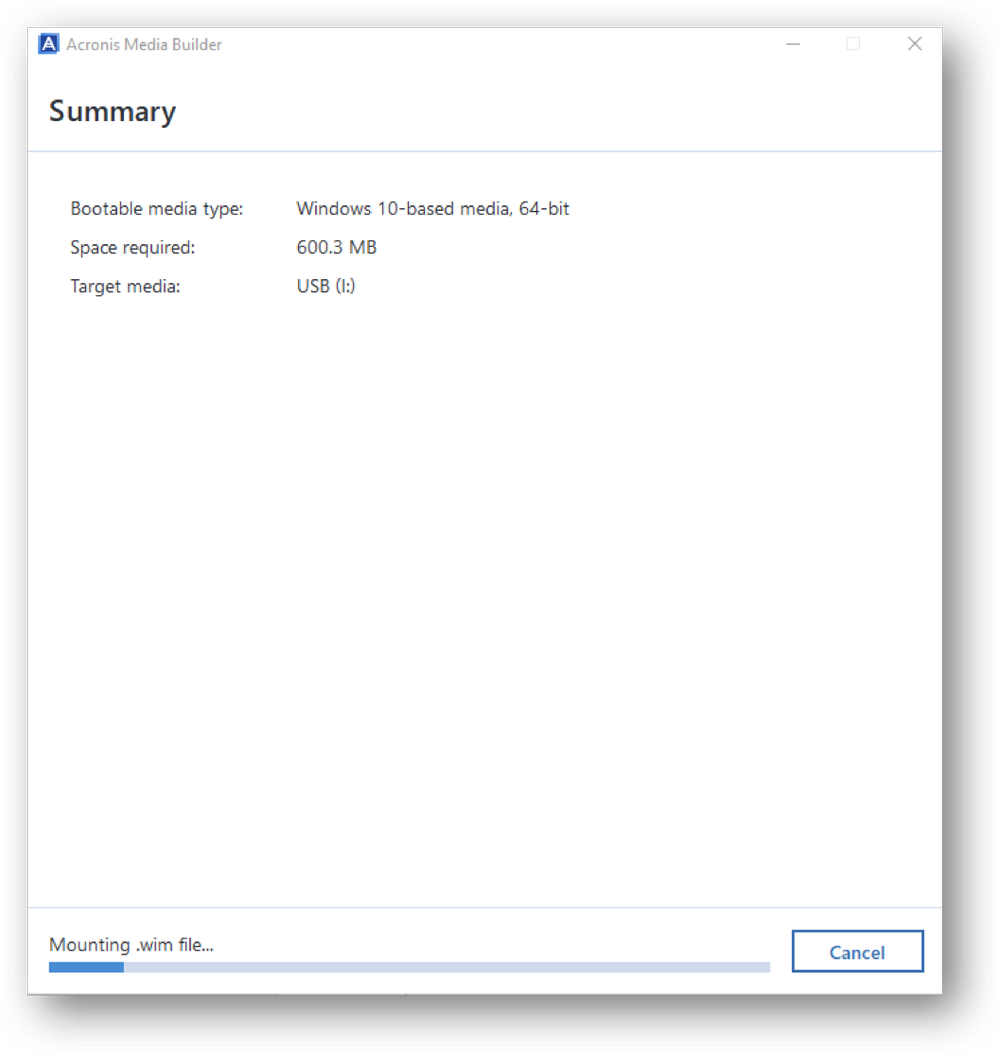
Next you will see the media-creation process, which indicates the actions being performed and the progress.
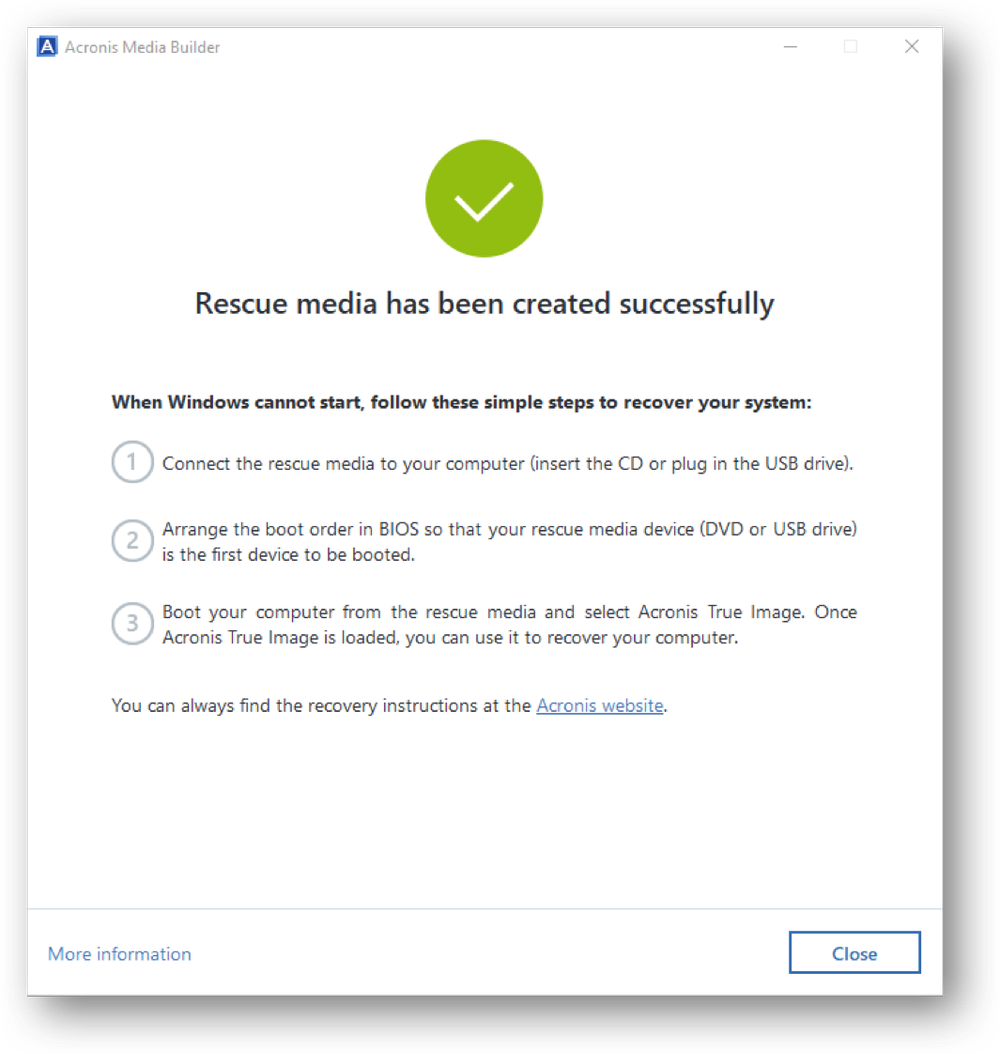
Next you should see a Success screen with some instructions regarding the use of your Recovery Media. How can we verify that the driver file was added? We simply need to check the log file. Using Explorer, navigate to:
C:\Program Data\Acronis\TrueImageHome\Logs\ti_media_builder
Look for the log that has the same date and time of when you created your media. The log is a text file so double clicking on it will open it in Notepad. Toward the end of the log you will find a section for Updating drivers. If there are any errors, you will see them here.
Keep in mind, it is possible to add other drivers to your Recovery Media at this stage as well. If after creating your Recovery Media you find that a device (e.g. a wireless mouse, a network adapter, etc.) does not work on your computer or a storage disk cannot be found, you might try this procedure to remedy the issue. In most cases, a non-working device in Recovery media is due to a lack of driver support.
Congratulations! You’ve successfully used Acronis Media Builder Advanced to inject an additional driver.
About Acronis
A Swiss company founded in Singapore in 2003, Acronis has 15 offices worldwide and employees in 60+ countries. Acronis Cyber Platform is available in 26 languages in 150 countries and is used by over 21,000 service providers to protect over 750,000 businesses.